
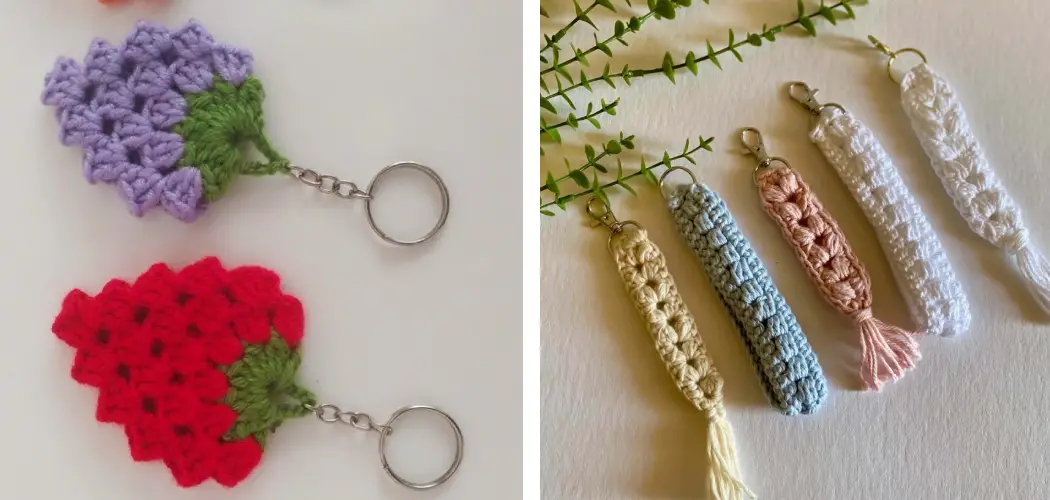
Are you looking for a way to show off your creative skills? Why not make a keychain out of crochet? It’s easy and fun, and you can make one quickly.

What do a fashionable purse, an eye-catching backpack, and your favorite coffee mug have in common? They can all be jazzed up with a crochet keychain! A crochet keychain may seem intimidating, but this simple craft has amazing potential.
With just a few supplies, some practice, and determination, you will soon find yourself creating personalized charms to show off on bags or attach to your keys.
We’ll walk you through all of the steps on how to crochet a keychain – from selecting materials to finishing touches – required to turn a humble yarn ball into a stylish accessory that can be hung off purses, backpacks, lanyards, and more!
What Will You Need?
To get started on how to crochet a keychain, you will need the following supplies:
- Yarn of your choice
- Crochet hook (size depends on how thick the yarn is)
- Keyring
- Scissors
- Needle & Thread
- Tapestry needle
Once your supplies are gathered, it’s time to get crafting.
10 Easy Steps on How to Crochet a Keychain
Step 1: Make the Chain
Start by making a chain of 10 stitches. This will be the base of your keychain; how long you make it depends on how long you want your finished charm. Be careful not to tighten the chain too much, as it will make it difficult for you to stitch the crochet stitches into the base.
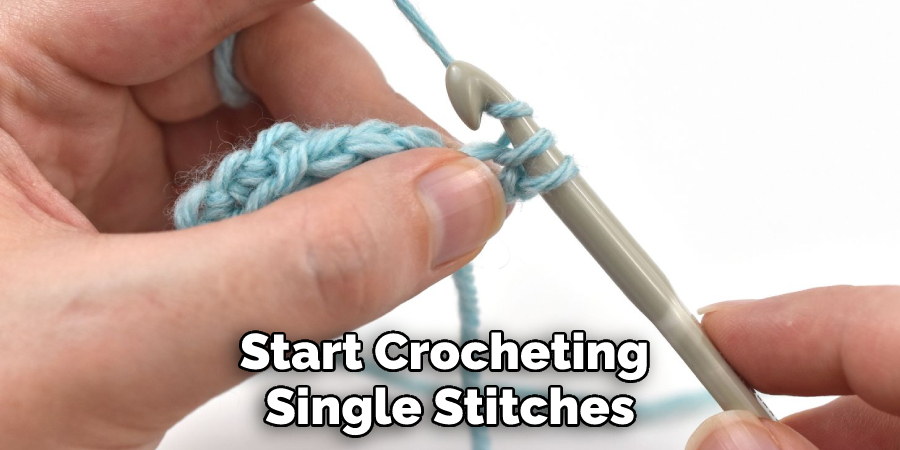
Step 2: Single Crochet Stitches
Once your base is ready, start crocheting single stitches into each of the 10 chain loops. This should result in a loop that looks like a tiny circle or tube. Continue crocheting the single stitches until you’ve reached your desired length for your keychain. Remember to keep the stitches loose. Otherwise, it will be difficult to slide the key ring through.
Step 3: Slip Stitch
After making a few rows of single crochet stitches, it is time to finish off your keychain with a slip stitch. To do this, insert your hook into the first stitch of the last row and pull up a loop. Then, yarn over and pull through both loops on your hook. This should create a neat edge along the top of your chain.
Step 4: Attaching the Key Ring
Now that your cute little crochet tube is complete, it’s time to attach it to a key ring! Cut off some extra yarn and thread a needle with it. Then, take the needle and pass it through the center of your crochet tube. Pull it out on the other end, then tie a knot at each end to secure the yarn in place.
Step 5: Attach It to the Key Ring
Now you are ready to attach your keychain to the keyring! Simply thread one side of the yarn through the key ring and then connect both ends of the yarn together onto a sturdy knot. This will ensure that your crochet charm is securely attached to your keys or accessories. Don’t forget to trim any excess yarn.
Step 6: Embellish Your Charm
If you want, you can add extra embellishments, such as beads or buttons, to make your crochet keychain even more unique. You can also use a contrasting color of yarn to stitch on details like eyes or smiley faces. Get creative and have fun with it! If you’re feeling extra crafty, you can even crochet some little figures and attach them to the keychain.
Step 7: Secure the Ends
Once you are finished embellishing your charm, make sure to secure the ends using a tapestry needle and some extra yarn. This will help prevent any loose strings from unraveling. Ensure that you pull the yarn tight as you work to ensure that all ends are securely in place.

Step 8: Trim Any Loose Strings
Now that all of your crocheting is done and your charm has been secured, it’s time to trim off any loose strings. Use scissors to cut off any excess yarn so that your keychain looks neat and tidy. Be careful not to cut too close to the crochet stitches, as you don’t want to snip them off accidentally.
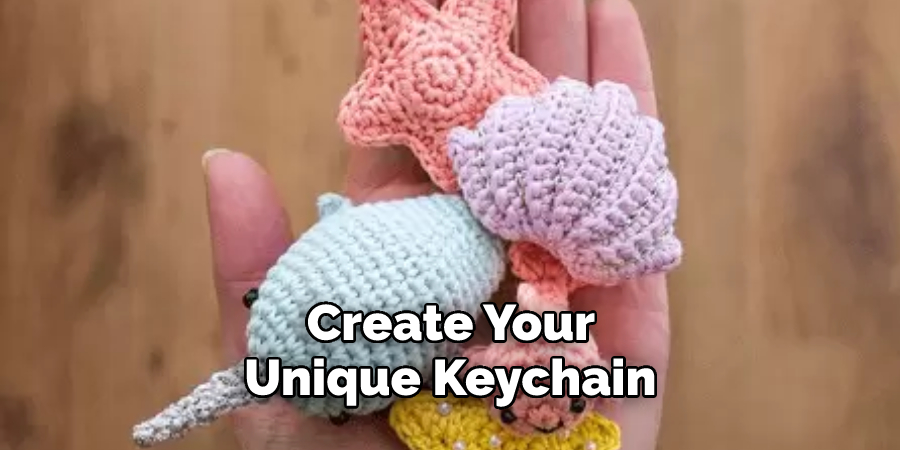
Step 9: Admire Your Work!
You did it! Congrats on crocheting a keychain. Now you can admire your work and show off your new accessory pridefully. Don’t forget to take a photo and share it with your friends. It’s time to attach your new charm and show it off! Get creative with how you display your keychain – loop it around your bag, hang it off of a lanyard, or simply attach it to your keys.
Step 10: Enjoy Crafting
Now that you know how to do it, you are well on your way to becoming an expert crafter. Enjoy the process of creating something unique and personal – it’s one of the greatest rewards of crafting. Have fun, and keep experimenting until you find what works best for you!
Now go out there, get creative, and make some amazing crocheted keychains! You never know how much joy they will bring to others – or how helpful they will be in helping you stay organized. Happy crafting!
5 Additional Tips and Tricks
- Use a keyring or jump ring to attach the finished keychain to a zipper pull, bag handle, or key ring.
- Slip stitches are often used to finish crocheted items and can help make your keychain look neat and professional.
- If you would like your yarn colors to show more prominently on your keychain, try using single crochet stitches instead of slip stitches.
- Try experimenting with different stitch sizes when crocheting a larger project version for an extra-thick texture and effect.
- Get creative! Add beads or charms for unique embellishments in any design you wish for your own personalized accessory!
Now that you know how to do it, why not start right away? With simple materials, basic crochet techniques, and imagination, you can create your unique keychain in no time! Have fun crocheting! Good luck!
5 Things You Should Avoid
- Avoid using yarn fibers that are too slippery or stretchy, as they can make it difficult to crochet your keychain securely.
- Avoid using too many colors of yarn, as this can make the project look cluttered and messy.
- Avoid crocheting too tightly, as this could cause your stitches to become misshapen or unravel over time.
- Avoid making chains larger than you need them to be – sticking with shorter sizes will help keep the shape of your keychain intact.
- Avoid leaving loose ends from your stitching unsecured; this could lead to fraying and an untidy finish for your project! Make sure you use a tapestry needle and extra yarn to secure any ends before you trim them away.
With these tips in mind, you’ll be well on your way to creating beautiful and unique crocheted keychains! Have fun crafting! Good luck!
You Can Check It Out To Crochet Bear Ears
What Type of Yarn Should You Use?
When it comes to crocheting a keychain, the type of yarn you use is important. Choose lightweight yarn that doesn’t stretch too much, such as cotton or acrylic. This will make sure that your finished product keeps its shape and lasts longer. Avoid using woolen or mohair yarns, as these tend to be too thick and can be difficult to crochet with.
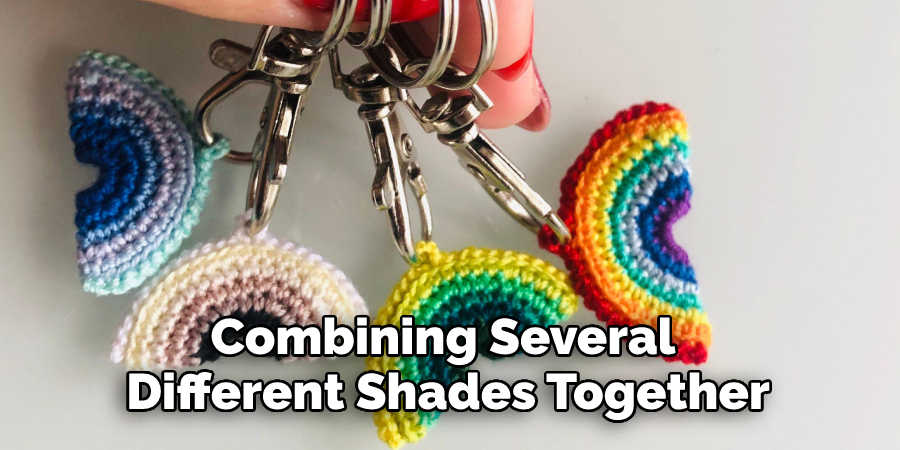
In terms of color, you can choose whatever shade or combination you prefer – just make sure not to go overboard! For a classic look, stick with one main color for the entire project; if you are looking for something more unique or complex, try combining several different shades together in one keychain.
Overall, the type of yarn you use is a matter of personal preference. Have fun exploring the different options available to you – with some practice, you’ll be able to find the perfect yarn for your crocheted keychain! Happy crafting!
Conclusion
Now that you know how to crochet a keychain, you can make something special for yourself or a loved one. The possibilities are almost infinite with so many different patterns and colors available. With basic stitches and a few supplies, you can create something unique and beautiful that can easily hang off your keys.
Whether this is your first time crocheting or you are a veteran in the craft, taking the time to make a special keychain will help bring comfort, joy, and meaning to your life. It is also a great way to show your creative side while giving something practical as a gift. Take some time today to crochet something meaningful – you never know what special memories it might bring up!
Hopefully, this how-to guide on crocheting a keychain has provided you with all the information and tips necessary to get started. Just remember to find the right supplies, practice your stitches and techniques, use the right type of yarn for the best results, get creative with colors and embellishments, and secure all of your stitch ends. Thanks for reading, and happy crocheting!
You Can Check It Out to Crochet a Beach Bag