
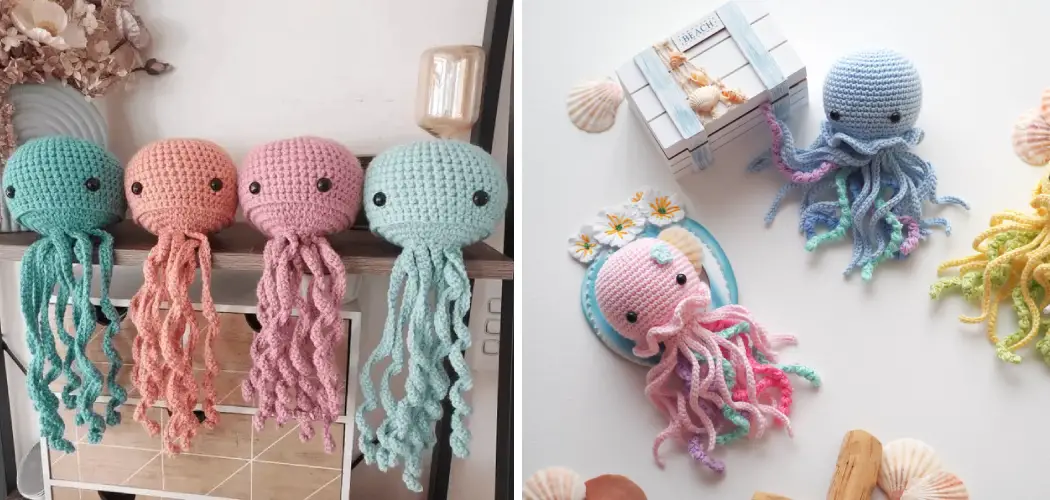
Embarking on the journey of crochet opens up a world of endless possibilities, even for beginners. A delightful project perfectly suited for those taking their first steps into the world of yarn and hooks is crafting a crocheted jellyfish. This whimsical and beginner-friendly creation not only introduces newcomers to essential crochet techniques but also results in an adorable and imaginative finished piece.

The simple yet enchanting process of crocheting a jellyfish encompasses fundamental stitches that lay the foundation for more intricate projects. In this article, we’ll dive into how to crochet a jellyfish for beginners, guiding beginners through each step with clear instructions and visual aids.
From choosing the right materials to mastering basic stitches and assembling the components, you’ll find yourself captivated by the joy of creating a charming and delightful crocheted jellyfish.
The Appeal of Crocheting a Jellyfish as a Whimsical and Manageable Project
Crocheting a jellyfish is an achievable project for the beginning crocheter. It’s a fun, creative endeavor that results in a unique item of decor or toy and provides excellent practice for basic crochet stitches. While it may look daunting at first, if you follow our instructions step-by-step, you’ll have no trouble crafting your own whimsical jellyfish in no time.
To get started you will need some basic crochet supplies. You’ll want to have a G or H hook, sport weight yarn in two colors, and stuffing material such as acrylic fibre fill. Making sure you have all the necessary materials beforehand will help make your project go smoothly.
Suitable Yarn Choices for a Soft and Lightweight Jellyfish
When it comes to crocheting a jellyfish, the type of yarn you use plays an important role in giving it the desired look and feel. To achieve a soft and lightweight effect, opt for a super soft and fine 100% acrylic or cotton yarn. If you want some extra sparkle, look for one with metallic accents. Alternatively, consider using eyelash or Mohair yarn. Whatever you choose, make sure it’s strong enough to hold its shape and color.

To begin the jellyfish base, start by making a magic circle with six single crochet stitches. From there, increase the number of stitches in each new round until your jellyfish is as wide as you like. To get an elegant look, aim for a flat circle with no pleats or puckers.
Once your jellyfish body is complete, it’s time to create the tentacles. Use any yarn of your choice and begin by chaining several stitches until they’re long enough to create the desired effect. Then attach the tentacle chains one by one to the body using single crochet stitches.
10 Steps How to Crochet a Jellyfish for Beginners
Step 1: Gather Your Materials and Inspiration
Start by gathering all the materials you’ll need for the project. These include crochet hooks, yarn, fiberfill stuffing, safety eyes (optional), a yarn needle, and scissors. Consider the colors you want for your jellyfish, as well as the texture and weight of the yarn. For inspiration, browse online platforms, crochet forums, and social media for images of crocheted jellyfish to spark your creativity.
Step 2: Choose a Simple Pattern
For beginners, it’s important to choose a pattern that’s labeled as easy or beginner-friendly. Look for patterns that use basic crochet stitches like single crochet, double crochet, and chains. These patterns often include step-by-step instructions and clear explanations of the stitches used. Be sure to read through the pattern carefully and make sure that you understand the terminology before beginning.
Step 3: Start with the Head
The head is the central part of your jellyfish. Begin by creating a magic ring, which is a technique for starting in the round without leaving a hole in the center. Work single crochet stitches in a spiral, increasing the stitch count gradually to create a spherical shape. This forms the main body of the jellyfish.
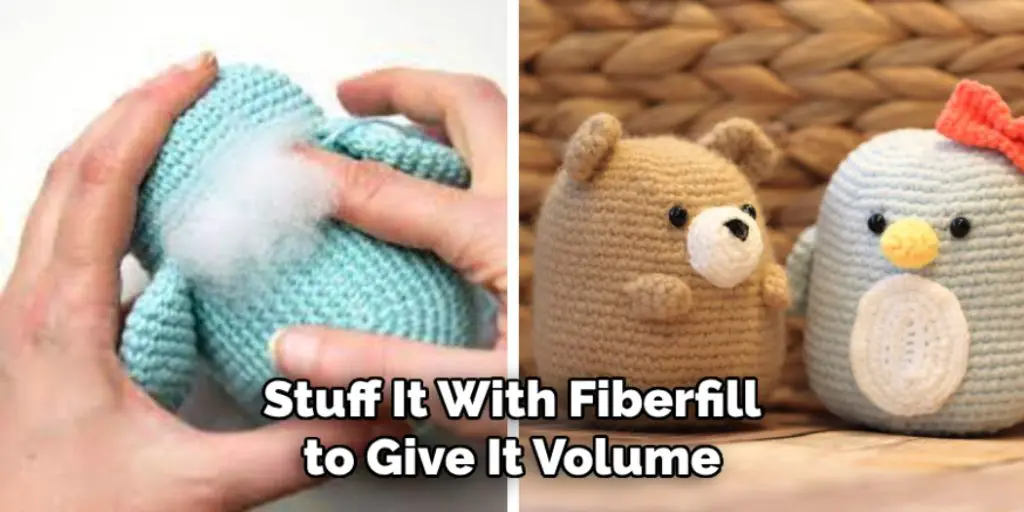
Step 4: Add Fiberfill Stuffing
As you crochet the head, stuff it with fiberfill to give it volume and a soft texture. Make sure not to overstuff it, as this might distort the shape. Gently insert small amounts of fiberfill at a time and use your fingers or a crochet hook to distribute it into the crevices. Once you’re happy with the amount of stuffing, continue crocheting the head until it reaches the desired size.
Step 5: Create the Tentacles
The tentacles are a defining feature of a jellyfish. Create a chain of stitches and then work single crochet stitches along the chain. You can adjust the length of the chain to achieve the desired tentacle length. Make multiple tentacles to attach to the jellyfish’s head.
Step 6: Attach Tentacles to the Head
Position the tentacles around the bottom edge of the jellyfish’s head. You can sew them on using a yarn needle and the same yarn you used to crochet the head. Alternatively, you can crochet the tentacles directly onto the head by inserting the hook through the stitches of the head and working the tentacle stitches.
Step 7: Adding Details
Depending on your chosen style, you can attach safety eyes or embroider eyes using black yarn or thread. This step adds character and personality to your jellyfish. You can also use embroidery to create a smile or other facial features. If you’d like the jellyfish to have tentacles, try crocheting a few in different colors and attaching them.
Once you’ve finished adding details, it’s time to stuff your jellyfish with polyester stuffing. Be sure to include enough stuffing for the correct shape but be careful not to overstuff it as this could warp its shape.
Step 8: Create the Hanging Loop (Optional)
To hang your jellyfish as a decoration, you can create a loop at the top of the head. This loop can be made by chaining a few stitches and then attaching the loop to the top of the head. Use a crochet hook to make this loop. Once the loop is secure, you can use yarn or string to hang your jellyfish wherever you want!

Step 9: Finishing Touches
Before finalizing your jellyfish, weave in any loose yarn ends using a yarn needle. Make sure all your stitches are secure and neatly finished. Adjust the stuffing and tentacles as needed to achieve the desired shape and appearance. Finally, you can add any extra embellishments such as eyes or antennae for a more realistic look. You can also hang loops of yarn from the sides for tentacles.
Step 10: Display Your Crochet Jellyfish
With your crochet jellyfish complete, it’s time to proudly display your creation. Whether you hang it from a hook or give it as a gift, your jellyfish represents your dedication to learning crochet and your ability to transform yarn into a delightful piece of art. As you progress in your crochet journey, you’ll gain confidence to experiment with different patterns, stitches, and techniques, creating even more intricate and beautiful projects in the future.
Things to Consider When Crocheting a Jellyfish for Beginners
As a beginner, crocheting a jellyfish can seem like an intimidating task. But with the right knowledge and resources, it doesn’t have to be overwhelming! To help you get started on your project, here are some things to consider when crocheting a jellyfish:

- Choose your yarn – Jellyfish are typically made of cotton or wool yarn. You can also use acrylic or bamboo yarn, depending on your preference.
- Determine the size of your jellyfish – This will depend on how big or small you want your finished jellyfish to be. Measurements should include the height and width of the body, as well as the length and width of the tentacles. Make sure to take into account the yarn’s thickness when deciding on measurements.
- Make a pattern – Making a pattern can help you keep track of your stitches and ensure that your jellyfish is symmetrical. You can find free patterns online or design one yourself using graph paper.
- Double-check your stitch count – When crocheting, it’s important to make sure that you’re counting your stitches properly. If the count is off, it can throw off the shape of your jellyfish and lead to an uneven final result.
- Have fun! – Crocheting a jellyfish might seem like a daunting task, but with patience and practice, you will be able to make one in no time. Enjoy the process and have fun with it!
Conclusion
Crafting has always been a great way to express yourself and embrace your creativity. Whether you are a beginner or a gifted crocheter, learning how to make this adorable jellyfish headband will give you countless hours of productive fun. Adding this cute accessory to your wardrobe can definitely help you stand out from the crowd! Have fun creating this delightful adornment for yourself or as a gift!
Plus, it’s an inexpensive venture that requires very little time to complete! So, forget the store-bought headbands and grab those crochet hooks – You now know how to crochet a jellyfish so go get creative! If you have further questions, don’t hesitate to contact us. We love inspiring others who are learning how to Crochet a Jellyfish for Beginners – and we’re only ever a click away.