
Dive into the world of crochet and embark on a whimsical journey as we explore the art of crafting your very own crocheted dolphin. These playful marine creatures have long captured our imagination with their graceful movements and charming personalities.

In this article, we’ll guide you through the steps on how to crochet a dolphin, transforming yarn and a crochet hook into a captivating aquatic friend.Whether you’re a seasoned crocheter or just starting on your fiber art adventure, creating a crocheted dolphin is a delightful and rewarding project.
Get ready to bring the enchanting beauty of the ocean into your hands as we delve into the techniques, materials, and step-by-step instructions to craft a charming crocheted dolphin that will surely make a splash in your crochet collection.
Inspiration behind Crocheting a Dolphin
When talking about crocheting an animal, a dolphin is one of the most popular choices. Whether it’s for their playful and friendly nature or because they are such unique creatures, dolphins inspire plenty of people to create them out of yarn.
Crocheting a dolphin provides an opportunity for fiber artists to create a beautiful ornament that can be used as decor or given away as a gift.With some basic crochet skills and supplies, you’ll be able to make your own dolphin in no time.
Although you may find the process difficult initially, keep practicing and you will eventually get better. By following this guide, you should be able to crochet a cute and cuddly dolphin in no time. So let’s get started!
Choosing the Right Dolphin Crochet Pattern
Crocheting a dolphin is an enjoyable and rewarding activity. Whether you are a beginner or an experienced crocheter, finding the right crochet pattern is essential for success. To make sure your project turns out as desired, take some time to research the different patterns available.
The first step in choosing the right crochet pattern is to decide what type of dolphin you want to make. There are dozens of variations, from realistic-looking dolphins and playful cartoon versions, to abstract designs that use basic shapes like circles and squares.

Once you have narrowed down your choices, take a closer look at the pattern’s instructions for any special techniques or materials that may be needed to complete the project.You should also consider your skill level.
Beginners may want to start with something simple like a basic flat design, while experienced crocheters can try their hand at more intricate designs that involve shaping and colorwork.
10 Steps How to Crochet a Dolphin
Step 1: Gather Your Materials
Before you begin, assemble the necessary materials. You’ll need various shades of yarn for the dolphin’s body and fins, a crochet hook suitable for your chosen yarn weight, safety eyes or embroidery thread for the eyes, fiberfill stuffing, a tapestry needle for weaving in ends, and scissors.
Step 2: Choose a Dolphin Pattern
Select a dolphin crochet pattern that suits your skill level. Patterns can range from simple designs for beginners to more intricate patterns for experienced crocheters. Make sure to read through the pattern instructions before you start. Gauge is also important to consider, as a difference in size may alter the completed product.
Step 3: Begin with a Slip Knot
Start by creating a slip knot at the end of your yarn. This will serve as the foundation for your crocheted dolphin. Insert your crochet hook into the slip knot and tighten it gently. Although the knot should be secure, it should also remain loose enough to manipulate with your crochet hook.

Next, create six single crochet stitches into the loop of the slip knot. To do this, you will need to insert your crochet hook through the loop and pull a length of yarn up from the skein. Then, wrap the yarn around the hook and draw it back through the loop to make one single crochet stitch. Repeat this process until you have six stitches on the hook.
Step 4: Crochet the Body
Follow the pattern instructions to crochet the dolphin’s body. This will typically involve creating a series of chain stitches and working single crochet stitches into the chain to form the body shape. As you progress, your dolphin’s body will begin to take form. If you are having trouble, refer to the pattern instructions for guidance.
To shape the body of your dolphin, you may need to increase and decrease certain stitches as indicated in the pattern. Keep an eye on your progress and make sure that all increases and decreases are done correctly.
Step 5: Add the Fins
Crochet the dorsal fin and pectoral fins using the designated colors and stitches outlined in the pattern. Attach the dorsal fin to the top of the dolphin’s body and the pectoral fins to the sides. These fins give your crocheted dolphin its characteristic shape. To attach the fins, use your needle to sew them into place with yarn of the same color.
If you’d like to add a bit of extra pizzazz, try using a contrasting color for the tips of the fins. This will give an even more realistic effect! Once all the fins are attached, your crocheted dolphin is finished and ready to play!
Step 6: Create the Tail
Crochet the tail using the appropriate stitches and colors. The tail adds balance and movement to your dolphin. Attach it securely to the back of the body, ensuring it aligns with the body’s curvature. Follow the same process as when you made the fin.
Next, attach a short piece of yarn to each side of the tail for extra stability. This will help your dolphin stay in place and keep its shape. Once all pieces are securely attached, it’s time to give your dolphin an adorable face!
Step 7: Add the Eyes and Embellishments
Attach the safety eyes or embroider eyes using embroidery thread to give your dolphin a lifelike appearance. You can also embroider a smile or add other facial features if desired. These small touches contribute to the dolphin’s personality.

To finish the project, sew on a few buttons or beads to give your dolphin some extra texture. You can also add small pieces of ribbon or yarn for tails and fins. Get creative with the details and make your crochet dolphin unique! And that’s it – you are now the proud owner of your very own crocheted dolphin.
Step 8: Stuff Your Dolphin
Gently stuff your crocheted dolphin with fiberfill to give it a three-dimensional shape. Be careful not to overstuff, as this can distort the stitches and proportions. Ensure the dolphin’s body is evenly filled for a polished look. Although the stuffing step is optional, it’s strongly recommended for a professional-looking outcome.
Step 9: Close and Shape
Follow the pattern instructions to close the dolphin’s body, typically by crocheting or sewing the opening shut. Shape the body as you go to maintain the dolphin’s realistic form. Add any additional shaping you may want, such as fins or a tail.
Step 10: Finishing Touches
Weave in any loose ends using a tapestry needle and trim excess yarn. Once you’re satisfied with the shape and appearance of your crocheted dolphin, your creation is complete!
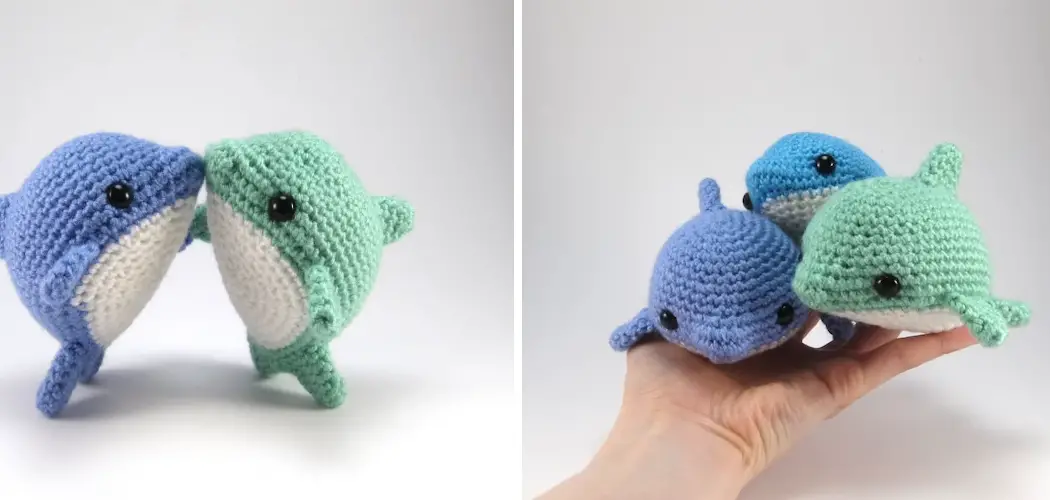
Now you can make a whole pod of crocheted dolphins for yourself or to give away as gifts! You could even use different colors of yarn for each dolphin and mix and match patterns. Whatever design you choose, creating your own crochet animals is an enjoyable and rewarding experience.
Some Common Mistakes to Avoid When crocheting a dolphin
There are a few common mistakes to avoid. One of the most common is starting off with too large of a hook. You want to start off small so that you have more control and accuracy when forming your stitches. Another mistake is not taking enough time in between steps. This can result in uneven or inaccurate shaping for your dolphin’s body.

Additionally, make sure your gauge is correct; otherwise you’ll end up with a wonky-looking dolphin. Finally, try not to rush through your stitches – take your time and ensure that each stitch is even and consistent. With these tips in mind, you should be able to crochet the perfect dolphin!
In addition to mastering the basics of crocheting a dolphin, it’s important to understand the materials and tools needed. You’ll need crochet hooks of various sizes, yarn in your desired colors, scissors for cutting the yarn, a tapestry needle for weaving in ends, and a stitch marker. It may also be helpful to use some tape or pins to secure your work when you are not actively crocheting.
Conclusion
Congratulations, you have now learned how to crochet a dolphin! This project is a fun and rewarding one that will delight your friends, family, and even yourself. Not only did you learn a new skill but you also created something unique and special.
You can show off the creative masterpiece you’ve created among your peers or given it as a heartwarming gift to someone special in your life.Crocheting a dolphin is an enjoyable activity and skill set that can be used to make unique gifts for any occasion or even simply for your own pleasure.
What makes this craft really awesome is that there’s so much room for personal expression when creating this piece of art. So, don’t be afraid to get creative with colors, textures, and patterns and make the crocheted dolphin your very own original work of art!