
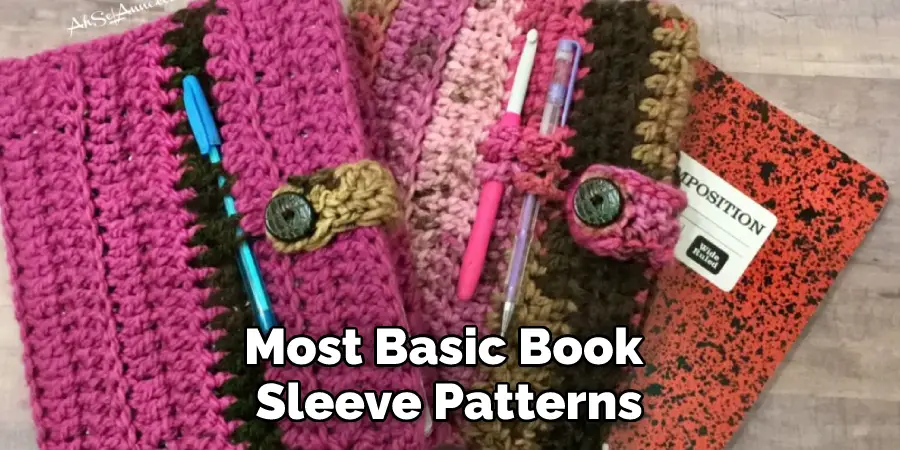
Are you looking for a way to protect your latest paperback or Kindle? Crafting your own book sleeve is the perfect solution! Crocheting is an easy and fun activity that yields beautiful handmade projects. In this blog post, we’ll show you how to crochet a book sleeve from start to finish.
All it takes is some simple knowledge of crocheting, plus basic supplies like yarn and a crochet hook – all of which can be found at any craft store. You’ll soon see just how easy it is to customize your own book cover with cost-effective materials and interesting patterns! Follow along as we guide you through each step in creating the perfect one-of-a-kind book sleeve.
What Size Is a Book Sleeve Pattern?
Book sleeve patterns come in a range of sizes to fit various book dimensions. To choose the right size, measure your book and compare it to the measurements provided with the pattern. Check out our guide on how to measure your book for more information.
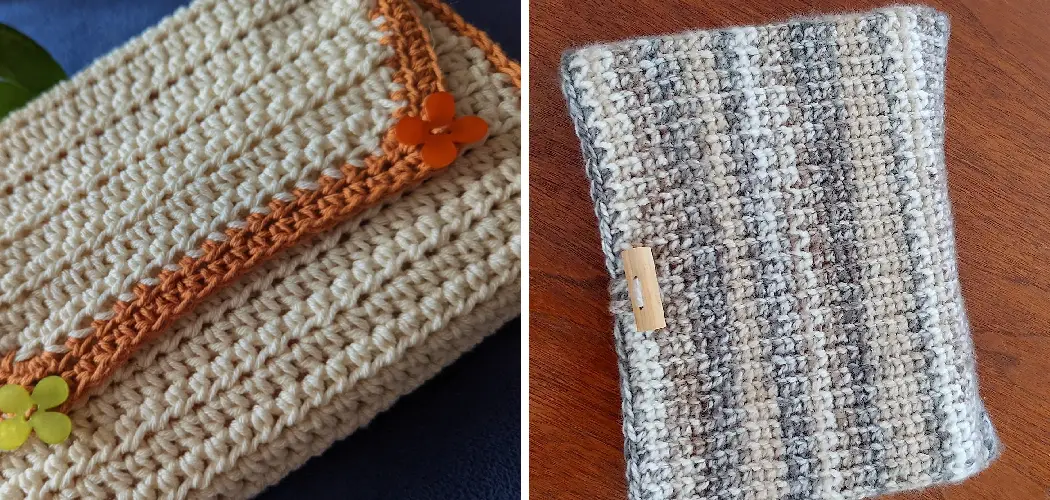
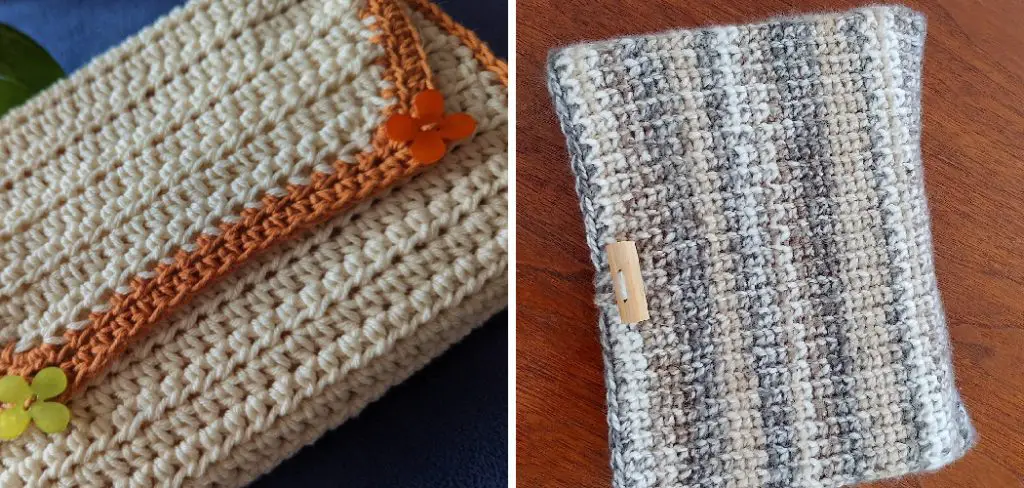
Most basic book sleeve patterns include instructions for two sizes: small and large. The smaller size typically fits a book measuring 6 to 8 inches in height, while the larger size is suitable for books up to 11 inches.
For more precise sizing, you can find patterns that provide measurements for five different sizes, ranging from extra small (4.5-6 inches) to extra large (10-11.5 inches). These patterns often come with detailed diagrams or illustrations to help you choose the correct size.
In addition to finding the right size pattern, remember that crochet fabric will stretch and fit more snugly around larger books than smaller ones. If your book is a bit bigger than the maximum stated size in the pattern, use slightly thicker yarn or go down one hook size so that your sleeve will fit better when it’s finished.
Finally, if you’re making a book sleeve as a gift or for yourself, always make sure to measure the recipient’s book before starting your project. That way, you can get it just right and ensure that the finished product fits perfectly.
8 Methods How to Crochet a Book Sleeve
1. What You’ll Need
Before you start crocheting your book sleeve, you’ll need to gather a few supplies. You’ll need a crochet hook, yarn, scissors, and a tapestry needle. The type of yarn you use is up to you, but I would recommend using a worsted-weight yarn for this project.
You’ll also need a ruler to measure your work and make sure it’s the right size. If you’d like, you can also add some decorative elements to your book sleeve, such as lace or buttons.
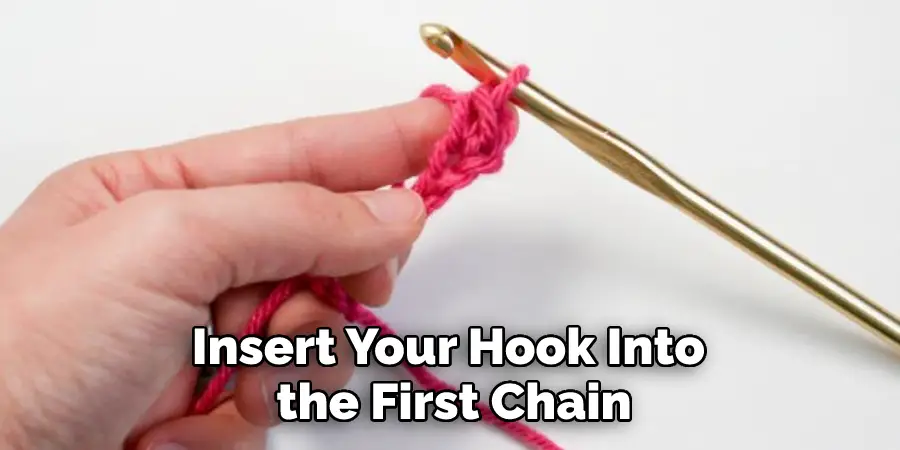
2. Make a Chain
To start crocheting your book sleeve, you will need to make a chain that is long enough to fit around your book. The number of chains you will need will depend on the size of your book.
Once you have made your chain, slip stitch to the first chain to form a loop. If you are using a pattern, follow the instructions to determine how many chains you need and what kind of stitch you should use. Although a basic chain stitch is the most common, you can also use other stitches such as double crochet, half double crochet, and single crochet.
3. Single Crochet in the Round
Now that you have made your loop, you will need to single-crochet around the entire loop. To do this, insert your hook into the first chain, yarn over, and pull up a loop. Yarn over and pull through both loops on your hook to complete the stitch. Continue single crocheting around until you have reached the end of the round. Slip the stitch into the first stitch to join.
While you are single-crocheting, count your stitches to make sure you have the same number at the end of each round. Though it may take some practice, it is important to develop an even tension, so your stitches are smooth and uniform.
4. Double Crochet in the Round
Once you have completed one round of single crochet, you will need to double-crochet around the entire loop. To do this, yarn over and insert your hook into the first stitch.
Yarn over and pull up a loop (three loops on the hook). Yarn over and pull through two loops (two loops on hook), yarn over and pull through two loops (one loop on hook). This completes the double crochet stitch. Continue double crocheting around until you have reached the end of the round. Slip the stitch into the first stitch to join.
5. Half Double Crochet in the Round
After you have completed one round of double crochet, you will need to half double crochet around the entire loop. To do this, yarn over and insert your hook into the first stitch. Yarn over and pull up a loop (three loops on the hook).
Yarn over and pull through all three loops on your hook to complete the half-double crochet stitch. Continue half-double crocheting around until you have reached the end of the round. Slip the stitch into the first stitch to join. You now have two rounds of crochet. Begin the next round in the same manner as before by double crocheting around.
6. Crochet Two Rounds Together
Once you have completed one round of half double crochet, you will need to crochet two rounds together (decrease). To do this, insert your hook into both the next stitch and the following stitch (three loops on the hook). Yarn over and pull through all three loops on your hook to complete one decrease stitch.
Join with a slip stitch and cut yarn, leaving a long tail for sewing. If you have not previously completed a decrease stitch, watch the video tutorial to learn how. Try to stay consistent with your decreases so that the crochet book sleeve has an even shape.
7. Attach Sleeves Together
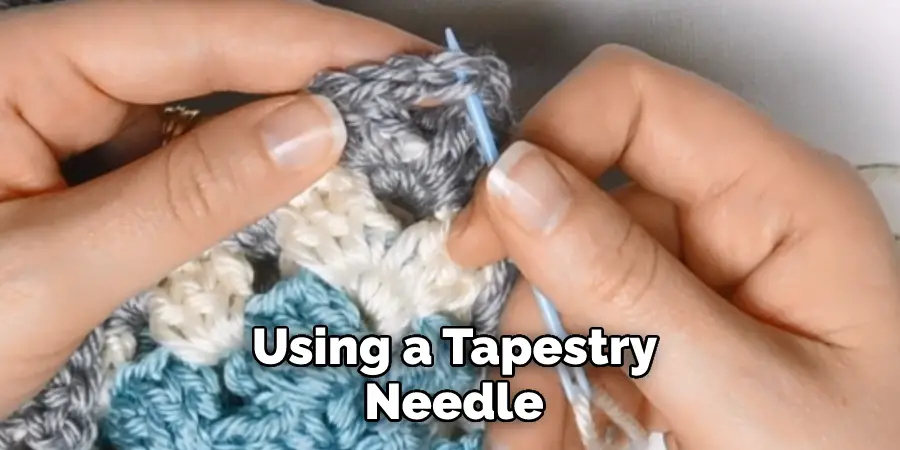
Join sleeves together by lining up side edges and single crocheting across them OR whipstitch them together using a tapestry needle and matching thread or yarn. Sew the bottom of the sleeves together with a whipstitch, making sure that your seam is secure and even.
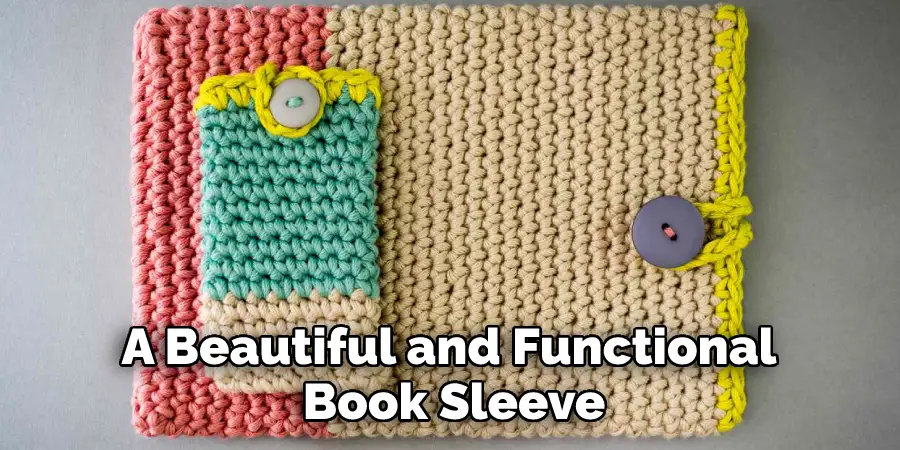
Once the sleeves are connected, you can add any extra embellishments or details to make your book sleeve unique. For example, you can add a simple edge to the top of the sleeve by sc around. Alternatively, you could add some decorative buttons or applique to the front of your sleeve. Once you are done, all that is left to do is insert a book into your custom-made book sleeve!
8. Finishing Touches
Lastly, weave in all loose yarn ends using a tapestry needle. This will help ensure that all threads are secured and won’t unravel over time. With this last step completed, your crocheted book sleeve is now ready to be filled with books. Enjoy your new handmade creation!
By following these steps, you can easily make a cozy and stylish book sleeve that will help keep your favorite books in great condition. Not only is this project fun and easy to complete, but it also makes a great gift for any book lover. Have fun crocheting your own unique!
Things to Consider When Crochet a Book Sleeve
When crocheting a book sleeve, there are some things to consider.
1. Choose the Yarn
With crocheting, yarn is an important part of the process. Choose a yarn that is soft and flexible, so it doesn’t damage your book. Also, make sure to use a yarn that is machine washable and won’t pill easily.
2. Choose the Size
You want your book sleeve to fit snugly on your book, so you don’t have excess fabric sagging or creasing around the edges. Measure the length and width of your book before beginning to crochet your sleeve.
3. Choose the Stitch
The stitch you choose will depend on the look you’re going for and the type of yarn that you’ve chosen. For example, if you are using a soft, chunky yarn, then a single crochet may be best, while a thinner yarn may require double or half-double crochet stitches.
4. Choose the Closure
Your book sleeve will need some sort of closure to keep it snug around your book. The best option for a crocheted sleeve is usually velcro, ribbons, or buttons and loops. Make sure that whatever you choose won’t scratch or damage your book.
By considering these important elements, you can create a beautiful and functional book sleeve that will keep your books safe for years to come. Have fun experimenting with different yarns, stitches, and closures to make your book sleeve unique and perfect for you!
Conclusion
Now that you know how to crochet a book sleeve, get started on crocheting one for yourself! Follow the steps to crochet a book sleeve outlined in this blog post, and soon you’ll have a cute and unique book cover.
With so many different yarns and patterns available, the possibilities are endless. Have fun experimenting with different materials and designs until you find the perfect combination for your next project.
You Can Check It Out to Shrink Crochet