
A slip stitch purlwise is a common stitch used in knitting and crocheting that can add texture, color, or decorative elements to your project. It’s a relatively simple stitch that only requires basic knowledge of the craft, but it can be used to create complex patterns. In this blog post, we’ll discuss how to slip stitch purlwise. So keep reading to learn more!

Can You Slip Stitch Purlwise?
One of the most difficult aspects of learning how to knit is deciphering the instructions in patterns. For example, one important stitch that can be tricky to learn is the slip stitch purlwise.
To understand how to do this, you need to know that the two main types of stitches are the knit stitch and the purl stitch, and slipping a stitch purlwise involves slipping it with the right side of the knitting facing you and inserting your needle as if you are doing a purl stitch.
Once you understand this technique and practice it continuously, you can achieve different kinds of textures and patterns to make interesting garments. So don’t be daunted by needing to slip a stitch purlwise; instead, use it to enhance your knitting skills!
Why Should You Slip Stitch Purlwise?
Slip stitching purlwise is an excellent way to add subtle texture and durability to a knitted piece. It creates a firm, neat seam that will hold up to wear and tear better than any other technique. Slip stitching purlwise also helps create neatly finished edges that can be used as part of the garment’s design.
In addition, it results in stitches that are relatively easy to work with when increasing or decreasing your work. Furthermore, slip stitching purlwise creates an even tension throughout the material so that you don’t end up with lumps or bumps in your fabric. All together, slip stitching purlwise is an excellent choice for anyone looking for the best finish.
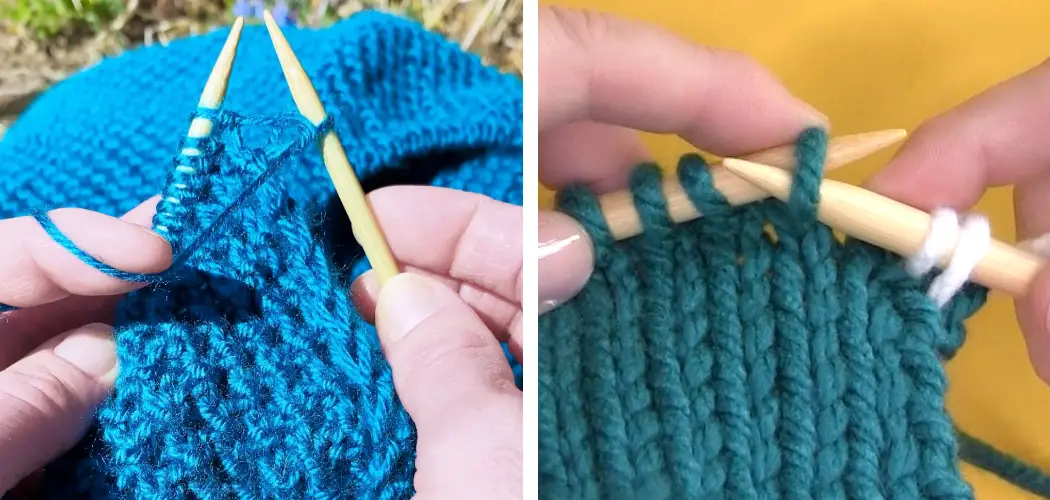
7 Tips to Follow on How to Slip Stitch Purlwise
1. Make a Slipknot
To start, you will need to make a slipknot on your knitting needle. To do this, take the yarn and wrap it around your needle once. Then, take the end of the yarn and insert it through the loop that is already on the needle. Next, pull the yarn tight so that you have a small loop on your needle.
2. Insert Your Needle Into the Stitch
Once you have made your slipknot, you will need to insert your needle into the stitch that you wish to slip. To do this, simply insert your needle purlwise into the next stitch on your knitting needle.
3. Wrap Your Yarn Around Your Needle
Once your needle is inserted into the stitch, you will need to wrap your yarn around your needle. To do this, take the end of your yarn and wrap it around your needle clockwise so that it is now in front of your needle.

4. Draw Your Needle Through The Stitch
Now that you have wrapped your yarn around your needle, you will need to draw your needle through the stitch that you are slipping. To do this, insert your needle into the stitch as if you were going to purl. Make sure that you insert the needle from front to back.
5. Drop The Stitch From Your Needle
Once you have drawn your needle through the stitch, you will need to drop the stitch from your needle. To do this, ensure that the yarn is still wrapped around your needle, and then simply let go of the slipped stitch so that it drops off your knitting needle.
6. Insert Your Needle Into The Next Stitch
Now that you have dropped the stitch from your knitting needle, you will need to insert your needle into the next stitch on your knitting needle to slip it. To do this, simply insert your needle purlwise into the next stitch on your knitting needle.
7. Repeat Steps 3-6 Until You Have Slipped All Of The Stitches That You Wish To Slip
Once you have inserted your needle into the next stitch, you will need to repeat steps 3-6 until you have slipped all the stitches you wish to. When you have finished slipping all of the stitches, cut off any excess yarn and weave in any loose ends so that they are secure.
That’s it! You’ve now learned how to slip stitch purlwise. With these seven tips in mind, you’ll be able to master this technique in no time at all. So grab your needles and yarn and get stitching!
5 Benefits of Slip Stitch Purlwise
1. It’s Easy
The slip stitch purlwise is one of the easiest stitches to learn. Once you get the hang of it, it’s a breeze to do. And once you know how to do it, you can use it in various ways to create different effects in your knitting.
2. It’s Fast
Another benefit of the slip stitch purlwise is that it’s fast. So you can knit a lot of stitches in a short amount of time, which is great when you’re trying to finish a project quickly.
3. It Creates a Firm Fabric
When you use the slip stitch purlwise, you create a firm fabric. This is because the stitches are tightly packed together. This can be beneficial if you’re looking for a fabric that will hold its shape well.

4. It’s Versatile
The slip stitch purlwise is also versatile. You can use it to create different textures and patterns in your knitting. Additionally, it can be used in various projects, such as sweaters, hats, and scarves.
5. It’s Inexpensive
Another benefit of the slip stitch purlwise is that it’s inexpensive. You don’t need any special yarn or needles to do it, and it doesn’t take long to learn.
6 Common Mistakes People Make When Trying to Slip Stitch Purlwise
1. Not Securing Your Yarn at The Beginning
One of the most common mistakes people make when slip stitching purlwise is not securing their yarn at the beginning. This can cause your stitches to become loose and can make it difficult to keep your work even. To avoid this, make sure to secure your yarn at the beginning of your work by either tying a knot or using a stitch marker.

2. Not Using the Correct Needle Size
Another common mistake people make is not using the correct needle size. When slip stitching purlwise, you should use a needle that is one size smaller than the needle you used for your cast-on. This will help create a tighter stitch and prevent your work from becoming loose.
3. Not Slipping the First Stitch
Many people forget to slip the first stitch when they are slip stitching purlwise. This can cause your work to become uneven and can make it difficult to keep your stitches tight. To avoid this, make sure to slip the first stitch before you begin working your way across the row.
4. Not Working Evenly
Another mistake people often make is not working evenly when slip stitching purlwise. This can cause your work to become uneven and can make it difficult to achieve even tension. To avoid this, take care to work evenly across the row, making sure to slip each stitch purlwise with the same amount of tension.
5. Not Turning in Your Work After Each Row
Many people forget to turn their work after each row when they are slip stitching purlwise. This can cause your work to become twisted and can make it difficult to keep your stitches even. To avoid this, make sure to turn your work after every other row so that you are always working with the right side facing you.
6. Not Securing Your Yarn at The End
Another common mistake people make is not securing their yarn at the end of their work. This can cause your stitches to become loose and can make it difficult for your work to lay flat. To avoid this, make sure to secure your yarn at the end of your work by either tying a knot or using a stitch marker.
Can You Make Patterns with Slips Stitches Made Purlwise?
Slip stitches made purlwise may seem basic, but they’re actually incredibly versatile! With a few simple techniques, you can use them to create intricate patterns and designs.
For example, you can customize the number of slipped stitches for different effects; increasing the number of slips could create textures reminiscent of cables or striping. You can also mix up the type of stitch (knit or purl), the direction (both right and left), and the needle placement (knitwise and purlwise) to make more complex patterns.

The possibilities are endless! Slip stitches made purlwise offer a great way to experiment with knitting and inject creativity into your projects.
What Kind of Yarns Work Best When Slipping Stitches Purlwise?
When it comes to slipping stitches purlwise, the key is to find a yarn that isn’t too slippery. The best type of yarn for this project is a fingering weight or sock yarn, which is slightly thinner in diameter than worsted and bulky weight yarns.
Fingering weight or sock yarns have enough grip to stay close to your knitting needles while sliding easily where you need them. If possible, choose an un-plied yarn specifically designed for precise stitch work like Shetland wool or angora that offers a slight stickiness and plenty of texture and stitch definition.
Regardless of the type of yarn you choose, make sure you are familiar with its characteristics before attempting any projects requiring slipped stitches to get a better idea of what kind of slip-stitch movement works best with each fiber.
How Can I Make Sure My Stitches Are Even when Slipping Purlwise?
When knitting and purling stitches, the goal is to ensure each stitch has an even count of maintaining a professional look. To ensure your stitches are slip-purled evenly, it’s important to position your needle to catch the yarn just right. Moving the needle in and out with each stitch helps create tension on the knitted fabric and holds it together.
Additionally, be mindful of how tight or loose you’re gathering each stitch, as some stitches can be more challenging than others if not careful. Finally, practice slipping purlwise on a few pre-existing knit rows before attempting more complicated patterns. With time and patience, all knitters can master producing even and consistent stitches!

Conclusion
Slip stitching purlwise is an essential skill for any knitter or crocheter looking to add texture and complexity to their work!
With just a few simple steps, you can easily make basic slipped stitches, but plenty of advanced techniques are available for those who wish to take their crafting skills up a notch!
Whether you’re looking for something simple or more complex, mastering this essential skill will open up all exciting possibilities! Thanks for reading our post about how to slip stitch purlwise.
You Can Check It Out to Knit a Bow