
Do you want to learn how to center clay on a pottery wheel? Centering the clay is an essential skill for any aspiring ceramic artist. It may seem intimidating at first, but with a few helpful tips and practice, anyone can master this important technique.

This blog on how to center clay on pottery wheel will provide in-depth explanations of how to properly center clay as well as offer advice on troubleshooting common issues one might encounter while mastering the process. So prepare your supplies and get ready to become a pro at centering clay!
What is Pottery Wheel?
A pottery wheel is a machine that spins clay around at high speed, allowing the artist to shape it into desired forms. It includes a foot pedal for controlling the speed and how fast the wheel rotates. This device allows potters to create beautiful pieces of art with greater ease than using their own hands alone.
Why Do You Need to Center Clay on Pottery Wheel?
Centering clay on a pottery wheel is an important step in the ceramic-making process. When properly centered, the clay is balanced and ready for shaping. If it’s not centered, the necessary shapes will be difficult to achieve since the clay won’t rotate evenly around the axis of the wheel. Additionally, uncentered clay produces less symmetrical pieces.
Step-by-step Guidelines on How to Center Clay on Pottery Wheel
Step 1: Gather Your Supplies
Before you begin, make sure you have everything you need for centering the clay on the pottery wheel. You will require a clay-throwing tool, a bat (a flat surface that you place the clay on when throwing), and of course, your clay.
It is also important to have a damp sponge on hand to help you adjust the clay as needed. It is best to use a clay-throwing tool when centering the clay in order to prevent damage to the wheel.

Step 2: Apply a Small Amount of Water
To get started, apply a small amount of water to the bat as well as the center of the wheel. The moisture will help keep your clay from sticking and make it easier to move around. This step is essential for any successful centering process.
It is important not to use too much water, as this can lead to the clay being too wet and difficult to work with. But don’t worry, if you use too much water a damp sponge should help to absorb any excess moisture.
Step 3: Put Clay Onto the Bat
Next, carefully place your lump of clay onto the wetted bat. You can use your hands or pottery tools to shape it into a round mound that is slightly higher in the middle than at its sides.
This mound should be approximately the same size as the wheel head, and it should also have a flat bottom once it’s placed onto the wheel. But don’t worry if it looks a bit uneven — you can always adjust it once it’s on the wheel.
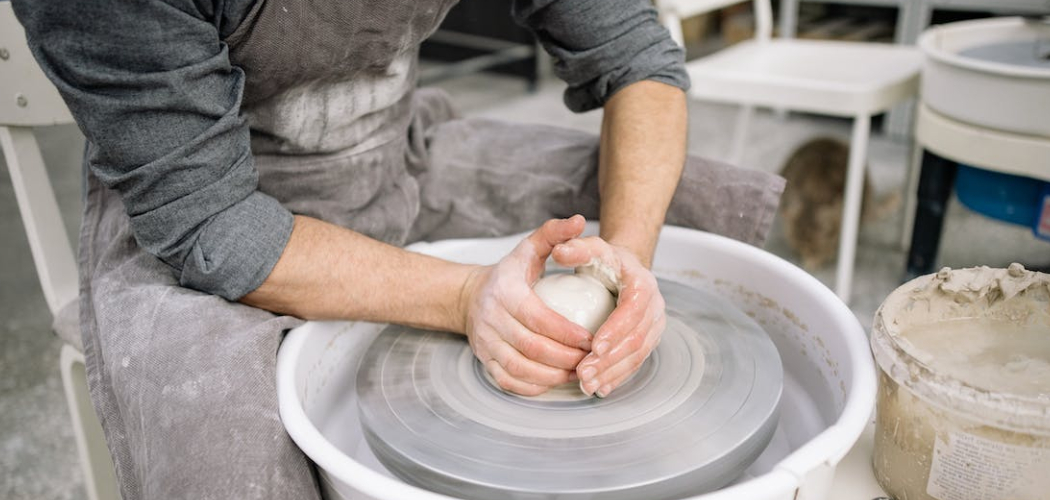
Step 4: Place Clay On Wheel Center
Once you have shaped the clay into a mound, place it onto the center of the wheel. Use gentle pressure to secure the clay in place. It is important that the clay mound is firmly attached to the wheel head, as this will ensure a perfectly centered piece.
It is also important to make sure that the mound remains level and maintained as it rotates on the wheel. This can be done by using a damp sponge to adjust the clay as it spins.
Step 5: Spin the Wheel at a Low Speed
Now you can begin to spin the wheel using your foot pedal. Start with a slow speed and gradually increase as needed until the clay is spinning evenly on its own. If it’s not spinning properly, use your hands or tools to help guide it to the center again.

It may take a few attempts before the clay is centered and spinning properly. This is normal and part of the process. It is best to practice centering the clay multiple times in order to perfect your technique.
Step 6: Adjust the Clay Pressure
To ensure that your clay stays centered, adjust how much pressure you’re applying while spinning as well as when stopping and starting. Too much pressure will cause your piece to become unbalanced and difficult to work with. This is why it’s important to adjust the pressure in accordance with the speed of the wheel. It may take a bit of practice to get the hang of it, but it will be worth it in the end.
Step 7: Increase Speed
Now you can begin to increase the speed of the wheel until it is spinning at a comfortable rate. At this point, your clay should be spinning evenly and you’re almost done centering the clay. This is the perfect time to take a break and admire your work.
You have successfully centered the clay on the pottery wheel! It is important to note that you can always go back and adjust the pressure or speed if needed. But, if you feel confident in your technique, you can move on to the next step which is shaping and throwing your clay.
Step 8: Tap Clay
To further center the clay, tap it gently with a wet finger or tool. This will help realign any misaligned pieces while also helping to press them together more firmly. Be sure not to apply too much pressure or tap too aggressively as this could cause your piece to become unbalanced again.
If needed, use your damp sponge to help adjust the pressure as you tap. This will ensure that your clay stays centered as you work.
Step 9: Stop Wheel
When your piece looks centered and balanced, stop the wheel by pressing down on the foot pedal. Make sure to press down gently, otherwise, the sudden stop could cause your clay to become uncentered. It is also important to be aware of how much pressure you are applying while stopping the wheel. Too much pressure could cause your clay piece to become distorted,
Step 10: Lift Clay Off Bat
Finally, you can lift the clay off the bat and begin shaping it on your pottery wheel. Congratulations! You have just learned how to center clay on a pottery wheel. With practice, you will be able to perfect this skill and create beautiful pieces of art in no time.

Always remember to use a damp sponge and apply gentle pressure when adjusting the clay on the wheel. This will ensure that your pieces are perfectly centered each and every way.
We hope that this blog on how to center clay on pottery wheel has been helpful for you in mastering this important technique! If you have any questions or comments, please feel free to leave them below. Good luck with your creations!
Frequently Asked Questions
Q: How Long Does It Take to Center Clay on the Pottery Wheel?
A: It usually takes around 5-10 minutes to properly center clay on the pottery wheel, depending on the size and shape of your piece. With practice, you can reduce this time significantly.
Q: Does Centering Clay Affect How I Shape It?
A: Yes, centering clay is essential for shaping it properly as well as creating symmetrical pieces. If your clay is not centered correctly, it will be difficult to create smooth shapes and balanced items.
Q: What Other Tips Can Help Me Center Clay Easily?
A: One helpful tip is to add a small amount of water to both the bat and the center of the wheel before placing your lump of clay onto it. Additionally, make sure you tap the clay gently with a wet finger or tool to help it stay centered as you work. Finally, always press down on the foot pedal gently when stopping the wheel to avoid unbalancing your piece.
Q: What Should I Do If My Clay Is Not Centered?
A: If your clay is not centered properly, use your hands or tools to help guide it back into place and adjust how much pressure you’re applying while spinning. Additionally, tap the clay gently with a wet finger or tool and increase the speed of the wheel until it is spinning evenly on its own. With practice, you can master this important technique!
Good luck with your creations!

Conclusion
All in all on how to center clay on pottery wheel, centering clay on a pottery wheel is an art form that can be learned. With patience and dedication, anybody can learn to master the steps listed above and become successful in centering clay. From proper wetness and thickness of the clay to the best seat position, successful centering requires practice and a bit of finesse.
Working with a good instructor or taking classes at a ceramics studio is also an excellent way for any aspiring potter to become well-versed in how to center clay on a pottery wheel. So what are you waiting for? Get started today and let your creative inspirations run wild!
You Can Check This Out To Sew Crochet Sweater Pieces Together