
Do you have a stack of mason jars sitting in your cupboard, just waiting to be given life? Then this post is perfect for you! Wrapping a mason jar in pretty material or ribbon can give it an extra special touch that will make everyone at the table smile. Here we’ll show you how to wrap a mason jar with some pizzazz so they can become part of all the wonderful memories and experiences that take place around them.

From using fabrics like lace and felt to adding accents like glitter and bows, there are dozens of ways to spruce up these classic containers! Get ready for lots of ideas on making those plain old mason jars ready for celebration!
Why May You Need to Wrap a Mason Jar?
1 . To Protect the Jar and its Content
Mason jars are known for their durability, but even they can break if not handled properly. Wrapping them can provide an extra layer of protection against accidental bumps or falls. In addition, wrapping a mason jar can help prevent direct contact between the glass and other surfaces, such as countertops or tables, which can cause scratches or chips over time.
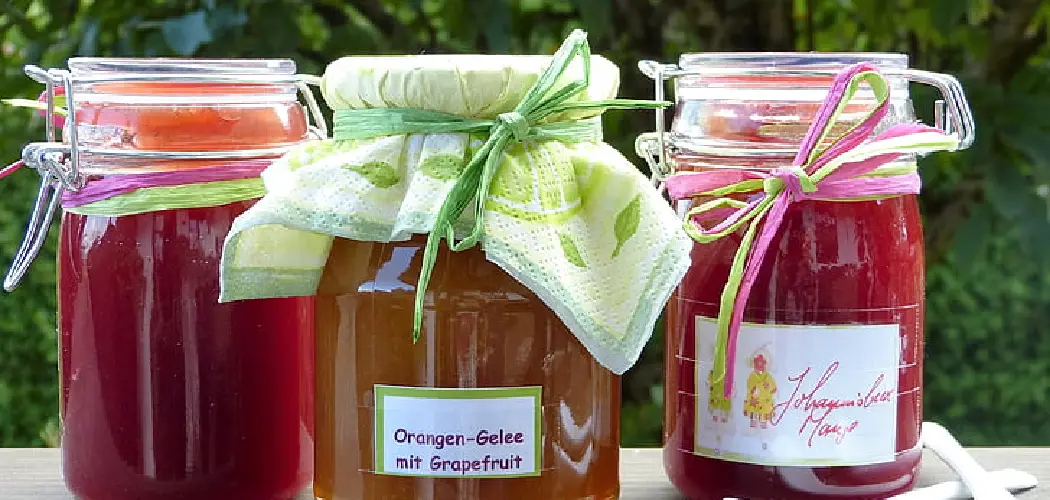
2 . To Add Personalization and Decoration
Mason jars are a popular choice for DIY projects, especially for events like weddings or parties. Wrapping them can give them a unique touch and help tie in with the overall theme or decor. You can use different materials such as burlap, lace, ribbon, or even glitter to create a customized look for your mason jars.
3 . To Keep the Content Fresh
Mason jars are commonly used for storing food items, such as jams, pickles, or dried herbs. Wrapping them can help keep the contents fresh and protect them from exposure to light, which can cause spoiling or discoloration. It can also help maintain the temperature of cold items, such as drinks or salads, for a longer period.
4 . To Make Them Easier to Grip
Mason jars can sometimes be difficult to grip, especially if they are filled with slippery or wet items. Wrapping them with materials like cloth or silicone can provide a better grip and prevent accidents from dropping the jar while trying to open it.

How to Wrap a Mason Jar in 6 Easy Steps
Step 1: Gather Your Supplies
Before you begin wrapping your mason jar, make sure you have all the necessary supplies ready. This includes:
- A Mason Jar
- Decorative Paper or Fabric
- Scissors
- Mod Podge (or any other decoupage glue)
- Paintbrush
- Twine, ribbon, or lace (optional)
Step 2: Prepare Your Workspace
It’s important to have a clean and spacious workspace when wrapping your mason jar. Make sure you have enough room to spread out your supplies and work comfortably. Also, you have to make sure the surface is clean so that your mason jar doesn’t get dirty during the process.
Step 3: Measure and Cut Your Paper or Fabric
Take your decorative paper or fabric and measure it around your mason jar, leaving a small overlap on both ends for gluing. Make sure to cut the paper or fabric in a straight line. Also, measure the height of your mason jar and cut a strip of paper or fabric to fit around it.
Step 4: Apply Mod Podge
Using a paintbrush, apply a thin layer of Mod Podge onto your mason jar. Then carefully wrap your paper or fabric around the jar, smoothing out any wrinkles or air bubbles as you go. Use your fingers to press the paper or fabric firmly onto the jar.
Step 5: Add Embellishments (optional)
To add some extra flair to your wrapped mason jar, you can tie twine, ribbon, or lace around the mouth of the jar. You can also add a tag or label for a personalized touch. Be creative and make it your own!
Step 6: Let It Dry
Allow your mason jar to dry completely before using it. This usually takes about an hour, but you can also leave it overnight for best results. Once dried, your wrapped mason jar is ready to be used as a beautiful decoration or gift!
Some Extra Tips to Wrap a Mason Jar
1 . Do Not Use Stickers
If you’re planning on wrapping a mason jar, make sure to avoid using stickers of any kind. While they may seem like a quick fix, the adhesive can easily become stuck to the glass and ruin your hard work.

2 . Personalize Your Jar
One of the best things about wrapping a mason jar is that you have complete creative freedom. Take advantage of this and add personal touches to your design. Whether it’s a monogram, a name, or some other special element, adding a personal touch will make the jar even more special.
3 . Use Different Materials
Don’t be afraid to experiment with different materials when wrapping your mason jar. Instead of just using paper or fabric, try incorporating elements like ribbon, lace, or twine for a unique and textured look. You can also use different adhesives such as Mod Podge or glue dots to add dimension and interest.
4 . Add Embellishments
To take your wrapped mason jar to the next level, consider adding embellishments like buttons, beads, or charms. These small details can make a big difference and add personality to your jar.
5 . Consider the Occasion
If you’re wrapping a mason jar as a gift or for a specific occasion, keep that in mind when choosing your design. For example, if it’s for a wedding, opt for elegant and romantic materials. If it’s for a birthday, incorporate fun and colorful elements. Tailoring your design to the occasion will make the jar even more meaningful.
6 . Practice Makes Perfect
Wrapping a mason jar can take some practice, so don’t get discouraged if your first attempt doesn’t turn out exactly how you envisioned. Keep practicing and experimenting with different techniques until you find what works best for you.

Frequently Asked Questions
What Precautions Should Be Made Before Wrapping a Mason Jar?
Wrapping a mason jar can be a fun and creative way to personalize your jars. However, there are some precautions that you should keep in mind before starting this project. Firstly, if you plan on wrapping the exterior of the jar, make sure to clean it thoroughly beforehand.
Any dirt or oils left on the surface of the jar can prevent the wrapping material from adhering properly. Additionally, if you are planning to wrap a mason jar with food inside, make sure to choose a non-toxic and food-safe wrapping material.
What Materials Can Be Used for Wrapping a Mason Jar?
Several materials can be used for wrapping a mason jar, depending on your preference and purpose. Some popular options include twine, burlap, lace, fabric, paper, and even washi tape. Each material offers a unique look and feel to the mason jar, so choose one that best fits your style or occasion.
What Are Some Creative Ways to Wrap a Mason Jar?
The possibilities for wrapping a mason jar are endless! You can wrap the jar with a single material, such as twine or fabric, for a simple and rustic look. Or, you can get creative and combine different materials to create a more unique and personalized design.
For example, you can wrap the jar with burlap and add a lace trim for a shabby chic touch. You can also incorporate other embellishments like buttons, ribbon, or beads for added texture and charm.
Can Wrapping a Mason Jar Serve Any Other Purpose Besides Aesthetics?
Yes, wrapping a mason jar can serve multiple purposes besides adding visual appeal. If you plan on using the wrapped jars as drinking glasses or vases, you can choose materials that provide insulation to keep your drinks cool or your flowers fresh.

You can also use wrapping materials that are easy to write on, making the jars perfect for labeling or organizing items in your pantry or workspace. Get creative and think outside the box to find other practical uses for your wrapped mason jars!
What Are Some Tips for Wrapping a Mason Jar Neatly?
Wrapping a mason jar can be a bit tricky, especially if you are using unconventional materials. To ensure a neat and tidy look, start by cutting the wrapping material to the appropriate size for your jar. Then, use adhesive or double-sided tape to secure one end of the material onto the jar. Slowly wrap the material around the jar, slightly overlapping each layer to create a seamless look.
Conclusion
Wrapping a mason jar is one of the easiest and most creative ways to give a gift! There are endless possibilities with the supplies you can use, be it fabric, burlap, or ribbon. So get out there and start uncovering your inner gift-wrapping genius. Whether you’re planning to give away something special, or simply want to add a little sparkle to your home decor, use this tutorial as a starting point and watch your ideas come to life!
Now you know how to wrap a mason jar! I’m sure that whoever receives it will love the unique touch and will have fun unwrapping their present while admiring its beauty. Now don’t be shy – try out these creative wrapping ideas. Let us know how it went in the comments below. Happy gifting!