
Choosing a diaper bag for your little one can be a daunting task. With so many options on the market, it can be tough to find one that fits all your needs and doesn’t break the bank. That’s why we’ve put together this step-by-step guide on how to sew a diaper bag. Not only will it be personalized to your tastes, but it will also save you money and be something you can be proud of for years to come.

Can You Sew a Diaper Bag?
As parents, we know the importance of having all the essentials when diaper changing on the go. What better way to ensure you have everything you need than with a custom-made diaper bag? While sewing a diaper bag may seem like a daunting task, with the right tools and a bit of patience, you can create a stylish and practical bag that fits your needs and personality.
From pockets for wipes and diapers to insulated compartments for bottles, the possibilities are endless. So, dust off your sewing machine and let your creativity flow as you embark on this fun and rewarding project!
Why Should You Sew a Diaper Bag?
If you’re a new parent or know someone who recently welcomed a little one, then you know how essential a diaper bag can be. While many opt to purchase pre-made options, there’s something special about crafting your own. Whether you’re an experienced sewer or just starting, creating a diaper bag allows you to customize it to your liking.
You can choose fabrics and patterns that reflect your style, add specific pockets for your baby’s needs, and even create a design that can be passed down to future generations. Plus, the sense of pride and satisfaction knowing you made something functional and beautiful is unbeatable. So why not try your hand at sewing a diaper bag? You might just surprise yourself with what you can create.
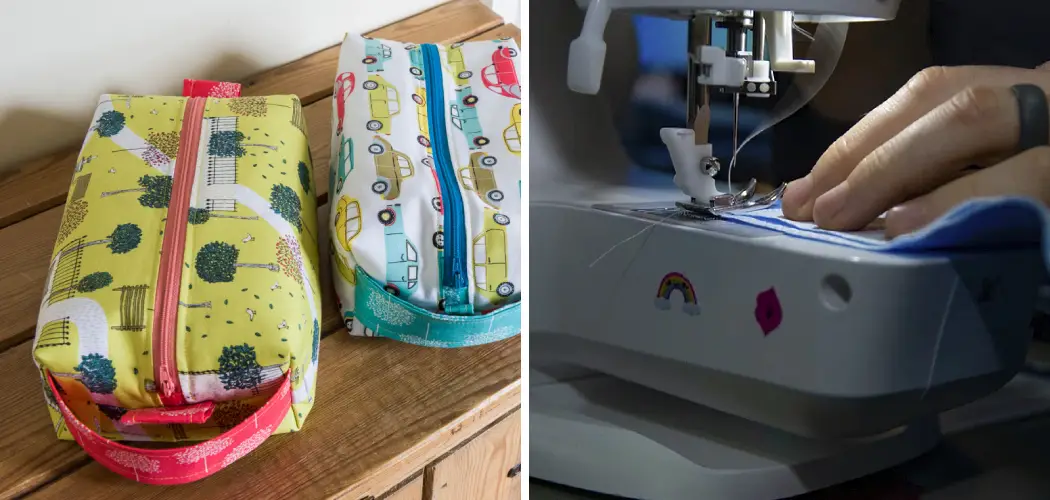
A Step-by-Step Guide on How to Sew a Diaper Bag
Step 1. Choose Your Fabrics
The first step in sewing a diaper bag is choosing the right fabrics. When selecting your fabrics, it’s important to consider both the aesthetic and functionality of each. You’ll want something durable and stain-resistant for the exterior but also something fun and colorful for the interior. Some popular fabrics for the exterior include canvas, denim, and leather, while the interior can be made from cotton blends, flannel, or even oilcloth for easy cleanup.
Step 2. Cut Your Pieces
Once you’ve chosen your fabrics, you must measure and cut out each piece. Most diaper bags consist of a main body, front and side pockets, and straps. Make sure to take your time with this step, as a mistake in cutting can set back the entire sewing process.

Step 3. Sew Your Pockets
With your pieces cut out, you can now focus on sewing your pockets. Pockets are a key component of any diaper bag, as they offer quick and easy access to essentials like wipes, diapers, and snacks. To add these pockets, simply fold and sew the edge of each pocket piece, then attach it to the exterior of your main bag body.
Step 4. Sew Your Straps
The straps of your bag need to be both sturdy and comfortable. We recommend using a heavy-duty nylon strap webbing and lining it with a softer fabric like cotton. This will make the straps comfortable to wear all day while also ensuring they can support the weight of your bag and its contents.
Step 5. Sew Your Bag Together
With your pockets and straps sewn, it’s time to assemble everything. Start by sewing the front and back of the bag together and then adding the side panels. Once these pieces are secure, attach your pockets and strap them to the exterior of your bag. Finally, sew the interior lining and attach it to the bag, leaving a small gap to turn the bag right side out.
Step 6. Add Finishing Touches
Now that your bag is taking shape, it’s time to add some finishing touches. This can include adding a closure mechanism such as a zipper or magnetic snap, as well as any decorative elements like embroidery or appliques.
Step 7. Test and Adjust
Once your diaper bag is fully assembled, it’s important to test it out and make any necessary adjustments. Put some weight in the bag and wear it for a while to see if any areas need reinforcement or if the straps need to be adjusted for comfort. This final step is crucial in creating a diaper bag that not only looks great but functions well, too.

Now that you know the steps, sewing a diaper bag may seem less intimidating. Remember to take your time and have fun with the process. With some patience and creativity, you can create a beautiful and functional diaper bag that will make your parenting journey easier. Happy sewing! So go ahead and start creating your very own unique, personalized diaper bag today!
5 Considerations Things When You Need to Sew a Diaper Bag
1. Fabric Choice
When sewing a diaper, it is important to consider the type of fabric you will use. Diapers must be absorbent and comfortable, so cotton or bamboo fabrics are usually best. You should also ensure the fabric is durable enough to withstand multiple washings without losing its shape or color. Additionally, if you plan on using a waterproof layer, choose a breathable material such as polyurethane laminate (PUL).
2. Pattern Choice
Once you have chosen your fabric, you must select a pattern for your diaper. There are many different patterns available online and in craft stores that can help you create a unique diaper design. When selecting a pattern, it is important to ensure that it includes all of the necessary components, such as elastic waistbands and leg openings, snaps or velcro closures, and pocket openings for inserts.
3. Size Considerations
The size of the diaper is another important consideration when sewing a diaper. It is important to measure your child’s waist circumference and leg length to ensure that the diaper will fit properly and provide adequate coverage. Additionally, some patterns may require additional measurements, such as rise (distance from waistband to legs) and crotch width, to achieve an optimal fit.
4. Closure Type
Another factor to consider when sewing a diaper is the type of closure you would like to use. Snaps and velcro are both popular options as they provide an adjustable fit that can easily be changed as your child grows. Suppose you prefer not to use either of these closures.
In that case, there are also patterns available with drawstring or tie closures, which can be adjusted for a snug fit while still allowing easy access for changing diapers quickly and efficiently.

5. Inserts
Finally, it is important to consider what type of inserts you would like to include in your diaper design when sewing a diaper. Cloth diapers typically include two layers: an absorbent inner layer made from cotton or bamboo and an outer waterproof layer made from PUL or other breathable materials such as fleece or wool.
You can also choose from different inserts, including prefold cloth diapers, flat fold cloth diapers, fitted cloth diapers with snap-in inserts, or pocket cloth diapers with removable inserts.
Benefits of Sew a Diaper Bag
Sewing your own diapers might seem like a daunting task, but the benefits are certainly worth it. Not only do you get the satisfaction of creating something from scratch, but you’ll also save money in the long run. Disposable diapers can cost a small fortune, especially if you have multiple children.
By sewing your own diapers, you can choose the materials that work best for your baby and create a customized fit. Plus, using cloth diapers is also better for the environment, as disposable diapers can take years to decompose in landfills. With a little practice, sewing your own diapers can become a fun and rewarding hobby.
4 Common Mistakes People Make When Trying to Sew a Diaper Bag
1. Not Measuring Properly
One of the most common mistakes people make when trying to sew a diaper is not measuring properly. It is important to measure the fabric accurately so that you can cut the pieces correctly and ensure that they fit together properly. Additionally, it is important to measure the elastic and other components accurately so that they are the correct size for your diaper.

2. Not Following Instructions Carefully
Another mistake people often make when sewing a diaper is not following instructions carefully. It is important to read through all of the instructions before starting your project, as this will help you understand each step and ensure that you do not miss any important details. Additionally, it is important to follow every step exactly as described to ensure that your diaper turns out correctly.
3. Not Using Quality Materials
Using quality materials is another key part of making a successful diaper. It is important to use fabrics designed specifically for diapers, such as cotton or bamboo, as these fabrics are more absorbent than other fabrics and will help keep your baby dry. Additionally, it is important to use high-quality elastic and other components to ensure that your diaper will be durable and last long.
4. Not Testing Before Use
Finally, it is important to test out your finished diaper before using it on your baby. This will help you identify any potential problems with the fit or construction of the diaper before putting it on your baby’s delicate skin. Additionally, testing out the diaper beforehand will also allow you to adjust any parts of the design if needed before using it on your baby.

Conclusion
As you can see, sewing your own diaper bag can be a fun and rewarding experience. Not only will you end up with a bag that’s personalized to your taste, but you’ll also save money and have a sense of accomplishment. No matter your skill level, with a few hours and some patience, you can create a functional and stylish diaper bag that you and your little one will treasure for years to come. Thanks for reading our post about how to sew a diaper bag.