
Are you looking for a way to make beautiful, intricate designs quickly and easily on your sewing machine? Look no further than mastering the art of using a double needle. With its two spools of thread and two hands, it creates unique stitches that can add an exciting dimension to your projects and elevate them from merely crafted into outstandingly fashioned works of art.

Double-needle stitching is not just for advanced sewers. It can be easily learned by beginners, too. Additionally, double needles are versatile and can be used on various sewing machines. So, let’s dive into how to use double needle on sewing machine.
In this blog post, we’ll explore the ins and outs of utilizing this powerful tool so you can unleash your creativity and tailor garments with immaculate detail!
What Will You Need?
First, let’s ensure you have all the necessary materials to use your double needle on a sewing machine successfully. You’ll need:
- Sewing machine with twin needle capabilities
- Double needles (size depending on your project)
- Two spools of thread
- Bobbin with matching thread color
Once you have all these items, you’re ready to get started!
10 Easy Steps on How to Use Double Needle on Sewing Machine:
Step 1: Prepare Your Sewing Machine
Before you begin sewing with the double needle, make sure your sewing machine is set up properly for twin-needle stitching. This typically involves attaching a second spool pin or using a spool holder to hold both threads in place. If you need help with how to set up your machine, consult the user manual or contact the manufacturer.
Step 2: Install the Double Needle
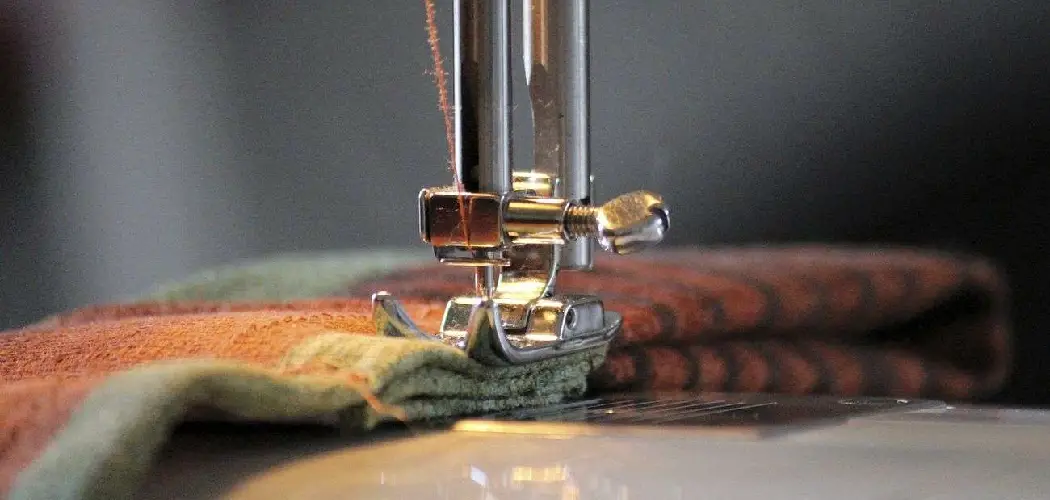
After your sewing machine is appropriately set up, you need to install the double needle. Take the double needle and insert it into the needle bar with the flat side towards the back of the machine.

You can confirm if you have installed it correctly by trying to move the needle from left to right, it should remain firmly in place. Remember to power off your sewing machine before changing the needle to prevent accidents.
Step 3: Thread the Machine
Now it’s time to thread your double needle. Start by taking one spool of thread and placing it on the first spool pin. Thread your machine as you would normally, leading the thread through the tension disc, take-up lever, and finally, through the left needle. Repeat the process with the second spool of thread, leading it through the right needle.
Remember to thread the needles separately to ensure that each needle has its own tension control. Once you have successfully threaded both needles, you can start sewing. Always make sure to pull a few inches of thread to the back before starting to sew to prevent the thread from getting tangled.
Step 4: Adjust the Stitch Settings
After threading the machine, it’s vital to adjust the stitch settings on your sewing machine. For double-needle sewing, you’ll primarily be using a straight stitch. Make sure to adjust the stitch length and the tension according to the fabric you’re using.

It’s always a good idea to do a test run on a scrap piece of fabric similar to the one you’ll be using for your project. This will help you fine-tune the settings and ensure smooth, even stitches. Remember, when using a double needle, avoid using any stitch width settings that might cause the needle to hit the presser foot or the needle plate, as this can easily break your needles.
Step 5: Start Sewing
After you’ve made the necessary adjustments, you’re ready to start sewing with the double needle. Place your fabric under the presser foot, making sure to align the intended stitch line with the center of the presser foot. Lower the presser foot and start sewing slowly, maintaining an even speed.
You’ll notice that the double needle creates two parallel lines on the top of the fabric and a zigzag stitch on the back, giving your projects a professional finish. Always remember to keep a slow and steady pace to prevent thread jamming or needle breaking.
Step 6: Finish Off Your Stitches
Once you’ve completed your sewing, it’s crucial to properly finish your stitches to prevent them from unraveling. To accomplish this, ensure that the needle is raised and then carefully pull about 6 inches of thread towards the back of the fabric.

Cut the threads leaving a decent tail. Then, using a hand sewing needle, yarn the tails and tuck them back into the last few stitches you’ve sewn. This will secure your stitches and give your project a neat finish. Remember to always raise the presser foot before removing your fabric to release the tension on the thread.
Step 7: Practice and Experiment
The key to mastering the use of a double needle is practice. Start off with simple projects and gradually work your way up to more complex designs. Experiment with different types of fabric, stitch lengths, and thread colors to create various effects.
Remember, the double needle can be used for many sewing techniques like pin tucking, topstitching, and decorative stitching. Be creative, and don’t be afraid to test out different ideas. With enough practice, you can use the double needle to create beautiful, professional-quality garments and crafts!
Step 8: Maintenance and Troubleshooting
Maintenance is crucial in ensuring the smooth operation of your double needle. After each sewing session, clean the machine, especially the bobbin area and the feed dogs, to remove lint and thread remnants. Regularly check the needles for any signs of wear and tear. A bent or blunt needle can result in skipped stitches, uneven stitches, or even damage to your fabric.

If you encounter any issues while using the double needle, like skipped stitches or thread bunching, re-thread the machine, adjust the tension, or replace the needle. Remember that troubleshooting is a part of the learning process, so keep going if things go differently than the first time. Keep practicing, and you’ll soon master the art of double needle sewing.
Step 9: Safely Store Your Double Needle
After you’ve completed your sewing and the machine is clean, storing your double needle properly is crucial. Avoid leaving it in the machine, as this could lead to unintentional damage, especially if another user isn’t aware of the double needle attachment.
Remove the needle carefully from the machine and store it in a designated needle case or a needle organizer. This helps maintain the needle’s sharpness and condition and prevents any potential accidents or misplacement. Safety should always be a priority when dealing with sharp sewing tools.
Step 10: Recap and Review
After successfully using the double needle, it’s beneficial to take a moment to review and recap the entire process. Reflect on the challenges you encountered and how you overcame them. Consider the type of fabric you used, the thread tension, and the overall sewing experience.
Make notes of your best settings and any other observations that will assist in future projects. Such self-reflection can significantly enhance your sewing skills and efficiency. Remember, every step in the learning process is vital to proficiently using a double needle. Don’t rush. Take your time, and embrace the journey of mastering this advanced sewing technique.

5 Additional Tips and Tricks
- Test, Test, Test: Before starting your main project, always test your double needle on a scrap piece of fabric first. This will allow you to make any necessary adjustments to the tension or stitch length and ensure that your machine works correctly.
- Use the Right Needles: Double needles come in various sizes and types, each suited for different kinds of fabric and thread. Make sure you select the right type for your project in order to achieve the best results.
- Patience is Key: Sewing with a double needle may take longer than using a regular needle, especially if you’re new to the technique. Remember to take your time and don’t rush the process.
- Maximize Your Sewing Machine’s Features: Many modern sewing machines have features that can be quite helpful when using a double needle. For instance, some machines have an automatic needle threader or a built-in thread cutter. Leverage these features to make your sewing process smoother and more efficient.
- Double Check Your Work: After you’ve finished sewing, take the time to carefully inspect your work. Check that the stitches are even and secure and that there are no loose threads or skipped stitches. This will ensure that your final product is of the highest quality.
With these tips and tricks in mind, you’re now ready to use a double needle on your sewing machine confidently.
5 Things You Should Avoid
- Overloading Your Machine: Avoid overloading your sewing machine with heavy fabrics when using a double needle. Excessive strain could cause the needles to break and damage your machine.
- Ignoring Maintenance: Never overlook the importance of regular maintenance. Neglecting to clean and service your machine can lead to performance issues and even damage your double needle.
- Using the Wrong Needle Size: Using a needle size that’s not suitable for your fabric can result in poor stitch quality and cause needle breakage. Always ensure the needle size matches the fabric type.
- Forgetting to Test First: Only start sewing your main project after testing on a scrap of fabric first. This helps to avoid any potential issues during the actual sewing process.
- Disregarding Safety: Always remember to remove the double needle after use and store it safely. Leaving it attached could lead to accidents, especially if children are around or others aren’t aware of the double needle. Keeping your work area clean and organized is vital to prevent injuries.
By avoiding these common mistakes, you can ensure a smooth and successful experience when using a double needle on your sewing machine.
Conclusion
After reading this blog post, you should now better understand how to use double needle on sewing machine. While it can be a bit intimidating at first, practice makes perfect – the more often you use the double needle on your project, the easier it will become. If you’re just starting out, trying out a few practicing stitches and experimenting with some different types of fabric is always a great way to develop your skills.
Remember, take your time and have fun! Once you master this method, you’ll be able to show off your creative side in no time. Don’t be afraid to unleash that inner designer in you and take on any sewing projects with confidence!
Hopefully, the article on the use of double needles on sewing machines has given you the necessary knowledge and confidence to try out this advanced sewing technique. With these tips and tricks, you’ll be on your way to creating beautiful double needle stitches in no time! Happy sewing! Thank you for reading!