
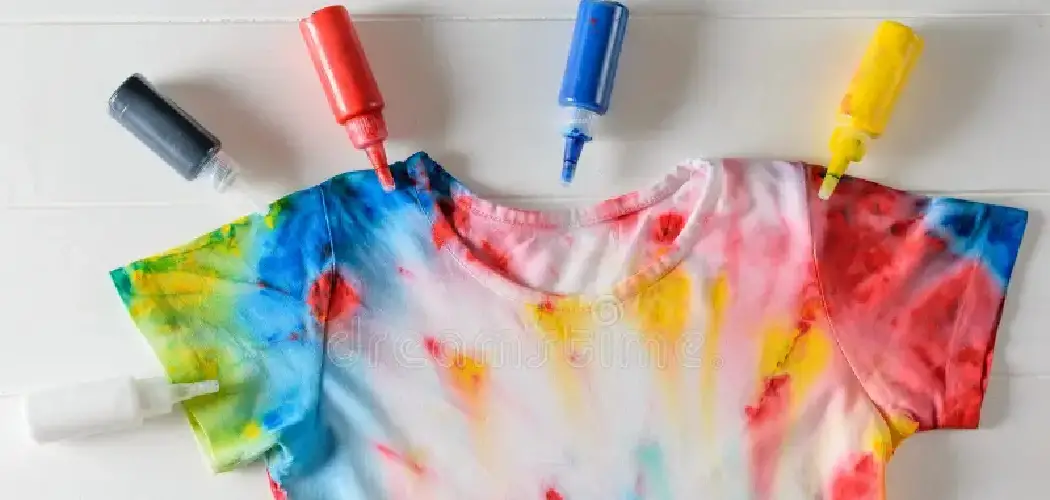
Are you looking for a fun and creative way to customize your wardrobe? From personalized t-shirts to bright jeans, dyeing fabrics with acrylic paint is one of the most economical and easy ways to add unique style to clothing pieces.

Whether it’s for yourself or someone else, this project can be just as rewarding as it is satisfying. Aside from creating bold designs and vibrant colors, you’ll also have durable wear that won’t fade whenever you wash the item.
Dying clothes with acrylic paints can be done in several ways, each resulting in different effects and techniques. This guide will take you through the necessary steps on how to dye clothes with acrylic paints and give you tips along the way for the best results.
Ready to give dying clothes with acrylic paints a try? Keep reading!
What Will You Need?
First things first, gather all the necessary materials before you begin.
- Acrylic paints (colors of your choice)
- Fabric medium
- Clean sponge or paintbrush
- Water and mixing cup
- Clothing items to be dyed (preferably light-colored)
- Plastic sheet or bin for protection against spills
Once you have all your materials ready, it’s time to start the dyeing process.
10 Easy Steps on How to Dye Clothes With Acrylic Paints
Step 1: Prepare Your Clothing Item
Before starting the dyeing process, wash and dry your clothing item without using fabric softener. This will ensure the fabric is clean and free from any residue that may affect the dye’s absorption. It’s also best to choose light-colored clothing items as they will allow the acrylic paint colors to show more vibrantly.

Step 2: Mix Your Acrylic Paints
In a mixing cup, blend your chosen acrylic paint colors with fabric medium. The fabric medium is essential in helping the paint adhere and penetrate the fabric fibers evenly, resulting in a longer-lasting color. If you want a lighter shade, add more fabric medium to your mixture.
Step 3: Apply the Paint to the Fabric
Now that you’ve prepared your mixture, it’s time to apply it to your clothing item. Place your clothing on a flat surface protected by a plastic sheet or bin to prevent any accidental spills. Use a clean sponge or paintbrush to apply your acrylic paint mixture onto the fabric.
You can either cover the whole item for a dyed effect, or you can paint specific areas for a more design-oriented look. Make sure to evenly distribute the paint to avoid clumps and ensure a smooth finish. Remember, the thicker the paint layer, the darker the dyed fabric. Allow the paint to completely dry before moving to the next step.
Step 4: Heat Set the Paint
After the paint has completely dried, it’s time to heat set it. This is a crucial process as it helps to lock the color into the fabric, making it more durable and fade-resistant. To heat set, turn your clothing item inside out and press it with an iron set to a high heat setting appropriate for your fabric type (do not use steam). Move the iron constantly to avoid burning the fabric.
Spend about 2-3 minutes per painted area. Alternatively, you can also use a clothes dryer to heat set your painted item. Just pop it in the dryer for about 30-40 minutes on a high heat setting. After heat setting, allow your item to cool down before moving to the next step.

Step 5: Rinse and Dry Your Clothing Item
After the clothing item has cooled down, it’s time to rinse it. Run it under cool water to remove any excess paint that might be sitting on the fabric’s surface. Be gentle to avoid scrubbing off the paint. Keep rinsing until the water runs clear.
Once rinsed, wring out any excess water and lay your item flat to dry. Alternatively, you can also hang it up to dry. Just make sure it’s completely dry before wearing or storing it to prevent any accidental smudging of the paint.
Step 6: Evaluate Your Results
Once your clothing item is dehydrated, it’s time to evaluate your work. Look at the overall finish of the dye job. Does the color look even and consistent? If there are any uneven spots or if the color isn’t as vibrant as you’d like, it’s possible to repeat the process until you achieve your desired result.
Be encouraged if it’s not perfect on the first go; dyeing clothes with acrylic paints is a fun and creative and takes some practice. Enjoy the journey and the unique piece of clothing you’ve just created.
Step 7: Care for Your Dyed Clothing
Maintaining the vibrancy and longevity of your dyed clothing item is crucial. Always wash your painted clothes inside out and opt for a gentle cycle on your washing machine using cool water. Avoid using harsh detergents or bleach, as they can cause the colors to fade.

For best results, air-dry your painted clothes instead of using a dryer. Following these care instructions will ensure your painted clothing item remains vibrant and wearable for a long time.
Step 8: Showcase Your Creation
Now comes the most rewarding part- wearing and showcasing your newly dyed clothing item. Whether you’ve created a vibrant t-shirt, a statement pair of jeans, or a unique fabric, take pride in your creativity and effort. Remember, one of the joys of dyeing clothes with acrylic paints is that every creation is unique.
Don’t hesitate to experiment with different designs, patterns, and color combinations in your future projects. Happy crafting!
Step 9: Share Your Work
Don’t keep your artistic prowess to yourself; share your hand-dyed clothing with the world! Take photos of your garment and post them on your social media platforms. Not only will you inspire others to try their hand at this creative and fun process, but you might also receive valuable feedback and ideas for future projects.
Remember to use the hashtag #AcrylicFabricDyeing so that others interested in this craft can easily find your work.
Step 10: Continue to Experiment and Learn
Dyeing clothes with acrylic paints is a journey of exploration and creativity. Take your time with your first project. Continue experimenting with different clothing items, patterns, colors, and techniques. Learn from any mistakes and take note of what works best for you.
Consider attending a workshop or watching online tutorials for more inspiration and guidance. The more you practice, the better you’ll get, and soon, you’ll be creating professional-looking dyed clothing items with acrylic paints. Remember, the most crucial part is to enjoy the process and have fun with your creations.
By following these steps and tips, you can confidently dye clothes with acrylic paints and create unique and vibrant pieces for your wardrobe. Remember always to use caution when working with any art supplies, and have fun unleashing your creativity!
5 Additional Tips and Tricks

- Play with Color Gradation: Experiment with different shades and tones of the same color for a gradient effect. Start with a heavy concentration of paint at one end of your clothing item and gradually lighten it by adding more fabric medium as you progress.
- Stencils are Your Friend: If you need more confidence in freehand painting, use stencils or tape to create clean lines and shapes. Make sure they’re securely attached to the fabric before you start painting.
- Test Before You Apply: Always test your paint and color mixture on a scrap piece of fabric before applying it to your desired clothing item. This can save you from any unwanted surprises regarding color and consistency.
- Try Different Techniques: There are numerous techniques you can use for painting with acrylics on fabric. For example, try stippling for a textured, pointillist effect or sponging for a softer, more diffused look.
- Patience is Key: Let your clothing item dry entirely between coats of paint and after the final application. It’s tempting to move forward quickly, but rushing can lead to smudging and uneven color. Patience does pay off in the end!
With these tips and tricks, you’ll be well on mastering the art of dyeing clothes with acrylic paints.
5 Things You Should Avoid
- Avoid Overloading the Fabric with Paint: One of the most common mistakes is applying too much paint, leading to a stiff and uncomfortable finish. Aim for thin, even coats and build up slowly for the best results.
- Don’t Skip the Heat Setting Step: After painting, you might be tempted to skip the step in haste to see the final result. However, this step is crucial for ensuring the paint bonds to the fabric and is durable in the long run.
- Avoid Washing Dyed Clothes Too Soon: Resist the urge to wash your painted item immediately after painting. Allow the paint to cure for at least 24 hours before the first wash to ensure the color sets well.
- Never Use Hot Water for Washing: Hot water can dramatically fade the color of your dyed clothing. Always use cold or lukewarm water for washing your painted clothes.
- Avoid Using Fabric Softeners: Fabric softeners can interfere with the paint’s ability to bond to the fabric properly, leading to premature fading. Stick to mild detergents without fabric softeners for the best results.
By avoiding these common mistakes, you can ensure that your dyed clothing items are vibrant and long-lasting.

Conclusion
Armed with the knowledge of using acrylic paints as an alternate dye, you should now be able to create your own unique and vibrant wardrobe. There are no limits to what you can do when it comes to experimentation and expression in fashion, and the world is your stage.
Start by taking on some smaller projects to help build confidence, and then you can move onto larger projects if you choose. Utilize this new knowledge to showcase yourself through artistry, creativity, and stunning colors that will get everyone turning heads in admiration!
Hopefully, the article on how to dye clothes with acrylic paints has inspired you to try new things and explore your creative side. Have fun creating and wearing your one-of-a-kind pieces, and remember to share the results with others!
Remember that when it comes to self-expression, there are no wrong answers – anything goes. So go ahead – grab a tube of acrylic paint and release your inner fashionista!