
Are you a die-hard crafter looking for a way to take your creative projects up a notch? If so, then Cricut Printable Sticker Paper is the perfect product for you! From making custom labels and name tags to adding unique designs and lettering to crafts, this versatile product can open up endless possibilities for your project.

With its user-friendly interface and simple operation instructions on how to use cricut printable sticker paper, anyone can become an expert in no time when it comes to using Cricut Printable Sticker Paper. Read on to learn how easy it is to create stunning works of art with just a few clicks of the mouse!
What is Cricut Printable Sticker Paper?
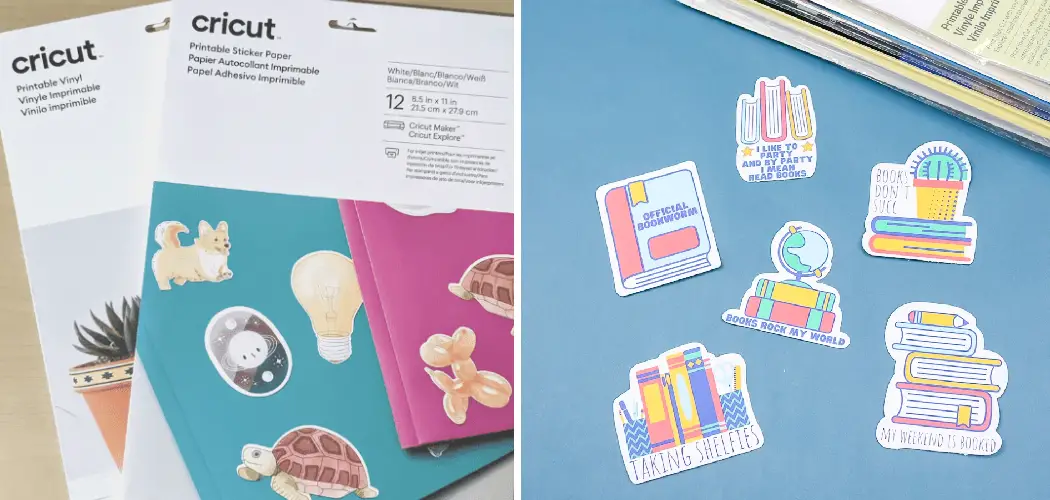
Cricut Printable Sticker Paper is a special type of adhesive paper designed to be used with Cricut cutting machines. It’s ideal for labeling, accenting, and decorating crafts and projects.
The sticker paper can be printed on at home with an inkjet printer before being cut out with your Cricut machine. It is also available in a wide range of colors and sizes to give you the freedom to create beautiful, custom-made stickers.
Advantages and Disadvantages
Given below are the Advantages and Disadvantages of Cricut Printable Sticker Paper:
Advantages:
- Easy to Use
- Wide Range of Colors and Sizes Available
- Can Be Printed on With an Inkjet Printer
- Creates Stunning Labels, Name Tags, and Accent Pieces
- Perfect for Creating Custom Designs and Lettering
Disadvantages:
- Not Suitable for Projects That Require Durability and Waterproofness
- Sticker Paper Tends to Curl Up When Exposed to Moisture or Heat
- Some Intricate Shapes May Not Be Possible With the Cricut Machine Alone.
Necessary Materials
Given below is the list of materials needed to use Cricut Printable Sticker Paper:
- Cricut Cutting Machine
- Inkjet Printer
- Cricut Printable Sticker Paper
- Scissors (Optional)
11 Step-by-step Instructions on How to Use Cricut Printable Sticker Paper
Step 1: Choose the Design
The first and most important step is to decide on the design you want to make. You can create a custom-designed sticker, or choose from the many pre-made designs available online. It’s important to ensure that the design is compatible with your Cricut machine.

But don’t worry – the Cricut Design Space software will help you choose the best design for your project. This software also lets you customize the design, so feel free to get creative!
Step 2: Download & Install Cricut Design Space
Once you’ve decided on the design you want to make, it’s time to download and install Cricut Design Space software. This software is available for free online, so simply follow the instructions and complete the installation process. But before you start using the software, make sure your device meets all the system requirements.
It should have a minimum of 1 GB RAM and an active internet connection. This is necessary for the software to run smoothly and without any interruption. Make sure to read the system requirements carefully before installation. You should also have enough storage space on the device to save the design file.
Step 3: Print Out Your Sticker Design
Once installed, open up the Design Space software and upload your chosen design onto it. Next, select ‘Print’ from the list of options at the top of the screen. Make sure that your printer is connected to your computer or laptop before proceeding with printing out your sticker design. Otherwise, the software won’t be able to detect and print it out.

It’s also important to select the correct paper size for your design. This ensures that it prints out accurately and without any errors. It’s also advisable to select ‘Print in Color’ as it will make the design look more vibrant and attractive. But if you want to conserve ink, then select ‘Print in Greyscale’. It’s s all up to you!
Step 4: Load Your Cricut Printable Sticker Paper into Your Printer
Make sure that you load your Cricut printable sticker paper into your printer correctly. The printable side should face up when loaded, and it’s important to ensure that the design is centered properly on the page before proceeding with printing. This will help ensure that your design prints out perfectly.
It’s also important to adjust the printer settings accordingly. For example, make sure that you select ‘Sticker Paper’ from the list of available paper types before proceeding with printing. It’s also necessary to select ‘Borderless Printing’ for optimal results. You can find this setting in the ‘Page Setup’ tab.
Step 5: Cut out Your Sticker
Once you’ve printed out your sticker design, it’s time to cut it out using your Cricut cutting machine. Place the sheet of stickers onto your Cricut mat before selecting ‘Cut’ from the list of options at the top of the screen. Make sure you select a setting that matches the type of material you are cutting (in this case, sticker paper). It’s also important to adjust the blade depth and pressure accordingly.

This helps ensure that your stickers are cut out accurately and without any errors. This step is where the magic happens! It’s also important to select the correct cutting mat. If you’re using adhesive sticker paper, it’s best to choose a sticky mat. Although more expensive, this type of mat will stick to your material and help ensure an accurate cut.
Step 6: Remove The Unwanted Pieces
When all the pieces have been cut, you need to remove the unwanted pieces from the page. This can be done by either peeling off the extra pieces manually or using a pair of scissors. This process may be slightly tedious, but it’s important to take your time and remove all the excess pieces properly.
This will ensure that you don’t end up with any weird or uneven edges on your stickers. It’s also important to remember that all the pieces you remove should be discarded in a safe manner. Although these pieces are small, they should not be thrown into the trash or disposed of in any other manner.
Step 7: Peel Off The Sticker
The next step is to peel off the sticker from its backing sheet. It’s important to do this gently and carefully, as it could damage your design if not done properly. If there’s any leftover adhesive on the back of your sticker, use a cloth or piece of paper towel to remove it.
It’s also important to remember that you should never use any type of solvent or adhesive remover on your stickers. This could damage the design and may also cause it to become unstuck from the surface you’ve applied it to.
Step 8: Place Your Sticker onto Its Surface
Now it’s time to place your sticker onto its intended surface. Again, make sure you handle your sticker with care and delicacy as any mishandling could damage your design. But don’t worry – Cricut stickers are designed to be very durable and won’t come off easily.

So you can rest assured knowing that your stickers will stay put! It’s also important to ensure that the surface your sticker is being applied to is clean and free from any dust or dirt. This helps ensure that the sticker adheres properly and without any problems.
Step 9: Secure Your Sticker with Clear Tape (Optional)
If you wish to make your sticker more durable and secure, you can use a thin strip of clear tape to do so. This is especially helpful if you are using stickers on clothes or fabric surfaces. It also helps protect the sticker from coming off due to sweat or moisture.
But make sure you don’t use too much tape, as this could damage the design. If you’re using stickers for walls or any other non-porous surface, then this step is optional. It’s all up to you!
This concludes our guide on How to Use Cricut Printable Sticker Paper. We hope that you now have a better understanding of this process and will be able to create amazing stickers for all your projects. Good luck and have fun!
Step 10: Admire Your Creation
Congratulations! You have successfully created your own custom-made stickers. Now it’s time to stand back and admire your creation! This is your moment to appreciate all the hard work and effort you’ve put in. Creating beautiful stickers with Cricut Printable Sticker Paper is both fun and rewarding.

So don’t forget to take a step back and admire your work every once in a while. It will help motivate you to stay creative and inspired! It’s also important to share your creations with others, as it helps spread positivity and creativity. So don’t forget to show off your stickers on social media and other platforms. Who knows – you may even start a trend or two!
Step 11: Repeat the Process with Different Designs (Optional)
If you wish to produce more stickers, simply repeat the above steps with different designs! That way, you will be able to create an array of unique stickers in no time. Always remember to experiment with different materials and techniques when creating your stickers. You never know what kind of results you might get! Have fun and enjoy the process of creating!
And there you have it – a complete guide on how to use cricut printable sticker paper! It’s a simple and easy process that anybody can do, so don’t be afraid to get creative and start making your own custom-made stickers. This is a great way to add something unique and personalize your projects.
You can even make stickers and give them away as gifts to your friends, family, or anyone else you think would appreciate it. Good luck and have fun
How Much Will It Cost?
The cost of using Cricut Printable Sticker Paper will depend on the type and amount of paper you buy. Generally, a single sheet of Cricut printable sticker paper costs around $2–$5 dollars, while bulk orders can be cheaper. It’s important to note that prices may vary depending on where you purchase it from.
Happy crafting!

Frequently Asked Questions
Q1. Can I Use Cricut Printable Sticker Paper With Other Types of Printers?
A1. Unfortunately, Cricut Printable Sticker Paper is designed to be used with inkjet printers only. It is not compatible with other types of printers such as laser and thermal transfer printers.
Q2. How Durable Are Cricut Printable Stickers?
A2. The durability of Cricut printable stickers will depend on the type of surface they are placed on and how they are handled. For best results, it’s recommended that you secure your sticker with a thin strip of clear tape if using it on clothes or fabric surfaces.
Q3. Can I Create My Own Custom Designs for Cricut Stickers?
A3. Yes! You can create your own custom designs in the Cricut Design Space software before printing and cutting them out with your Cricut machine. It’s a great way to customize your stickers and make them truly unique!
Q4. Are There Any Alternatives to Cricut Printable Sticker Paper?
A4. Yes, there are other brands of printable sticker paper on the market, such as Avery and Xyron. However, it’s important to note that these products may not be compatible with your Cricut machine or provide the same quality as original Cricut stickers.
Conclusion
We hope this blog post was helpful and informative in understanding how to use Cricut printable sticker paper. Ultimately, it is a great digital product for crafting projects, as it’s easy to use and produces high-quality results. Creating stickers can be an enjoyable activity, so make sure to consider this product if you’re looking for some DIY fun.
Have fun and enjoy making any kind of stickers with the help of Cricut! If you want to further enhance your Cricut experience, then don’t forget to connect the Blink Sync Module to wifi. That will allow you to seamlessly sync your mobile device with the physical machine, thus enhancing your crafting experience even more. So give it a try and see what kind of amazing designs you can create!