
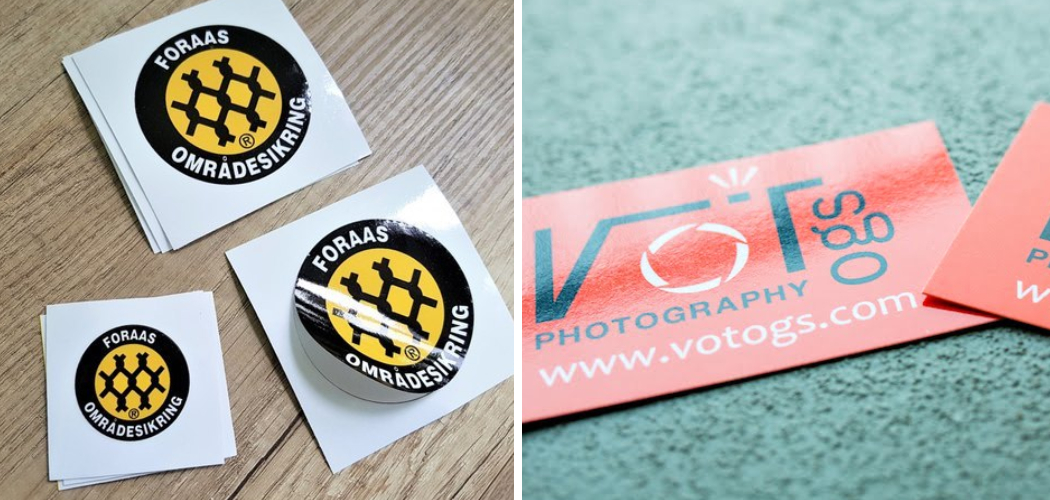
Are you looking to make your brand stand out from the competition with custom printed items? Look no further than glossy stickers! Glossy sticker printing not only makes any logo or design look more aesthetically pleasing but also adds protection and durability to it as well.
Need help with how to print glossy stickers? Fear not—in this blog post, we’ll look at everything you need to know before jumping into glossy sticker printing.
Whether you’re printing out a few hundred or a few thousand glossy stickers for your business, there are some key tips and tricks to remember.

From selecting the right stock for your project through mastering finishing techniques so that your products shine when they hit shelves—we have you covered! So if you’re ready to up-level the presentation of your printed materials with some dazzling gloss, let’s get started!
What Will You Need?
Before you start printing glossy stickers, there are a few supplies and pieces of equipment that you will need to complete the project.
- Label Printer: The first step is to invest in a reliable and high-quality label printer.
- Glossy Sticker Stock: Select a label stock that is designed for use with glossy ink.
- Glossy Ink: Depending on the sticker printer you choose, it may require specialized glossy ink to produce the desired effect.
- Finishing Techniques: To ensure your stickers look their best, you’ll need some finishing techniques, such as die-cutting or varnish coating.
With these supplies and tools in place, you can begin printing your own glossy stickers!
10 Easy Steps on How to Print Glossy Stickers
Now that you have everything ready to go for your project, let’s discuss how to print your glossy stickers. Here are the steps you should take:
Step 1. Prepare Your Design:
Ensure your design is correctly formatted for the label printer you are using. If you need help, seek out the advice of an experienced graphics designer. Try to keep the design simple, making it easier to print.

Step 2. Load The Stock:
Once your artwork is ready, load your glossy sticker stock into the printer. Make sure that it is correctly aligned and secure. Try to avoid any creases or wrinkles, as this may affect the quality of your finished product.
Step 3. Install The Ink:
Depending on the label printer you are using, you may need specialized glossy ink cartridges in order to achieve a high-shine finish for your designs. If this is the case, install them per the manufacturer’s instructions. Don’t forget to check the expiration date of your ink and replace it if necessary.
Step 4. Select Your Settings:
Select the appropriate settings on your label printer for printing glossy stickers, such as paper type, resolution, etc. This may vary slightly depending on your printer model and other factors, such as desired color saturation. Additionally, select the ‘glossy’ option to get the high-shine finish.
Step 5. Start The Print Job:
Once all the settings have been adjusted, you can begin your print job. Be sure to monitor the progress and make any necessary changes if needed. You can also use the test prints to check the quality of your glossy stickers.

Step 6. Finishing Techniques:
To ensure that your glossy stickers look their best, you may need to apply certain finishing techniques, such as die-cutting or varnish coating, after printing has finished. It will depend on the type of printer you’re using and the desired outcome for your project. You can also ask your printer for tips or advice on achieving the best results.
Step 7. Trim The Edges:
Using scissors or a paper trimmer, trim any excess material from the edges of the printed sticker sheets and prepare them for packaging or shipping. Be careful not to cut too closely, as this can affect the overall quality of your finished product. Instead, try to leave a few millimeters of extra material around the perimeter.
Step 8. Package Your Stickers:
Once you have trimmed the edges of your stickers, it’s time to package them up. Choose an appropriate container for storing or shipping your glossy stickers, such as a box or envelope. If you’re shipping, use bubble wrap or another protective material to avoid any damage in transit.
Step 9. Label and Ship:
Carefully affix labels to each package that include all relevant information, such as the destination address, sender address, product name, etc. Then you can ship out your glossy sticker orders! Keep in mind that delivery times may vary depending on the carrier and method of shipping you choose.
Step 10. Enjoy Your Finished Product:
The last step is to enjoy your finished product—your custom printed glossy stickers! Whether you’re using them for promotional purposes or adding a bit of flair to your home decor, these shiny additions will surely turn heads and start conversations.
Remember, with some planning and finishing techniques, you can create unique and attractive glossy stickers that will make your brand stand out from the crowd.

We hope this guide on how to print glossy stickers has been helpful. With these tips, you’ll be well on your way to creating stunning products that perfectly represent your brand or business!
5 Additional Tips and Tricks
- If you’re printing on an inkjet printer, using glossy paper will help create a more vibrant and glossy finish.
- When adjusting your printer settings, select the glossy finish option if it’s available.
- Choose a quality inkjet printer that can handle heavy paper stock for more vibrant and glossy sticker prints.
- If you’re sticking your stickers onto any type of surface, use a special adhesive that will not damage or leave marks on the surface once removed.
- 5. Make sure to store your stickers in an airtight container to keep them from fading due to moisture or sunlight exposure.
Following these tips can ensure that your printed stickers remain glossy and vibrant for longer!
5 Things You Should Avoid
- Avoid using cheap, low-quality paper for printing stickers, as this can result in a dull finish.
- Use less ink when printing your stickers, as this will lead to smudging and fading over time.
- Avoid pressing down the edges of your sticker onto surfaces – they should simply stick on their own with minimal pressure applied.
- Don’t apply any type of clear coat after sticking your stickers – this may cause the colors to fade or become distorted.
- Finally, don’t expose printed glossy stickers to direct sunlight or extreme heat, as both can damage the color vibrancy over time.
By following these tips, you can ensure that your glossy stickers will look vibrant and glossy for longer.
Can Normal Printer Print on Glossy Sticker Paper?
Yes! You can use your normal inkjet printer to print on glossy sticker paper. However, you must adjust your printer settings accordingly and select the appropriate paper type (glossy or matte) before printing. Additionally, using a quality inkjet printer that can handle heavy paper stock will help ensure the best results.

With the right settings and paper type, you can easily use your normal printer to print glossy stickers.
Will Ink Dry on Glossy Paper?
Yes, the ink will usually dry on glossy paper. However, depending on the type of printer and ink you are using, it may take longer to dry than regular matte papers. If you’re using an inkjet printer, make sure to select the right finish option before printing for faster drying times. Additionally, some specialty inks can be used that are designed specifically for glossy paper and will provide quicker drying times.
In conclusion, ink can be successfully printed onto glossy paper if the correct settings are selected, and appropriate inks are used.
What Color is Best for Printing on Glossy Paper?
The best color for printing on glossy paper depends largely on your preference and the desired outcome. Generally, brighter colors such as reds, yellows, oranges will create a more vibrant finish when printed onto glossy paper. Depending on the design, darker shades like blues and blacks may also look great.
Ultimately, experimenting with different colors is the best way to determine which works best for you – just remember that some colored inks can be prone to smudging when printed onto glossy paper!
That’s all we have about printing glossy stickers! We hope these tips will help you create stunning prints that last longer and stand out.
Conclusion
Now you know all the tips and tricks of how to print glossy stickers at home. You can use various inkjet printers to get a smooth, glossy finish with your printed designs. In addition to the common printer settings, use the right paper type and coating to maximize the effect of your sticker creations.
By following these steps, you’ll be sure to produce only the highest quality stickers quickly! With some practice, you will master professional-grade prints every time. Getting creative with your designs will help you stand out by adding an extra level of pop and shine to any project.
So go ahead, let your inner artist shine on; print those glorious glossy stickers now!