
Are you looking for a creative way to update the look of your home? Bead garland is an easy, inexpensive, and eye-catching decorative accent suitable for both modern and traditional décor. From windowsills to mantels, bead garland can instantly brighten up any interior design scheme in your home.

This blog post will guide you through how to use bead garland so that you can bring color and texture into any room with ease!
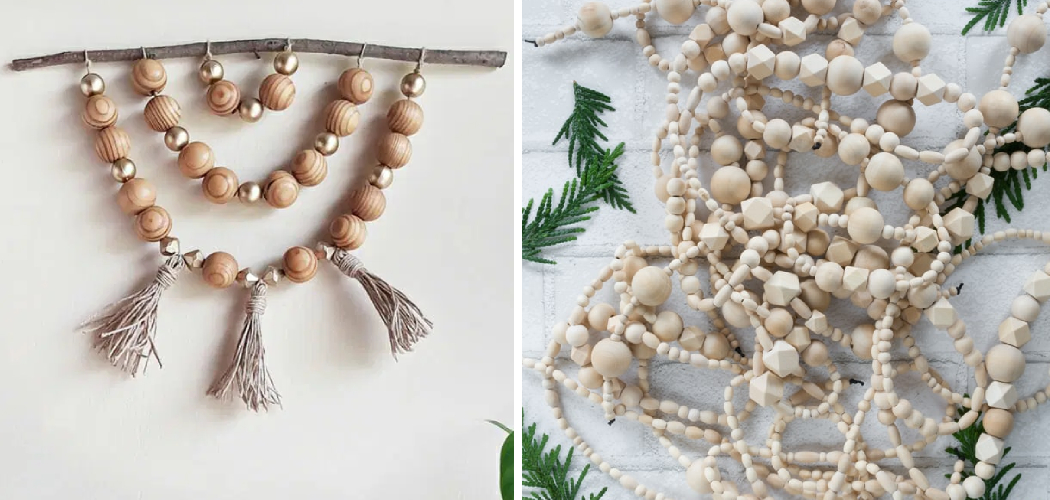
What is Bead Garland?
Bead garland is a decorative string of beads with various shapes, sizes, and colors. It can be hung in windows or doorways, draped over furniture pieces like mantels and bookcases, or simply looped around items to give them a colorful accent.
Bead garland adds texture to any room while providing a splash of color without overwhelming the design. It is an easy and affordable way to give your home a quick makeover.
Step-by-step Guidelines on How to Use Bead Garland
Step 1: Choose a Color Scheme
Before you start to hang your bead garland, decide on a color scheme. You can choose colors that match the existing décor or select a contrasting palette to create an eye-catching design. It is important to choose colors that flow together and complement the existing décor.
This will help create a cohesive look and ensure the bead garland does not overwhelm the room. If you need some inspiration, try browsing photos of completed bead garland projects for ideas.
Step 2: Cut the Bead Garland
Once you have chosen your colors, measure and cut the bead garland into sections that are appropriate for the area where it will be hung. Make sure to leave some extra length for when you come to hang it up.

But be careful not to cut too much extra length, as this can make it difficult to hang the garland properly. It is also important to remember that the bead garland should not be too tight, as this can cause it to break when hung. This is especially true if you are using heavier beads.
Step 3: Tie Loops
At the end of each section of bead garland, tie loops using a piece of string or thread so that you can hang them up easily later on. These loops should be about 5 inches in diameter and tight enough so they won’t slip off. This will make it much easier to hang the garland when you come to do so.
It is a good idea to make the loops at least 6 inches apart so that they are spaced out evenly. But be sure to leave a few extra inches so that you can adjust the spacing if necessary.
Step 4: Hang It Up
Now it’s time to hang the bead garland. You can use nails, hooks, or command strips depending on where you are putting it. This may require some trial and error to get the right height and spacing. Once you have the garland secured, start at one end and loop it around the nails or hooks until it is all hung up.
Make sure that the loops are evenly spaced and not too tight. But if you find that the spacing is too close or too far apart, just adjust it as needed. This will help make sure the bead garland looks even and balanced.
Step 5: Create a Pattern
Now that you have your bead garland hung up, create a pattern with each section of beads. Play around and move them until you find something that looks great! This is a great way to add some visual interest and make the bead garland stand out. Try using contrast colors or an ombre effect for an eye-catching look.
It is also a good idea to move the beads around from time to time so that your décor doesn’t become stagnant. You can also mix and match different types of bead garland for an eclectic style.

Step 6: Secure It
Once you’re happy with the pattern of your bead garland, secure it in place using pins or tacks. This will help keep everything neat and tidy. This is especially important if you are using heavier beads as they can move around if not secured properly.
But if you are using lightweight beads, this step may be unnecessary. It is also a good idea to periodically check the loops around the nails or hooks to make sure they are still secured properly.
Step 7: Make Adjustments
If needed, make any adjustments to ensure that the bead garland is even and hangs nicely in all directions. If one side appears longer than the other, simply tighten the loops to even it out. It is also a good idea to periodically check the bead garland for any damage or loose beads.
If you find any, replace them immediately so that your décor looks its best. That’s it! But if you want to add a bit more flair, keep reading for some creative ways to use bead garland.
Step 8: Hang Decorative Elements
If desired, hang decorative elements off of the bead garland for an extra bit of flair. Think about hanging small planters or ornaments from each loop for a fun and unique look. However, if you are using heavier items, make sure that they are securely fastened to the bead garland so that they don’t fall off.
It is a good idea to periodically check these items as well and ensure that they are still secured properly. This will help ensure that your décor looks its best.
Step 9: Add Lights
You can also add lights to your bead garland for a festive touch! Pick up some battery-operated string lights at your local craft store and string them throughout the beads. This will create a beautiful glow in any room. It is also a good idea to periodically check the battery life of your lights and replace them when necessary. Although this step is optional, it will add a unique touch to your décor.

Step 10: Clean It Up
To keep your beading looking its best, give it a regular clean with a damp cloth if necessary and check for any loose loops every now and then. This will help ensure that your bead garland continues to look its best.
It is also a good idea to check the loops around the nails or hooks and make sure they are still secure. If not, simply tighten them up. Be careful not to pull too tight, as this can cause the bead garland to break.
Step 11: Enjoy!
Now sit back, relax, and enjoy your new beaded décor! Bead garland is a great way to add color and texture to any room in the house. With its range of colors and shapes, you can create unique designs that will always keep things interesting.
Have fun experimenting with different looks – you’ll be surprised at what you can come up with! Always remember to keep your bead garland neat and tidy, and don’t forget to check the loops around the nails or hooks to ensure that it is secure. By following these steps on how to use bead garland, you can enjoy your new bead garland for years to come!
Frequently Asked Questions
Q: How Long Should the Loops Be?
A: The loops should be about 5 inches in diameter and tight enough so they won’t slip off.
Q: Can I Hang Lights on the Bead Garland?
A: Yes, you can hang battery-operated lights for an extra bit of flair! This will create a beautiful glow in any room.
Q: How Often Should I Clean My Bead Garland?
A: To keep it looking its best, give it a regular clean with a damp cloth if necessary and check for any loose loops every now and then.
Q: Can I Use Bead Garland Outside?
A: While many bead garlands are suitable for indoor use, you should always check the packaging for details on whether the product is designed for indoor or outdoor use. If it’s suitable for outdoor use, be sure to protect it from the elements.

Conclusion
To conclude, bead garland is an easy and creative way to add a flair of color and sophistication to your space. Whether you choose to hang a garland around the perimeter of a room or the centerpiece of a table, the possibilities are endless. Don’t be intimidated by this craft and give it a try!
Spending some time building your own pieces can be quite therapeutic – just make sure you have enough space for their overflowing beauty! Before beginning your project, take into account the color scheme in the existing area, as well as what items would work best based on where you want to hang them.
Finally, take pride in knowing that no two people will have the same results – yours will truly be one-of-a-kind. So now that you know how to use bead garland effectively, why not start crafting away? Maybe in no time, you’ll even start inspiring others to create their own unique masterpiece!