
Using air-dry clay on a pottery wheel is an innovative and exciting approach that blurs the lines between traditional ceramics and contemporary art. The pottery wheel, typically associated with firing clay in a kiln, can also be a fantastic tool for shaping air-dry clay into unique and intricate forms without the need for high-temperature firing.
This alternative technique allows both novice and experienced potters to explore new dimensions of creativity, as it offers the convenience of air-drying and the immediate satisfaction of crafting clay art.

In this article, we will delve into how to use air dry clay on pottery wheel, providing a comprehensive guide on the tools, techniques, and tips for this unconventional method. Whether you’re looking to create decorative sculptures, modern tableware, or unique gifts, mastering this approach opens up endless possibilities for your clay creations.
So, let’s embark on this journey and uncover the art of using air-dry clay on a pottery wheel to shape your imagination into tangible works of art.
The Versatility and Convenience of Air-Dry Clay in Pottery Projects
Air-dry clay is an ideal material for pottery projects for many reasons. It is a versatile and convenient option that can be used by both professional potters and beginners alike.
One of the greatest advantages of air-dry clay is that it does not require a kiln for firing, unlike traditional clay that needs to undergo high-temperature firing to harden and set. This makes it a more accessible and cost-effective option for those who do not have access to a kiln or are on a budget.
Additionally, air-dry clay is much easier to work with compared to traditional clay. It is more pliable and forgiving, making it ideal for beginners who are still learning the basics of pottery techniques. Its soft texture also allows for easier sculpting and shaping, making it a great material for creating intricate designs and details.
With air-dry clay, there is also no need to worry about timing your work around the firing process. Unlike traditional clay that needs to be worked with quickly before it dries out, air-dry clay has a longer working time as it does not dry out as fast. This gives artists more time to perfect their designs and make adjustments as needed.
10 Methods How to Use Air Dry Clay on Pottery Wheel
1. Prepare the Clay
The first step in using air dry clay on a pottery wheel is to prepare the clay. Start by kneading the clay until it is soft and pliable. Kneading helps to remove any air bubbles that may be present in the clay, which can cause cracks or other imperfections when it is fired. Once the clay is ready, roll it out into a thin sheet and cut it into small pieces that are easy to handle.

2. Attach Clay to Wheel Head
Once you have prepared the clay, you will need to attach it to the wheel head of your pottery wheel. To do this, use a damp sponge or cloth to moisten the surface of the wheel head and then press your piece of air dry clay onto it firmly. Make sure that the entire piece of clay is securely attached before beginning to shape it with your hands or tools.
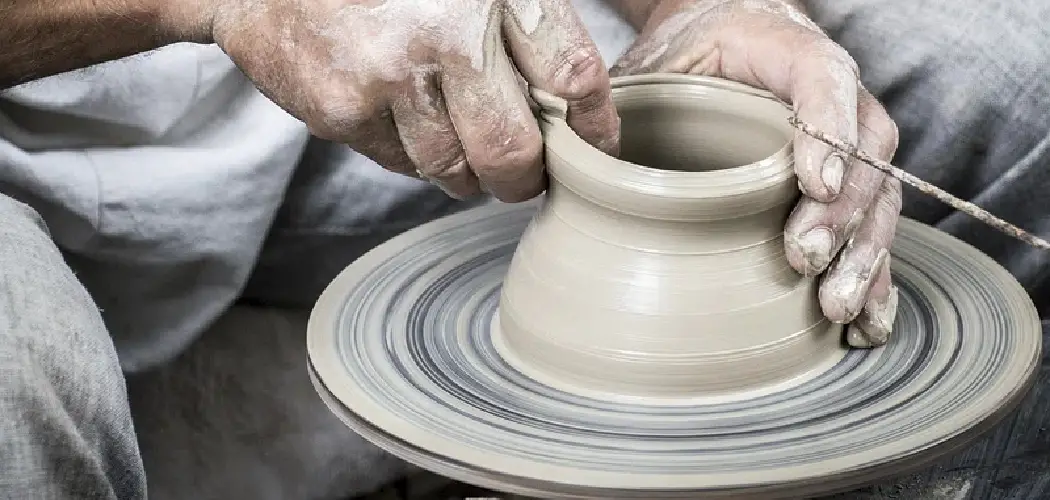
3. Shape Clay on Wheel Head
Now that your piece of air dry clay is attached to the wheel head, you can begin shaping it into whatever form you desire. Use your hands or specialized pottery tools such as knives and ribbons to create shapes and designs in your piece of clay. You can also use various techniques such as coiling and slabbing to create more intricate pieces of art from your air dry clay.
4. Remove Clay from Wheel Head
Once you have finished shaping your piece of air dry clay, you will need to remove it from the wheel head before allowing it to dry completely. Carefully lift up one edge of the clay with a metal spatula or knife and gently peel off any remaining pieces that are stuck on the wheel head surface. Be careful not to damage or break your work while removing it from the wheel head!
5 . Allow Clay Piece To Dry
Once you have removed your piece of air dry clay from the wheel head, place it on a flat surface where it can be left undisturbed for several days so that it can fully dry out before being fired in a kiln or oven at high temperatures for several hours in order for its shape and texture to become permanent.

6. Sand Clay Piece
Before firing your piece of air dry clay in a kiln or oven, you should sand down any rough edges using fine-grit sandpaper so that they become smooth and even when fired at high temperatures for several hours in order for its shape and texture to become permanent once cooled down again afterwards. This will help ensure that there are no flaws in your finished product once cooled down after firing!
7. Glaze Clay Piece
If desired, glazing can also be applied over the top of an already-fired piece of air clay before being placed back into a kiln or oven at high temperatures for further firing so as to give its color an extra shine and protect against wear over time due to its extra layer sealant protection provided by glazing itself.
This is done by brushing on layers of special glazes made specifically for pottery projects with either a brush or sponge, depending on which type best suits one’s needs before re-firing their project afterwards.
8. Fire Clay Piece
The last step before completing an air-dry pottery project is firing! Place your finished piece inside a kiln or oven set at high temperatures for several hours in order for its shape and texture to become permanent once cooled down again afterward.

After this process has been completed successfully, then all that remains left now is simply waiting until everything has fully cooled down again afterward before finally being able to enjoy one’s own handmade work creation afterward!
9. Clean Up Pottery Wheel
Once all steps have been completed successfully with one’s own handmade work creation project made from using an air-dry pottery technique along with their respective pottery wheel involved during this process, then all that remains left afterward would simply be cleaning up their respective pottery wheels used during this process too if desired.
This involves wiping down all surfaces present within/on top of their respective wheels themselves, along with wiping away any excess bits/pieces still stuck around them, too, if desired.
10. Enjoy Your Creation!
The final step, once everything has been cleaned up properly afterward, would simply involve enjoying one’s own handmade work creation project made by using an air-dry pottery technique along with their respective pottery wheels involved during this process too.
This could involve displaying them proudly around one’s home/office space if desired. Alternatively, these creations could also make great gifts given away to others if desired.
Things to Consider When Using Air Dry Clay
Air dry clay is a popular medium for pottery enthusiasts due to its convenience and ease of use. Unlike traditional clay, air dry clay does not require a kiln or high temperatures to harden. This makes it the perfect option for those who do not have access to specialized equipment.

- The moisture content: One of the most crucial things to consider when using air dry clay on a pottery wheel is its moisture content. Air dry clay tends to dry out quickly, especially when exposed to air or heat. This can make it difficult to work with and may cause cracks or other imperfections in your pottery.
- The speed of the wheel: Unlike traditional clay, air dry clay should be worked on at a slower speed. This helps prevent the clay from drying out too quickly and allows for better shaping and smoothing of the clay.
- The type of wheel: Not all pottery wheels are suitable for working with air dry clay. As mentioned earlier, this type of clay requires a slower speed which may not be achievable on all wheels. It is important to choose a wheel with adjustable speeds and a stable base for working with air dry clay.
Conclusion
Pottery wheel and air dry clay can be an essential stop for anyone who wants to enter the world of pottery with ease. Whether you are an amateur or professional, it is an excellent way to test your skills. The process of how to use air dry clay on pottery wheel may seem complex, but following the steps outlined here will allow you to develop your skills and create a unique piece of art.
Have fun with the process and remember that practice makes perfect! So why not get started right away on learning how to use air dry clay on the pottery wheel? Not only will you have access to a creative outlet, but you’ll also develop fresh ideas when used in combination with other mediums. With some time and dedication, you’ll be able to experience artistic freedom like never before!