
Creating a vase on a pottery wheel is an art form that combines the tactile pleasure of working with clay and the opportunity to craft a functional and visually stunning piece of pottery.
Vases, in particular, offer endless design possibilities and the chance to bring natural beauty into your home or share your creations with others. Learning how to make a vase on a pottery wheel is an exciting journey for both novice potters and experienced ceramic artists.

In this article, we will guide you through the step-by-step process of how to make a vase pottery wheel, from preparing your materials and centering the clay on the wheel to employing various techniques to create unique forms and textures.
Whether you’re aiming to craft a simple, elegant vase or experiment with intricate designs, this guide will help you unlock your creative potential on the pottery wheel and produce stunning vases that reflect your personal style. So, let’s embark on this pottery adventure and discover the art of making vases that stand as both functional pieces and works of art.
The Artistry and Creativity Involved in Pottery
Pottery is a form of art that involves the creation of objects by shaping and firing clay. It has been practiced by human civilizations for thousands of years, making it one of the oldest forms of art in existence. From ancient Greek amphorae to modern-day ceramic dishes, pottery has evolved into a diverse and versatile medium for artistic expression.
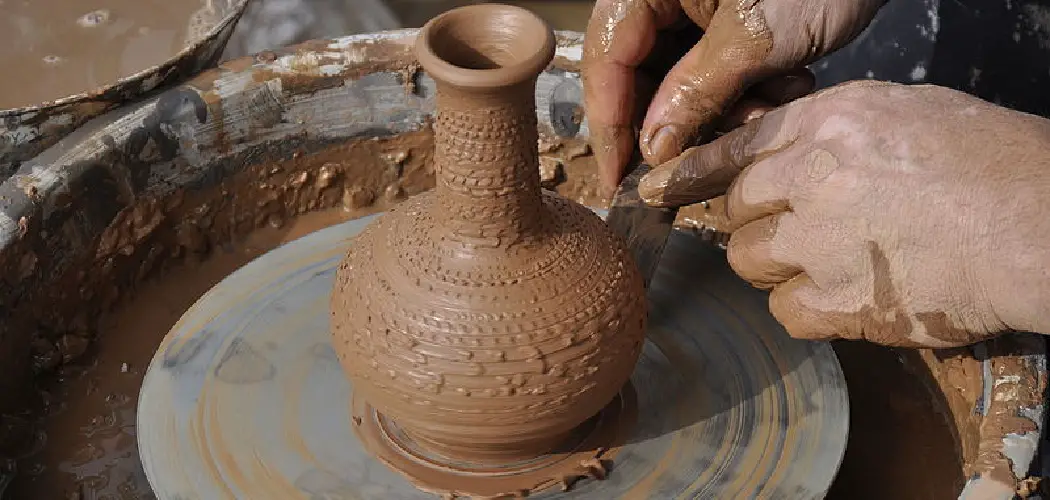
One of the most popular techniques used in pottery is making vases on a pottery wheel. This process involves spinning a lump of clay on a wheel while shaping it with the hands and tools to create a hollow vessel. While it may seem simple, mastering the skill of creating a vase on a pottery wheel takes years of practice and dedication.
The first step in creating a vase is choosing the right type of clay. There are different types of clay, each with its own unique properties and characteristics. Porcelain clay, for example, is known for its ability to create delicate and translucent pieces, while stoneware clay is more durable and suitable for functional items like vases.
Once the clay is selected, it is then prepared by removing any air bubbles or impurities that may cause the piece to crack during firing. The clay is then centered on the pottery wheel, which is a flat circular platform that rotates with the use of a foot pedal or motor. This allows the potter to work on the clay from all angles.
10 Methods How to Make a Vase Pottery Wheel
1. Gather Your Supplies
Before you start making your vase pottery wheel, make sure to gather all the necessary supplies. You will need a pottery wheel, a piece of clay, a sponge, a wire tool, and some glaze. Additionally, it is helpful to have an old towel or newspaper nearby to keep your work area clean.

2. Preparing the Clay
Once you have gathered all the supplies, you can begin preparing the clay for your vase pottery wheel. Start by kneading the clay until it is soft and pliable. Once it is soft enough, roll it out into a flat sheet that is roughly 1/4 inch thick.
3. Mounting the Clay
Next, mount the clay onto the pottery wheel by pressing it down with your fingers until it is firmly attached to the wheel head. Make sure that the clay is evenly distributed on all sides of the wheel head so that it doesn’t wobble when in motion.
4. Spinning The Wheel
Now that you have mounted your clay onto the pottery wheel, you can begin spinning it at a moderate speed using either your foot or hand pedal (depending on what type of wheel you are using). As you spin the wheel, use your hands to shape and form the clay into a cylinder shape – this will be your vase’s body.
5. Forming The Neck Of The Vase
Once you have shaped and formed your vase’s body, use your hands to create an opening at one end of the cylinder – this will be where you attach the neck of your vase later on in this process.

To do this, press down on one side of the opening with two fingers while pulling up on both sides with two other fingers – this will create a “V” shape which will serve as a guide for forming the neck of your vase later on in this process.
6. Attaching The Neck Of The Vase
Now that you have created an opening for attaching your vase’s neck, take another piece of clay and roll it out into a long snake-like shape that is roughly 1/4 inch thick – this will be used as part of attaching your vase’s neck later on in this process.
Place one end of this snake-like piece inside of the “V” shape opening created earlier and press down firmly until it is securely attached – this step may require some additional pressure from both hands depending on how thickly rolled out each piece was made prior to attachment (this step should not take more than 2 minutes).
7. Finishing The Neck Of The Vase
Once both pieces are securely attached together (forming an “L” shape), use either a wire tool or sponge to smooth out any rough edges around where they were connected together (this step should not take more than 2 minutes).
After smoothing out any rough edges around where they were connected together – use either a wire tool or sponge to further refine and define any details around where they were connected together (this step should not take more than 3 minutes).

8. Trimming Off Excess Clay From the Neck Of Vase
Once all details around where they were connected together are refined and defined – use either a wire tool or sponge to trim off any excess clay from around where they were connected together (this step should not take more than 2 minutes).
After trimming off any excess clay from around where they were connected together – use either a wire tool or sponge to further refine and define any details around where they were connected together (this step should not take more than 3 minutes).
9. Adding Glaze To Vase Pottery Wheel
Once all details around where they were connected together are refined and defined – add glaze to give color and texture to your finished product (this step should not take more than 5 minutes).
Apply glaze evenly over the entire surface area with either brush strokes or dipping method, depending on the desired effect – let dry completely before proceeding further with the next steps (this step should not take more than 10 minutes).
10. Firing And Cooling Process For Vase Pottery Wheel
Finally, once the glaze has dried completely – place the finished product inside the kiln for the firing process at a predetermined temperature setting according to manufacturer instructions (this step should not take more than 15 minutes) – after the firing process has been completed, allow finished product time to cool before handling further with next steps (this step should not take more than 30 minutes) – once cooled, remove from the kiln and enjoy your completed vase pottery wheel!
Things to Consider When Making a Vase Pottery Wheel
When it comes to pottery, vases are one of the most popular and common items to make. They come in different shapes, sizes, and designs making them an interesting piece of art. If you want to try your hand at making a vase pottery wheel, there are some things that you need to consider.
Firstly, you need to have the right equipment. This includes a pottery wheel, clay, and basic pottery tools such as a rib, sponge, and trimming tool. It is important to invest in good quality equipment as it can greatly affect the outcome of your vase.
Next, you need to choose the type of clay you want to use. There are different types of clays available and each one has its own unique properties. It is important to do some research and understand the characteristics of each type of clay before making a decision.

Additionally, you should also consider the design or shape of your vase. You can choose to make a traditional cylindrical vase or experiment with different shapes like a round, square or triangular vase. Keep in mind that certain shapes may be more challenging to create on the wheel, so it is important to have a good understanding of your skill level.
Conclusion
In conclusion, making a vase pottery wheel is a challenging but rewarding experience. When done properly, you can transform a lump of clay into a beautiful and unique piece to be cherished. It requires careful planning, skill and patience. With practice and dedication, anyone can gain the confidence to try their hand at this interesting craft.
Don’t be intimidated; there are plenty of resources available online to help you understand the process. Give yourself time to practice and improve your skills–you may even find a hidden passion in pottery!
Now that you know how to make a vase pottery wheel, it’s time to get started! So gather up all your supplies and materials, roll up your sleeves, take some deep breaths, and get creative! Who knows? You may have made your first masterpiece before you know it.