
Navigating the complexity of sewing machines can be a daunting task, especially when you’re just getting started. From learning how to thread the machine and winding bobbins, there are many different techniques that must be mastered in order to produce successful projects.

One such technique is knowing how to use a buttonhole foot; this tool provides an essential function for anyone trying to make their own garments or accessories. If you’ve ever wondered about what steps you need to take in order to properly operate a buttonhole foot, then look no further – we’ll explore all the nitty gritty details right here!
Needed Materials
Given below are the materials you will need to make use of a buttonhole foot:
- Sewing Machine
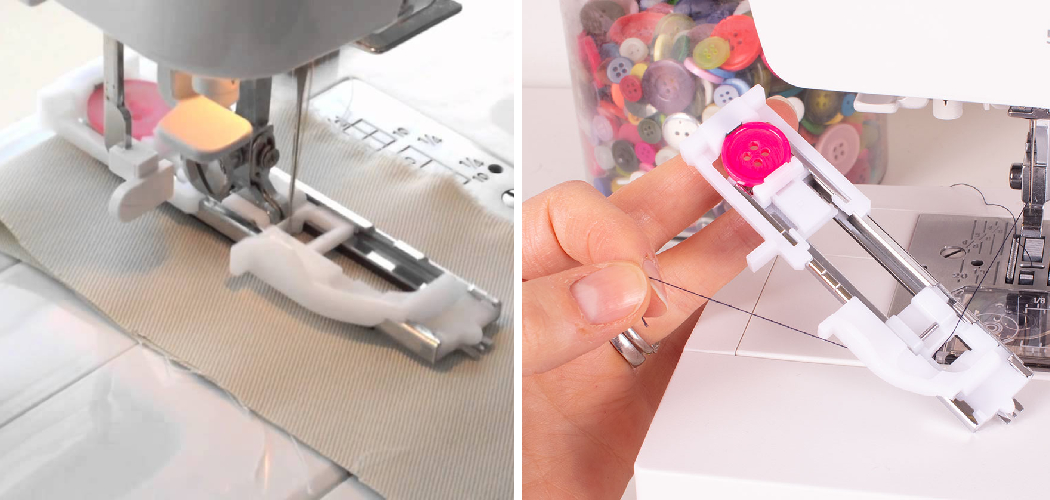
- Buttonhole Foot Attachment
- Ruler or Measuring Tape
- Scissors
- Buttons and Buttonholes (of Course!)
10 Step-by-step Guidelines on How to Use a Buttonhole Foot
Step 1: Measure and Mark Your Buttonholes
Start by taking measurements for your desired buttonholes and mark them on your fabric with the tailor’s chalk. Doing this will help to ensure that your buttonholes are even and consistently spaced out. It is best to measure each buttonhole individually to get the most accurate results.
But, if you need to mark multiple buttonholes at once, use a ruler or measuring tape to ensure that the space between each is consistent. It is also a good idea to use a piece of scrap fabric for this step in order to double check your measurements.

Step 2: Attach Your Buttonhole Foot
Once you have all the necessary materials, it’s time to attach your buttonhole foot to the machine. Depending on the type of sewing machine you have, there may be a slight variation in the steps required here; however, the general concept is the same.
It’s important to note that the foot should be firmly attached and facing the same direction as your needle. This ensures that your buttonholes will be sewn in the right direction. But, if you’re not sure how to set it up correctly, consult your manual for further details.
Step 3: Adjust the Buttonhole Foot to Fit Your Measurements
Now that you have your buttonhole foot attached to your machine, it’s time to adjust it so that it fits your measurements for the buttonholes. Depending on how wide or narrow you need the buttonholes to be, this should be done by either loosening or tightening the screws on the foot.
But, be sure to do this in small increments so that you don’t over or under-adjust the size of your buttonhole. This step is important to make sure that the buttonholes will end up the right size for your garment.
Step 4: Position Your Fabric
Once your buttonhole foot is adjusted, you can then position your fabric so that it lines up with the markings for the buttonholes. Make sure to keep a steady hand while doing this as any slight movement could throw off the measurements and ruin the entire process.
This is especially important if you’re using a more delicate fabric such as silk. But, if you take your time and make sure everything is in the right place before proceeding then there should be no issues.
Step 5: Set Your Stitch Length
Next, adjust your stitch length setting to a medium level; this will ensure that you are able to create buttonholes of the desired size without having to make any further adjustments.

If you’re using a machine with an automatic buttonhole setting then this step may not be necessary as the machine will be able to adjust it for you. Always make sure to double check the settings of your machine before continuing with the process. It’s better to be safe than sorry!
Step 6: Begin Sewing
Once all these steps are complete, you can begin to sew. Begin at one end of the buttonhole and slowly move toward the other end, keeping a steady hand throughout. Make sure that your fabric is not moving too much by holding it as close to the foot as possible.
But, don’t press too hard or you could end up stretching out your fabric. You want to keep the tension even throughout the entire process. It’s always best to practice on a scrap piece of fabric first to get the hang of things. But, once you get the technique down it should only take a few minutes to complete each buttonhole.
Step 7: Finish Sewing
Once you have sewn all the way through your fabric, securely finish off the stitching at the other end. This will ensure that your buttonhole is properly secured and won’t come apart easily. If your machine has a tie-off button then you can use this to secure the stitching.
This will give you a neat and professional finish. Otherwise, you can manually tie off the stitching at both ends. It’s up to you! This is also a good time to double check that your buttonhole is the right size.
Step 8: Cut Open Your Buttonholes
Now it’s time to cut open your newly completed buttonholes! Using a small pair of sharp scissors, carefully make an incision along both sides of each stitch line. This should open up the fabric enough to fit a button through without any difficulty.
But, be sure not to cut too deeply or you might end up damaging the fabric. This is a delicate process so take your time and be patient. However, once your buttonholes are cut open, you’ll be able to see the fruits of your labor!

Step 9: Test Your Buttonholes
To make sure your buttonholes are properly sized and in working order, it’s always best to test them out before using them on a project. Place a few buttons through the holes and check to see if they fit comfortably and securely.
Buttons should fit snugly, but not too tightly; if they are too loose or don’t fit at all then you may need to make further adjustments to the size of your buttonholes. It’s best to do this before continuing with a project.
Step 10: Enjoy the Proficiency of Your Sewing Machine!
Once you’ve successfully completed all these steps, it’s time to bask in the glory of a job well done! With this newfound knowledge, you can now use your buttonhole foot freely on any upcoming sewing projects. Have fun and be sure to show off your handiwork! It’s time to take your sewing skills to the next level!
Always remember that practice makes perfect, so don’t be discouraged if you have to do a few test runs first. After all, sewing is an art and it takes time to perfect it! And, with the help of your buttonhole foot, you can now become a master at creating perfect buttonholes every time! Happy Sewing!
By following these steps on how to use a buttonhole foot, you can confidently use a buttonhole foot on your next sewing project. Although it may seem intimidating at first, with practice you’ll quickly become an expert at this technique. So don’t worry – after a bit of time, effort, and patience, you’re sure to master the art of buttonhole foot usage in no time!
Frequently Asked Questions
Q: What is a Buttonhole Foot?
A: A buttonhole foot is an attachment for your sewing machine that allows you to make evenly-spaced buttonholes on fabric. It takes the guesswork out of making buttonholes and makes the process much easier and more accurate.
Q: Do I Need a Buttonhole Foot for Every Sewing Project?
A: Not necessarily – while it is helpful to have one, you may be able to get away with using other techniques such as hand stitching or machine stitching without the foot. It really depends on what type of project you’re working on and how much accuracy is required for the buttonholes.

Q: What Are Some Tips for Using a Buttonhole Foot?
A: The most important tip is to make sure that you take accurate measurements and mark them onto your fabric before starting to sew. This will ensure that your buttonholes are evenly spaced and of the desired size.
Additionally, it’s also important to adjust your stitch length setting to a medium level before beginning to sew. This will help you get the best results with minimal adjustments.
Q: What Is the Difference Between a Buttonhole Foot and a Zipper Foot?
A: The two attachments have similar functions, but they differ in one major way – a buttonhole foot is used to make evenly-spaced buttonholes, while a zipper foot is used to attach zippers to the fabric. Both feet are essential for sewing projects that involve buttons or zippers, but they should not be used interchangeably.
Conclusion
Learning how to use a buttonhole foot on your sewing machine can be daunting but with these tips, you’ll soon find that mastering this useful tool isn’t as difficult as you initially thought.
Whether you are a novice or an experienced sewer, the right practice and preparation make all the difference when it comes to creating beautiful and professional-looking results. The key is patience and focus, so take your time!
Remembering how to properly adjust both the serger’s tension and stitch length settings will help you ensure that your project’s buttonholes look neat and evenly sized.
Making small adjustments until it looks just right may seem tedious, but in the end, will show in the quality of your finished product. You now have the tools needed to create stunning handmade items with perfect buttonholes – good luck!