
Ready to start sewing with fabric but not sure how to pin fabric for sewing? You’ve come to the right place! Pining your fabric before you begin stitching is an important part of a successful sewing project. Still, many enthusiasts often wonder what type of pins they should use and where exactly they should put them.

If you’re ready to learn how to correctly and safely pin your fabric for sewing, we’ve got the answers you need right here!
In this blog post, we’ll cover the basics of pining different fabrics for any kind of sewing endeavor so that you can feel confident as you get started on your next creative project. Get ready to stock up on pins and learn how simple it can be to create perfect patterns every time!
What is the Importance of Pins for Sewing?
Pins are an important part of the foundation of any successful sewing project. Whether you’re working on apparel, accessories, or home decor items, pins help to hold the fabric in place while you make your cuts and sew it together. With them, fabrics can shift and pieces will fit together correctly, which can cause major issues for a project.
Plus, pins have the added bonus of allowing you to mark design features like pleats and darts that would otherwise be difficult to remember during construction.
Overall, pins provide a secure foundation for whatever you’re creating and can help ensure your project turns out just how you want it.
What Will You Need?
Before you start pinning your fabric, make sure that you have all the supplies you need. The key items to have on hand are:
- Fabric scissors
- Pins
- Tailor’s chalk (optional) or other marking tools like a water soluble pen
- A cutting board or other flat surface for measuring and pinning
- An iron (optional) and a pressing cloth
Once you have all your supplies ready, it’s time to get started!
8 Easy Steps on How to Pin Fabric for Sewing

Step 1: Preparing Your Fabric
The first step in pinning your fabric is to ensure it’s prepared correctly. You’ll want to start by pre-washing your fabric to remove any sizing, starch, or shrinkage that could affect the outcome of your sewing project.
Once your fabric is washed and dried, iron removes any wrinkles or creases. Be sure to place a pressing cloth between the iron and the fabric to avoid any potential heat damage. This will create a smooth, flat surface essential for accurate pinning.
Step 2: Laying Out Your Fabric
Place your fabric on a flat, clean surface – a cutting board or a table. Make sure the fabric is fully spread out with no wrinkles. For most sewing projects, you’ll want to fold your fabric in half, aligning selvages (the tightly woven edges), to create a double layer. This allows you to cut two pieces simultaneously, ensuring symmetry for your sewing project.
Step 3: Marking Your Fabric
Once your fabric is laid out, it’s time to mark your pattern. Use your tailor’s chalk or water soluble pen to draw your pattern onto the fabric carefully. Make sure to mark any notches, darts, and other important design features.
These markings will guide you when you start pinning. Remember to measure twice and mark once to ensure accuracy, as these markings will be crucial for proper alignment when sewing. If your pattern requires any folds or creases, mark these on your fabric.

Step 4: Pinning Your Fabric
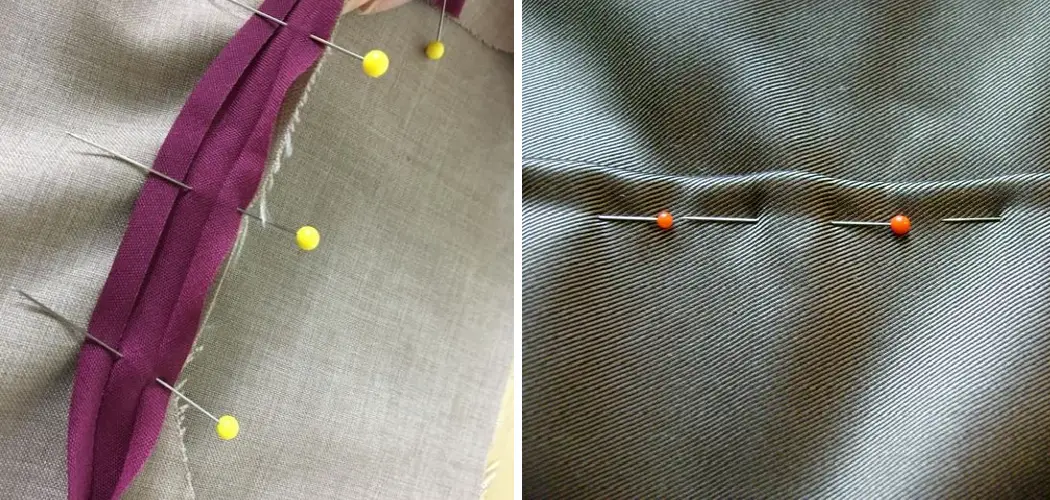
Start pinning your fabric following the markings you’ve drawn. Make sure to keep the pins perpendicular to the edge of the fabric for easy removal as you sew. Pin the fabric together along the lines of your pattern, making sure not to stretch or distort the fabric as you do so.
If your pattern includes curves, use more pins to ensure the fabric stays in the right shape. Remember to pin any folds or creases in place as well.
Step 5: Checking Your Pinning
Before you move on to the cutting or sewing process, it’s crucial to double-check your pinning. Ensure all pins are securely in place and that your pattern lines are accurate. Check that all notches, darts, and other design features are clearly marked and correctly pinned.
If your pattern includes folds or pleats, verify these are pinned as intended. This step is about ensuring accuracy before committing to cutting or sewing. It might take extra time, but it can save you from making irreversible mistakes.
Step 6: Cutting Your Pinned Fabric
Now that your fabric is securely pinned and you’ve double-checked your work, it’s time to start cutting. Utilize your fabric scissors to cut along the lines you’ve marked on your fabric. Remember to cut just outside the drawn lines to account for your seam allowance, which is the area between the edge of the fabric and the stitching line.
Be mindful of the pins as you cut, and do not distort the fabric by pulling or twisting it. Maintain a steady hand and cut slowly to ensure you follow your pattern accurately. Once cut, leave the pins in place, as they’ll guide you during the sewing process.

Step 7: Setting Up Your Sewing Machine
Before you begin sewing, it’s important to set up your machine properly. Start by choosing the right needle and thread for your fabric type. If you’re working with a heavy fabric like denim, you’ll need a larger, stronger needle and thicker thread.
A smaller needle and finer thread will work best for lighter fabrics like cotton or silk. Next, thread your machine and bobbin according to your machine’s instructions. Check and adjust your stitch length and tension settings as needed.
Step 8: Sewing Your Fabric
You can start sewing your fabric once your sewing machine is set up. Begin at one end of your fabric, removing the pins as you reach them. Se sew along the marked lines, leaving the appropriate seam allowance.
For straight seams, use a straight stitch. If your fabric has curves, change to a zigzag stitch to allow for stretch. Remember to backstitch at the beginning and end of your seams to secure your stitches. Stay patient and maintain a steady pace, ensuring that you maintain your pattern’s shape and design.
These 8 steps will help you pin your fabric and create a professional, finished look for any sewing project. With practice, you’ll be able to accurately measure, mark, cut, and sew with confidence. So what are you waiting for? Grab your supplies and get started on your next sewing adventure!
5 Additional Tips and Tricks
- Always Place Your Fabric on a Flat Surface Before Pinning: To ensure accuracy in sewing, it’s imperative to pin your fabric on a flat surface. This helps to keep the fabric smooth and prevents any unwanted folds or creases that could affect the sewing process.
- Use the Right Pins: Depending on the fabric, you may want to use a different pin type. For example, if you are working with delicate fabrics like chiffon or lace, you should opt for ballpoint pins with rounded tips that won’t snag and damage the material.
- Always Remember That the Direction of Your Pins Matters: When pinning your fabric, the heads of the pins should always point toward the edge of the fabric. This allows you to easily pull them out as you sew without disrupting the sewing machine.
- Invest in a Magnetic Pin Cushion: Consider using a magnetic pin cushion to maximize your sewing efficiency. It helps to keep all your pins in one place and makes it easier to pick up dropped pins.
- Pin at Regular Intervals for a Uniform Stitch: To ensure a consistent stitch length, pin your fabric at regular intervals. This will help you maintain a straight line and create a neat, professional-looking finish.

With these tips, you’ll be ready to pin and sew like a pro! Get creative with your projects and have fun!
5 Things You Should Avoid
- Avoid Pinning Across the Fabric: While it might seem like a quick solution, pinning across the fabric can lead to distortion and affect the accuracy of your sewing. Instead, place your pins parallel to the fabric’s edge, ensuring they go in the same direction as your stitching line.
- Don’t Use Dull or Bent Pins: Pins that are not sharp enough can damage your fabric or cause it to bunch up, leading to uneven sewing. Similarly, bent pins won’t give you the precision you need and could break and cause an accident.
- Avoid Pinning Too Close to the Edge: Pinning too close to the edge of the fabric can lead to your sewing machine missing the fabric entirely, resulting in loose seams. Aim to pin about 1.5 to 2 cm from the edge.
- Pay Attention to Regular Pin Maintenance: Regularly check your pins for any signs of rust, and clean them if necessary. Rusty pins can damage not only your fabric but also your sewing machine.
- Avoid Rushing the Pinning Process: Pinning is crucial in ensuring your sewing project turns out as planned. Take time with this process, and align and secure your fabric before you start sewing carefully.
With these tips in mind, you can ensure you get the best results for your sewing projects. So have fun and get pinning!
Conclusion
Sewing can be intimidating when starting, but with some knowledge and practice, you’ll soon be whipping up projects like a pro. As shown with pinning fabric for sewing, mastering the little details makes all the difference in creating beautiful pieces. To ensure your projects look their best, pin throughout the process and take extra time sitting down at the cutting table- it’s worth it!
Experiment with different techniques and find what works best for you; remember to have some fun along the way too! With these tips on how to pin fabric for sewing in mind, you’ll be confident to tackle any fabric project you set your sights on. Happy sewing!