
Are you a sewer tired of the hassle of constantly finding and organizing all your sewing patterns? Or you’ve started multiple projects but could never find the correct pattern needed to complete them. Finding and storing your sewing patterns doesn’t have to be an arduous task.
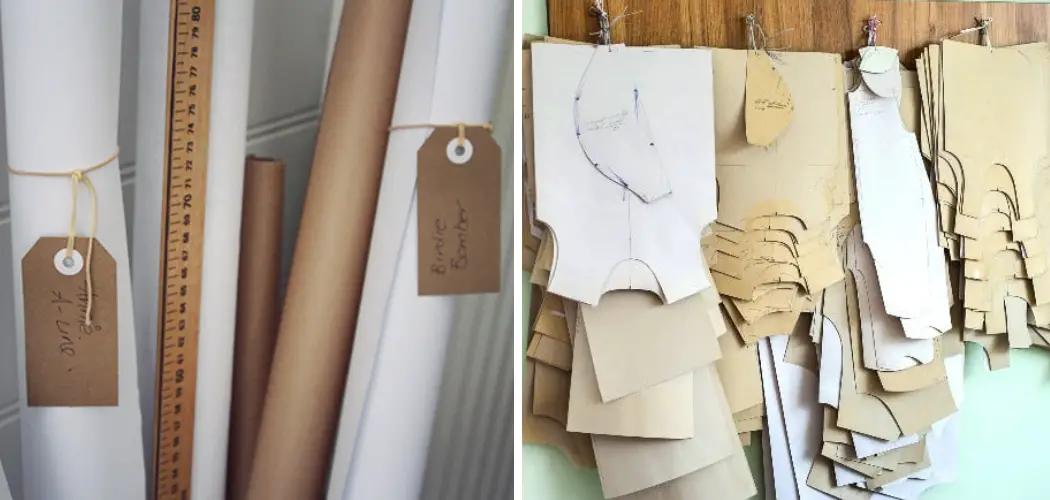
Whether you store your patterns in a box or hang them up on the wall, one of the best ways to ensure they will stay visible is to label each pattern with your name and project type. This way, when you look for it again later, you’ll know exactly what it’s for without having to open and search through the entire pattern!

In this blog post, we’ll delve deeper into how to store sewing patterns- from the best way to fold them to where you should keep them.
What Will You Need?
Before you begin, having everything you need on hand is important. Here are some of the supplies that could come in handy when sorting and storing your patterns:
- Notebook or journal
- Labels with your name written on them
- Pen or marker
- File folders or storage boxes
- Hangers (for hanging patterns)
- Zip lock bags (for storing smaller patterns)
Once you have all your supplies ready, the next step is to sort through your patterns and organize them into folders.
10 Easy Steps on How to Store Sewing Patterns
Step 1: Sort Your Patterns
Begin by spreading all your patterns on a large table or flat surface. This will give you a clear view and allow you to take stock of what you have. Start sorting your patterns based on their category. For instance, you could group patterns for dresses, pants, children’s clothes, or home decor items separately.
Making piles for each category will make it easier to store and find your patterns later. Be patient during this step, as it can be time-consuming if you have many patterns.
Step 2: Label Your Patterns
Once you’ve sorted your patterns according to category, it’s time to label them. Attach one to each pattern using the labels with your name written on them. This will help ensure that you avoid accidentally buying a duplicate of something you already have or losing the pattern later on. Be sure to write down any other information you’ll find useful, such as fabric type, size range, etc.

Step 3: Fold & Store Patterns in Envelopes
Now that your patterns are labeled and sorted into categories, it’s time to store them away. Start by folding each pattern neatly and placing them into envelopes. Ensure the envelope is big enough to fit the pattern without bending or wrinkling. This will help preserve the integrity of the pattern for future use.
Step 4: Choose Where to Store Your Patterns
Once you’ve folded and stored your patterns in envelopes, it’s time to decide where you want to keep them. Some sewers prefer to store their patterns in a filing cabinet, while others opt for a pattern box or storage chest. Whatever the case, make sure your patterns are stored in an area where they won’t be exposed to moisture or dust. This will help keep them looking their best for years to come!
Step 5: Use Hangers (for Large Patterns)
If you have larger patterns that don’t fit into envelopes, you can hang them up on the wall or a curtain rod. This will help free up some space and make it easier to find the pattern when needed. All you have to do is fold the pattern in half and attach it to a hanger with pins. Be careful not to place too many on one hanger, as this could cause unwanted creases.
Step 6: Store Small Patterns in Zip Lock Bags
Smaller patterns, such as appliques, motifs, or trims, can be stored in zip lock bags. This will help keep them safe and organized so you can easily find them when needed. Be sure to label the zip lock bag with your name and project type, just like you did for the larger patterns.
Step 7: Keep a Record of Your Patterns
Creating a record of all your patterns can be extremely helpful when it comes to locating them quickly. Start by taking note of the pattern number on each one and writing it down in a notebook or journal. You can also enter this information into an electronic spreadsheet if you prefer. This will help you keep track of which patterns you have so that you only buy duplicates appropriately.

Step 8: Make a Note of Any Changes
If you make any changes to the pattern, such as lengthening or widening it, it’s important to note down these details. This will help you avoid making the same adjustments repeatedly when using that particular pattern in future projects. It’s also a great way to keep track of your progress and have a reference point to refer back to.
Step 9: Keep Your Patterns in an Accessible Place
When deciding where to store your patterns, keep them in an easily accessible place. This will save you from having to go searching for them every time you need to use one. If you have multiple projects, it might help to store the patterns you’re currently working on in a separate box from the rest. That way, everything is kept together and organized.
Step 10: Enjoy Your Organized Patterns!
Once your patterns are stored away, take a step back and admire all your hard work – you did it! Now that they’re neatly sorted and labeled, you can start working on your next sewing project with total peace of mind. Remember, a little organization goes a long way toward ensuring that your patterns stay in great condition for years to come.
Following these ten simple steps, you can easily keep your sewing patterns organized and in tip-top shape. Whether you’re a beginner or an experienced sewer, having an orderly system will streamline the creative process and help make your projects even more enjoyable!

5 Additional Tips and Tricks
- Keep your fabric pieces, patterns, and pins all together with a handy crafting caddy! It’s the perfect way to store sewing supplies without forgetting something important.
- To make sure your pattern pieces are easy to find when you need them, label each and place them in a large envelope or folder. This will keep everything organized so you know exactly where your patterns are.
- Invest in a durable pattern storage box to keep everything organized and accessible. This is especially helpful for storing larger pieces of fabric or long patterns that won’t fit into smaller containers.
- If you are saving large amounts of fabric, try rolling them up instead of folding them to avoid any creases or wrinkles in the fabric.
- If you’re using a large pattern like a quilt or blanket pattern, try cutting it into smaller pieces to fit in storage easier. You can also trace the pattern onto paper and store them for future use! This will help to save paper too!
There are plenty of ways to ensure your sewing patterns are organized and easy to find. With a few simple tips and tricks, you can ensure your patterns stay neat and organized in your crafting area!
6 Things You Should Avoid
- Don’t store your patterns in an area where they can be exposed to humidity or heat, as this can damage the paper.
- Avoid folding the pattern pieces too often, as this can cause them to rip or tear.
- Don’t keep the patterns in plastic bags for extended periods of time, as it could damage delicate fabrics and threads.
- Avoid using bottom drawers or cupboards, as they can be difficult to reach when you need the patterns quickly.
- Don’t store your pins with the fabric and patterns; they can get mixed up and create a mess!
- Avoid storing your fabric pieces and patterns in an area that is prone to dust or pet hair. This will make cleaning up much harder and can ruin the integrity of the materials.

Following these tips and tricks for storing sewing patterns will ensure that all of your supplies are organized and easy to find when you need them. With a little bit of planning, your crafting area will be neat and tidy in no time!
Is It Okay to Mix Patterns?
Yes! In fact, it can be a great way to add some personality and creativity to your sewing projects. Just make sure that each pattern is cut from the same type of fabric so you don’t end up with an uneven finished product. When mixing patterns, try keeping the colors in a similar range to keep things cohesive. If you’re adventurous, you can mix contrasting patterns and colors for a bold look.
Additionally, if you’re using multiple patterns in one project, plan ahead and match up the edges for a seamless look. It’s also important to consider any embellishments necessary when sewing multiple patterns together.
Just remember to pay attention to the scale of each pattern so that they are all proportional. With some experimentation and creativity, mixing patterns can be an easy way to add fun to your sewing projects!
What Are Some Other Ways To Utilize Stored Patterns?
Stored patterns can be used for more than just sewing projects! You can use them to create unique decorations or gifts. Try using fabric scraps to make a handmade quilt or wall hanging. Patterned paper can also create custom cards, scrapbook pages, and party favors.
Another great use for stored patterns is to create a unique costume or dress-up outfit. You can mix and match fabrics to create fun looks that will stand out.
If you’re feeling crafty, why not try making your wrapping paper or gift tags with your stored patterns? The possibilities are endless when it comes to utilizing your stored patterns!

Conclusion
All in all, when it comes to storing and organizing sewing patterns, the key is ensuring you’re taking the necessary steps to protect them from potential harm. With this guide to help keep your beloved patterns safe, you can now travel down the fashion runway knowing your sewing patterns are stored properly!
From investing in a hanging file box or binder, choosing archival methods over traditional options, and labeling and sorting items correctly, these various tips can make a big difference when protecting your investment. With a bit of hard work and some creativity, you can have an organized storage system that works best for you – one that leaves you looking forward to exploring even more fabrics and patterns!
Hopefully, the article on how to store sewing patterns was useful in understanding the various methods of properly caring for your supplies. From using boxes and folders to labeling and rolling fabric pieces, plenty of options are available to suit everyone’s needs.