
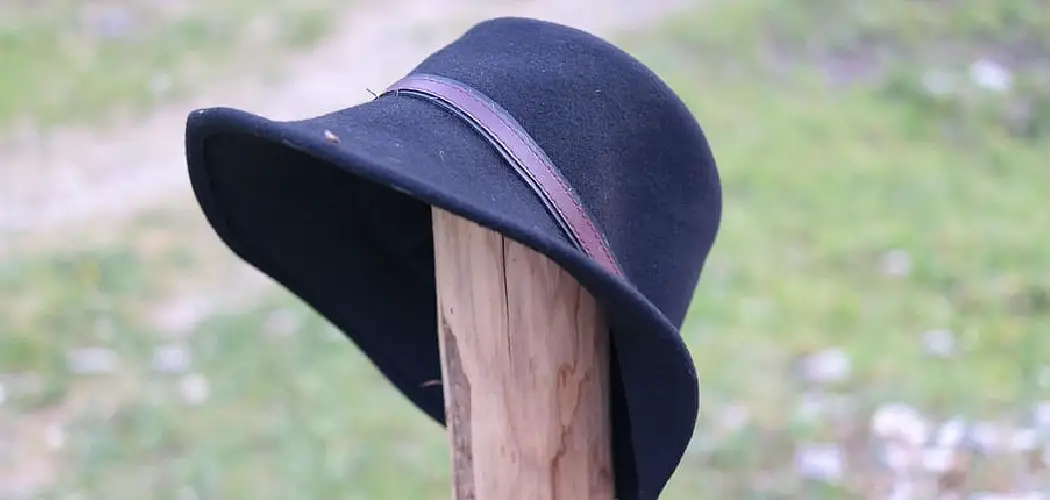
Are you looking for a unique way to customize your boonie hat? Have you ever wanted to shape, crunch, or roll the brim of your hat without it losing its original form? If so, then this blog post is just what you need!
A properly-shaped baloney hat brim can make your look complete and help keep the sun out of your eyes. Follow these simple steps to learn how to shape a boonie hat brim.

This article reviews the materials and steps required for shaping a boonie hat brim into whichever style you desire. Whether it’s for fashion or utility that guides your choices, anyone can learn how to make their customized hats with some practice and patience. So strap on your safety goggles and grab your supplies – let’s get started!
What Will You Need?
To shape a boonie hat brim, you’ll need the following:
- Your boonie hat
- A flat iron or hair dryer with adjustable settings
- Safety goggles and protective gloves for extra precaution
- An old towel to place between the brim and the flat iron/hair dryer.
Once you have gathered all the necessary supplies, you can start shaping your boonie hat brim.
10 Easy Steps on How to Shape a Boonie Hat Brim
Step 1. Adjust the Settings:
Before you start, make sure to adjust the temperature settings on your flat iron or hair dryer to a lower heat setting. This will prevent damage to the fabric and avoid any possible burning. Be careful not to use too much heat.
Step 2. Place the Towel:
Once you have adjusted the settings, place an old towel over the brim of your boonie hat. Make sure that it is properly draped from end to end and not bunched up in certain areas. This will help prevent any heat damage to the fabric.
Step 3. Start Curling or Rolling:
Now comes the fun part! Gently start curling or rolling up the edges of your boonie hat brim using a flat iron or hair dryer on a low heat setting. Move slowly and continuously until you’ve achieved your desired shape/style.

Step 4. Heat Again:
If needed, repeat step three once more. This will help set the shape and ensure it remains in place once you remove the hat. If you still need more time, repeat the process until you achieve your desired look.
Step 5. Let It Cool Down:
Once you’re happy with the shape, turn off the flat iron or hair dryer and let your boonie hat brim cool down for a few minutes before touching it. Keep a close eye on it as you want to make sure it is secured. It will cool down quickly.
Step 6. Set The Shape:
To set the shape of your boonie hat brim, use your hands to push down on any sections that may be sticking up or out of place. Make sure not to press too hard as this may cause damage to the fabric. Another way to set the shape is to use a rolling pin or other cylindrical object.
Step 7. Check Your Work:
Now check over your work and make sure everything looks just right! Repeat the above steps if any areas need more attention until you’re satisfied with your new hat shape. Another great way to check your work is to admire your handiwork in the mirror.
Step 8. Let It Dry:
Once you’ve finished shaping and setting the brim of your hat, let it dry completely before wearing it out in public. This will help prevent any future damage to the fabric from sweat or rain. You can also use a soft cloth to wipe off any excess moisture.
Step 9. Wear With Pride:
Now that you know shape a boonie hat brim, go ahead and show it off! You can wear your custom-shaped boonie hat with pride, knowing you put in the effort to create something unique. Keep in mind that with enough practice, you’ll be able to shape your hat into any style or shape you desire.

Step 10. Have Fun:
Finally, remember to have fun while giving your hats a stylish edge! Experimenting with different shapes and styles is a great way to explore creativity. Remember to take your time and be patient when shaping your boonie hat brim.
By following these steps, you can learn how to shape a boonie hat brim and make your unique statement with the hats you wear. With some practice and creativity, you can make your stylish boonie hats for any occasion. Happy shaping!
5 Additional Tips and Tricks
1. Consider the type of fabric for your hat. If you’re using a heavier material, it’s best to use a thicker brim that won’t be too floppy or easily damaged by everyday wear and tear.
2. Consider the width of the brim when deciding how much length you need. For example, if your hat has a wide brim, you’ll need more fabric to shape it properly.
3. Use a straight edge or ruler to measure and mark the fabric for cutting. This will help ensure that you have consistent measurements so your brim looks even once it’s finished.
4. If you’re using an existing hat as a base, consider tracing the brim onto the new fabric before cutting out your shape. This will guide you on how much material to use and where to cut.
5. Finally, remember to check your work by trying on the hat after shaping it and making any necessary adjustments! You want your boonie hat brim to look perfect in public!

With these tips and tricks in mind, it’s easy to shape a boonie hat brim that looks professional and stylish. With the right tools and fabric, you can craft a hat brim perfect for any outdoor adventure.
5 Things You Should Avoid
1. Remember to consider the amount of fabric needed. To ensure your brim looks even, you should always err on the side of caution and get extra material just in case.
2. Avoid using a jagged edge when cutting out your brim shape. This will make it difficult to sew together later and leave an uneven look once finished.
3. double-check the measurements before making any cuts – a few inches off can make all the difference in how your brim turns out!
4. Resist the urge to rush through the steps – take your time and pay attention to detail for best results!
5. Avoid using lightweight materials, as they won’t be able to hold their shape easily over time. It’s best to opt for heavier fabrics that won’t fray or break down after extended wear.
Following these tips and tricks, you can easily shape a boonie hat brim that looks professional and stylish. With the right tools and fabric, your hat can quickly be ready for any outdoor adventure!
What is the Correct Way to Wear a Boonie Hat?
The correct way to wear a boonie hat is with the brim pulled down over your forehead and eyes, protecting them from sun and rain. The hat should fit snugly around your head without being too tight or loose, and the chin strap can be adjusted for extra comfort.
It’s also important to remember that certain materials may be more durable than others, so look for high-quality fabrics when selecting a boonie hat. Finally, ensure you’re taking good care of your hat by storing it away from direct sunlight or heat sources when unused!

Additionally, you can add pins and patches to your boonie hat for an extra stylish look. Just ensure they are securely attached so they don’t come off in windy conditions!
With these tips, you can wear a boonie hat confidently and in style. Whether it’s a fashionable statement or functional protection from the elements, your custom-shaped boonie hat brim will make all the difference!
By following these guidelines, you’ll be able to enjoy wearing your boonie hat for years to come.
Why Do Boonie Hats Have Loops?
Boonie hats have looped around the brim for a few reasons. The main purpose of these loops is to attach foliage and other materials to camouflage the wearer’s head in certain environments. They can also be used to attach items such as a hat-mounted flashlight or radio antennae.
Finally, some boonie hats feature loops at the back that let you hang your hat when unused – perfect for keeping it off the ground during outdoor activities!
Overall, boonie hats are incredibly versatile pieces of headgear thanks to their unique features, such as adjustable chin straps and concealed loops. Whether you’re looking for protection from the elements or simply want an extra layer of anonymity, this hat will be handy.
By understanding the purpose of the loops and other features on a boonie hat, you’ll be able to get the most out of your headgear for any situation. With these tips in mind, you can ensure your boonie hat is always ready for action!
Conclusion
With the right knowledge on how to shape a boonie hat brim, you can ensure you have the perfect hat for any occasion. After following these steps and shaping your brim, you will be able to feel more confident in whatever kind of adventure you pursue.
Just remember that when it comes to shaping a boonie hat brim, it is not an overnight activity – you may need to practice several times before managing a desirable outcome. As they say, practice makes perfect, and so will a well-shaped boonie hat brim make perfect headgear!
Have fun experimenting with your hats till you find the look that’s just right for you.