
Do you ever find yourself drawn to clothing with unique details, like an exquisite pocket on a dress? If so, this blog post is for you! We’re going to show you how to make your own designs come alive by learning how to sew a pocket onto a dress. And it doesn’t have to be difficult – from choosing the right fabric and opening up the lining of your garment, we will detail everything that goes into making sure your pocket looks polished and professional.

So if you want to give your handmade garment some extra character and finesse, let’s get started on how to sew a pocket on a dress!
Why Add a Pocket to Your Dress?
First things first, let’s talk about why you would want to add a pocket to your dress. The answer is simple – pockets are both functional and stylish! They provide a convenient place for you to store small items like keys or lip balm, while also adding an interesting element to your overall look.
Plus, having pockets on your dress can also make it more comfortable to wear, as you won’t have to constantly hold onto your belongings. So whether you’re looking to add some practicality or pizazz to your dress, sewing on a pocket is the way to go.
Needed Materials
Before we dive into the steps, here are the materials you will need for this project:
- Dress With Lining
- Pocket Fabric
- Sewing Machine
- Thread in a Matching or Complementary Color
- Pins
- Scissors
- Ruler or Measuring Tape
10 Step-by-step Guidelines on How to Sew a Pocket on a Dress
Step 1: Choose Your Pocket Fabric
The first step is to choose the fabric you want to use for your pocket. Consider the weight and stretch of your dress fabric, and choose a pocket fabric that complements it well. You can opt for a matching or contrasting color depending on the look you are going for. It’s also a good idea to pre-wash and iron your pocket fabric before starting the sewing process. You want to make sure your fabric is clean and smooth for a professional finish.

Step 2: Prepare Your Dress
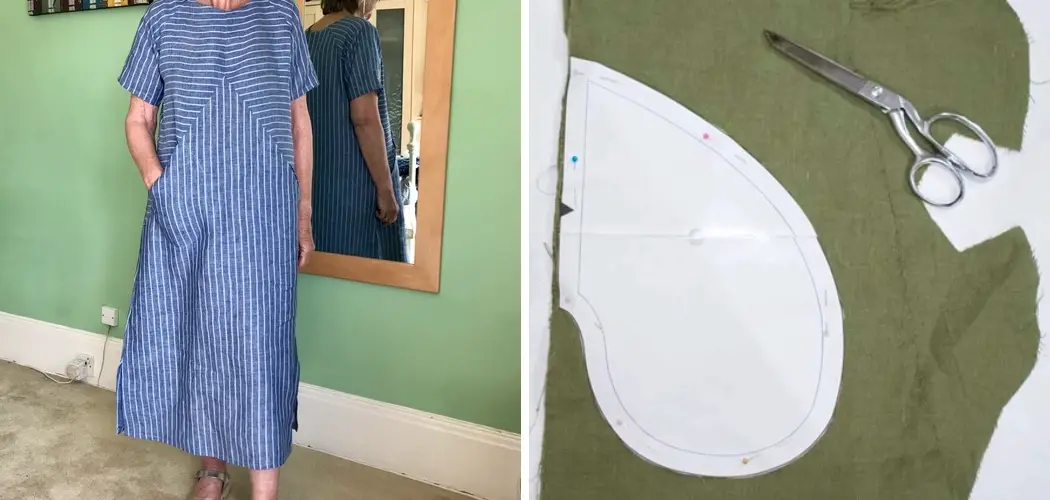
Lay your dress on a flat surface and identify where you want to place your pocket. Typically, pockets are positioned near the side seams or on the front of the dress, but you can get creative with placement. Once you have decided on a spot, use pins to mark where your pocket will go. It’s also helpful to make a template of your pocket shape and size using paper or fabric scraps.
Step 3: Cut Out Your Pocket Fabric
Using your template, cut out two pieces of fabric for the front and back of your pocket. Make sure to leave a small seam allowance around all sides, about 1/4 inch should do. If you want a wide pocket, you can adjust the size as needed. You can also choose to line your pocket fabric for a cleaner look. It’s a good idea to iron the edges of your pocket fabric for easier sewing.
Step 4: Pin Your Pocket Pieces
Place the front and back pieces of your pocket fabric right sides together and use pins to hold the edges in place. Make sure to align the edges carefully before sewing. It’s also a good idea to try out the pocket placement on your dress again at this point to ensure everything lines up correctly.
It’s better to make any necessary adjustments now rather than later on. You can also add a double layer of fabric to the top edge of your pocket for added durability.
Step 5: Sew the Pocket Pieces Together
Using a sewing machine, sew around the edges of your pocket pieces. Depending on your pocket shape, you may need to leave a small gap at the top or bottom for turning. Be sure to backstitch at the beginning and end of your seams for added strength. Once you have sewn all the edges, trim any excess fabric and clip the corners to reduce bulk. You can also use pinking shears to help prevent fraying.
Step 6: Turn and Press Your Pocket
Carefully turn your pocket right side out through the gap you left in the previous step. Use a pencil or chopstick to gently push out the corners for a crisp edge. Once your pocket is turned, iron it flat for a clean look. It’s also a good idea to iron the edges of the gap you left for turning for easier sewing later on. This is also a good time to try your pocket on your dress again to make sure everything lines up correctly.
Step 7: Prepare Your Dress Lining
If your dress has a lining, you will need to open it up at the side seams where your pocket will be placed. Carefully unpick the stitches and use an iron to press open the fabric. This step may require some patience and precision, but it’s worth the effort for a seamless pocket.

It’s also a good idea to measure the size of your pocket opening and mark it on your lining fabric for reference. You want to make sure your pocket will fit snugly and securely.
Step 8: Pin Your Pocket to the Lining
Place your dress on a flat surface with the lining open. Take your pocket and position it where you want it to go, making sure to align the edges with your markings. Use pins or basting stitches to hold the pocket in place. Make sure to check that your pocket is positioned correctly before moving on to the next step. Otherwise, you may end up with an uneven or crooked pocket.
Step 9: Sew Your Pocket
Using a sewing machine, sew around the edges of your pocket onto the lining fabric. Be sure to backstitch at the beginning and end of your seams for added strength. You can also sew along the top edge of your pocket for extra reinforcement. Once you have finished sewing, trim any excess threads and remove any basting stitches if used. It’s also a good idea to try out your pocket at this point to make sure it opens and closes smoothly.
Step 10: Close Your Dress Lining
Once your pocket is securely attached to the lining, carefully close up the side seam of your dress. Use a sewing machine or hand stitch to close up any openings and secure the lining back in place. Be sure to check that your pocket is still in the correct position before finishing off the seam. And voila! Your dress now has a stylish and functional pocket. It’s a simple addition that can make a world of difference in the convenience and style of your dress.
Following these steps on how to sew a pocket on a dress will help you sew a pocket on your dress with ease and precision. With practice, you can experiment with different pocket shapes and sizes to add unique touches to your garments. So go ahead and give it a try – you’ll be amazed at the difference a pocket can make! Happy sewing!

Additional Tips and Tricks
- If you are new to sewing, it’s always a good idea to practice on scrap fabric before working on your actual garment.
- Adding a small piece of interfacing to the wrong side of your pocket fabric can help prevent it from stretching out while sewing.
- You can also add decorative elements such as buttons, embroidery, or lace trim to your pockets for added flair.
- If you are using a lightweight fabric, consider using a lining fabric or interfacing for added stability and durability.
- Don’t be afraid to get creative with your pocket placement – try out different options and see what works best for your dress design.
- Always iron your fabric before sewing to ensure clean and smooth edges.
- And most importantly, have fun with it! Sewing is a skill that takes practice, so don’t get discouraged if your first pocket doesn’t turn out perfectly. Keep trying and you’ll soon be a pro at sewing pockets on dresses!
Frequently Asked Questions
Q: Can I Sew a Pocket on Any Type of Dress?
A: Yes, you can sew a pocket on any type of dress as long as it has side seams or open areas where the pocket can be attached. It may require some adjustments depending on the style and fabric of your dress, but with some practice, you can sew pockets onto any style of dress.
Q: Can I Add a Pocket to a Dress That Already Has a Lining?
A: Yes, you can add a pocket to a dress that already has a lining. The process may be slightly more complicated as you will need to open up the lining and sew the pocket onto it, but it is still possible. Just make sure to carefully measure and mark your pocket placement before sewing.

Q: Can I Sew a Pocket on a Dress by Hand?
A: Yes, you can sew a pocket on a dress by hand if you do not have access to a sewing machine. It may take a bit longer, but the same steps can be followed. Just make sure to use strong and even stitches for added durability.
Conclusion
With a simple pocket for a dress or blouse, you can make any outfit look stylish and chic. Sundresses, shift dresses, and A-line dresses are all great options for spicing up your wardrobe with the addition of a pocket. Practicality aside, adding a pocket will also add an unexpected pop of color that can help you stand out in the crowd.
By following these steps on how to sew a pocket on a dress, you’ll have your own unique creation hanging in your closet before you know it! So go ahead — break out those needles and thread and try giving your next dress or blouse an extra special accent with pockets. Who knows — it may end up being one of the best pieces in your wardrobe!