
As a sewing beginner, finding different ways to embellish your sewing projects and garments can be both exciting and intimidating. One of the best ways to add some texture and volume to your sewing projects is by using a ruffler foot.
The ruffler foot is an attachment for your sewing machine that makes gathering fabrics a breeze. If you’re new to using a ruffler foot, this guide will show you how to use a ruffler foot in no time.

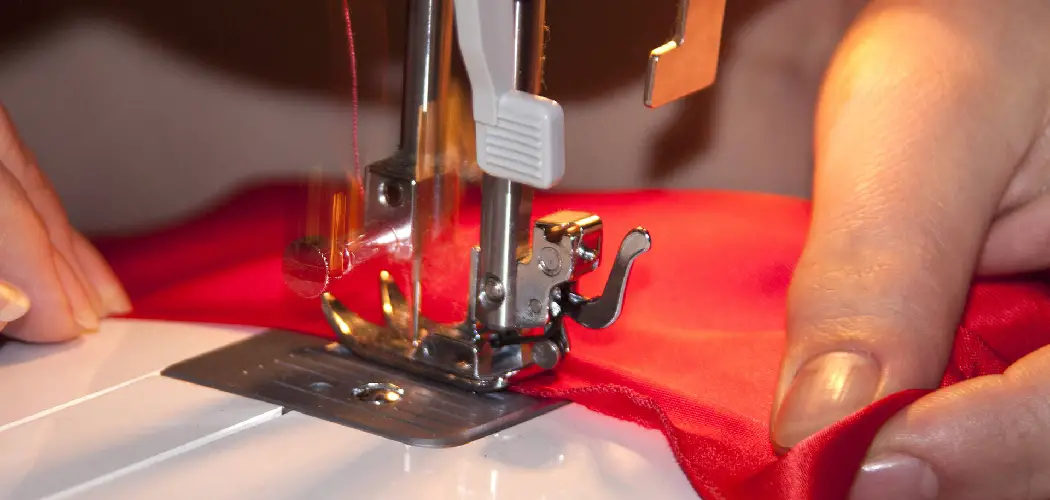
What is a Ruffler Foot Attachment?
If you’re a sewing enthusiast, you may have heard of a Ruffler Foot Attachment. But what exactly is it? Essentially, a Ruffler Foot Attachment is a sewing foot that creates gathers in fabric. It works by feeding the fabric through at a set interval, creating a pleat or gathering in the material.
This attachment can be incredibly useful for creating intricate designs, adding texture to a project, or simply saving time manually gathering fabric. Whether you’re a seasoned seamstress or just starting out with your sewing machine, a Ruffler Foot Attachment could be a game-changer in your crafting repertoire.
How Does a Ruffler Foot Attachment Work?
If you’re new to the sewing world, you may wonder how a ruffler foot attachment can make your sewing projects easier and more professional-looking. Essentially, a ruffler foot attachment is a specialized piece that can be clipped onto your sewing machine instead of the normal foot.
Once attached, the ruffler foot helps to create pleats or ruffles in your fabric as you sew. One of the best things about the ruffler foot attachment is that it allows you to easily adjust the size and depth of your ruffles with just a few simple adjustments. With a little bit of practice, you’ll be able to add beautiful ruffles or pleats to your sewing projects with ease!
How to Use a Ruffler Foot: A Comprehensive Guide for Sewing Beginners
1. Know Your Ruffler Foot
Ruffler feet come in many different forms, depending on the brand and model of your sewing machine. Before you start using your ruffler foot, it’s important to read up on the manual to determine the specific requirements of your attachment. Take note of the different settings that are available to you so that you can adjust the ruffling to your preferred style.

2. Preparing Your Fabric
Before you start using your ruffler foot on your fabric, you need to prepare it accordingly. Straighten out the fabric, iron it, and hem it if needed. You can also prepare your fabric by folding it at the ruffled edge and pinning it in place so it’s easier to attach to the ruffler foot. Once you’ve got your fabric ready, you’re ready to start ruffling.
3. Attaching the Ruffler Foot
The ruffler foot is easy to attach to your sewing machine, and it usually snaps onto the shank. Once it’s secured, lower the foot so it’s in place and ready for use. Depending on your sewing machine model, there may also be screws or bolts that need to be tightened or adjusted. Take note of these settings so that you can adjust them accordingly.
4. Setting the Tension
Tension settings are critical to creating beautiful, even ruffles. It’s essential to maintain consistent tension to avoid wrinkles in your fabric. If you’re new to using a ruffler foot, start with the lowest tension setting and work your way up as you get more comfortable and familiar with the attachment.
Additionally, you should always be mindful of the speed of your sewing machine and adjust accordingly.
5. Experiment with Different Settings
One of the best things about a ruffler foot is that it allows you to experiment with different settings and styles. You can adjust the amount of fabric being gathered, the spacing between gathers, and even create different pleats. Take some time to play around with these settings to see what looks best for your project.
6. Use a Guide
If you’re having trouble keeping the fabric straight while using the ruffler foot, try using a guide to help keep things in place. You can use a straight-edge ruler or even create a temporary guide by taping down some tissue paper with the desired width of your ruffle.
7. Practice Makes Perfect
As with any sewing attachment, practice makes perfect when using a ruffler foot. Don’t be discouraged if your first few attempts don’t turn out perfectly – keep practicing and experimenting with different settings until you find what works best for you. Before you know it, you’ll be a pro at using a ruffler foot, creating beautiful gathered pieces with ease. So, don’t be afraid to try new things and have fun while using your ruffler foot! Keep these tips in mind, and you’ll be well on your way to becoming a ruffling expert.

5 Tips for Ruffling with a Ruffler Foot Attachment
1. Set the Stitch Length and Tension Before Using the Ruffler Foot
Before using a ruffler foot attachment, it is important to set the stitch length and tension on your sewing machine. This will ensure that the fabric is properly fed through the ruffler foot and that the stitches are even and consistent. Be sure to test out a few scrap pieces of fabric before starting your project to ensure you have the correct settings.
2. Use a Walking Foot When Sewing With Heavy Fabrics
When working with heavy fabrics such as denim or canvas, it is best to use a walking foot when sewing with a ruffler foot attachment. A walking foot helps to evenly feed multiple layers of fabric through the machine, which makes it much easier to work with heavier fabrics.
3. Adjust the Ruffler Foot Settings According to Your Project
The ruffler foot has several adjustable settings that allow you to create different types of pleats and gathers in your fabric. It is important to adjust these settings according to your project to get the desired effect. Experiment with different settings until you find one that works for your project.
4. Take Care When Removing Fabric From The Machine
When removing fabric from the machine after using a ruffler foot attachment, be sure to not stretch or pull on the pleats or gathers created in your fabric. Doing so can cause them to become distorted or uneven, which could ruin your project. Instead, carefully remove each pleat or gather from around the presser foot before lifting up on the fabric itself.

5. Press Pleats and Gathers After Sewing
Once you have finished sewing your pleats or gathers with a ruffler foot attachment, it is important to press them after sewing for them to hold their shape better over time. You can use either an iron or steamer on a low heat setting for this step, but be sure not to press too hard as this could distort your pleats or gathers.
5 Benefits of Using a Ruffler Foot
1. Speed
Using a ruffler foot can significantly speed up gathering fabric into pleats or ruffles. This is because the foot is designed to automatically gather and pleat fabric as it passes through the machine, making it much faster than manually gathering and pleating fabric by hand.
Additionally, the ruffler foot can be adjusted to create different types of pleats and ruffles, giving you more control over the look of your finished product.
2. Consistency
A ruffler foot also helps to ensure consistency when creating pleats and ruffles. Since the foot gathers and pleats fabric automatically, each piece will be uniform in size and shape. This makes it easier to create garments with consistent pleating or ruffling throughout, resulting in a professional-looking finish.
3. Versatility
The versatility of a ruffler foot also makes it a great tool for sewing projects. Not only can it be used to create pleats and ruffles, but it can also be used for gathering fabric, attaching lace trim, creating pintucks, or even making decorative seams. The possibilities are endless!
4. Easy To Use
Using a ruffler foot is surprisingly easy once you get the hang of it! All you need to do is attach the foot to your sewing machine, adjust the settings according to your desired effect, and then feed your fabric through as normal. With practice, you’ll soon be able to quickly create beautiful pleats and ruffles with ease!
5. Cost Effective
Finally, using a ruffler foot is an incredibly cost-effective way to add detail to garments or other sewing projects. The initial cost of buying a good quality ruffler foot may seem high at first glance.
Still, when compared with the time saved from not having to manually gather and pleat fabric by hand – not to mention all of the other uses for this versatile tool – it quickly becomes apparent that investing in one is well worth it!

Conclusion
Using a ruffler foot is an added skill that any sewing beginner should add to their arsenal. By knowing how to use this attachment, you can create beautifully ruffled edges that give any garment a touch of elegance. Remember that the key to using a ruffler foot is to know your attachment, prepare your fabric properly, set your tension right, and ruffle your fabric at an appropriate speed.
With enough practice, using a ruffler foot will become second nature, and soon enough, you’ll be creating stunning ruffles that will make your sewing projects stand out. Thanks for reading our post about how to use a ruffler foot.