
Do you know how to measure the length of a zipper? Whether you’re working on repairing an old jacket or making some clothing alterations, it is important to get the correct size for your project. Measuring and cutting zippers can be quite difficult, but with this guide, we will show you exactly how to do it!

Learn all about the various tools, techniques, and tips for measuring zippers so that you can work confidently and accurately every time. In this blog post on how to measure a zipper length, you will learn everything.
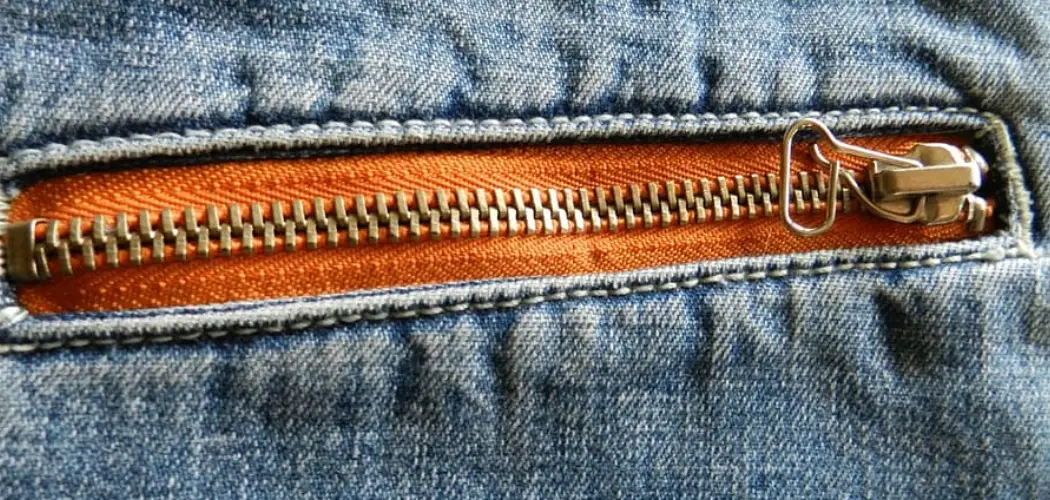
Needed Tools and Materials
Given below is a list of the basic tools and materials needed to measure zippers correctly and accurately:
- Pair of Scissors
- Ruler or Tape Measure
- Zipper Foot or Regular Sewing Machine Foot
- Pencils, Chalk, or Pins for Marking Zippers
11 Step-by-step Guidelines on How to Measure a Zipper Length
Step 1: Measure the Length
Take one of the ends of the zipper and measure its length using either a ruler or tape measure. Then, measure the length of the other end. Make sure to get the exact measurement by measuring the entire length of both zipper ends. It is always a good idea to measure twice to ensure accuracy.
Step 2: Mark the Measurement
Once you have measured both ends of the zipper, use a pencil, chalk, or pin to mark the measurement at both ends. Make sure that your marks are visible and accurate so that you can refer back to them later on. Otherwise, you may end up with the wrong size zipper.
It is also important to make an additional mark in the middle of the zipper for reference. But for this step, you do not have to measure the length of the middle part. It is just for reference. But it is important for the following steps.
Step 3: Double-check the Measurement
Before cutting the zipper, double-check your measurements once more. This will help to ensure accuracy when it comes time to sew the zipper into place. It is also important to make sure that both ends of the zipper are of equal length.
But if the measurements are not accurate, then a zipper foot will be able to adjust the length so that it fits perfectly. It is important to ensure accuracy at this stage as it will save you time and hassle in the long run.

Step 4: Cut the Zipper
Using a pair of scissors, cut off any extra material from both sides of the zipper based on your marked measurements. Make sure not to leave any excess fabric so that the zipper fits perfectly in place when finished.
If you are using a regular sewing machine foot, it is important to cut the zipper just slightly longer than your marked measurements. This will give you some room for adjustment if needed. But if you are using a zipper foot, the length of the zipper should be exactly according to your marked measurements.
Step 5: Secure the Ends
Once you have cut both ends of the zipper, it’s time to secure them. Use a regular sewing machine foot or a zipper foot to firmly attach both ends of the zipper together. But make sure not to sew the zipper too tight as it may cause tension and create puckering.
However, if you are using a regular sewing machine foot, it is best to keep the tension slightly loose. It is important to keep the tension even throughout the entire length of the zipper so that it looks neat and professional when finished.
Step 6: Check Measurements Again
Check your measurements once more before proceeding with the next steps. Double-checking is always a good idea. It will help to ensure accuracy when it comes time to attach the zipper.
This is especially important if you are using a regular sewing machine foot. But if you are using a zipper foot, the length of the zipper should be exactly according to the marked measurements. If it is not, you may need to adjust the length slightly.
Step 7: Sew On The Zipper Foot
When you have finished attaching the ends of the zipper together, it’s time to sew on the zipper foot. Place the base of the zipper onto your sewing machine and carefully guide it through as you sew it into place.
It is important to keep the tension even throughout the entire length of the zipper so that it looks neat and professional when finished. If you are using a regular sewing machine foot, it is best to keep the tension slightly loose. But if you are using a zipper foot, the tension should be slightly firmer.

Step 8: Test The Fit
Once you have sewn on the zipper foot, test out how well it fits by unzipping and zipping it up. Make sure that the zipper moves smoothly and that you can open and close it without any problems. It is important to test the fit before proceeding with any more steps.
If the zipper fits too tightly or if it snags when opened and closed, you may need to adjust the length of the zipper slightly. This is especially important if you are using a regular sewing machine foot.
Step 9: Trim Off The Excess Threads
Once you have tested out the fit of the zipper, trim off any excess threads using a pair of scissors. This will help to keep your project looking neat and professional. Although trimming off the excess threads is not necessary, it will help to make sure that your zipper looks neat and even. It is also important to make sure that the ends of the zipper are firmly attached before trimming off any excess threads.
Step 10: Check For Accuracy Again
It’s always important to double-check your measurements one more time before finishing up. Make sure that everything is accurate and exactly as it should be before moving on to the next step. Otherwise, you may end up with the wrong size zipper. If your measurements are not accurate, a zipper foot will be able to adjust the length so that it fits perfectly.
Step 11: Fasten And Zip Up The Zipper!
The final step in measuring a zipper length is to fasten and zip it up. This will make sure that your project looks perfect and professional. Always make sure to check the fit of the zipper one more time before fastening it in place.
This will help to ensure accuracy when it comes time to sew the zipper into place. Once everything is correct, you’re done! You have successfully measured a zipper length and zipped it up with accuracy.

That’s it! You now know how to measure a zipper length! With these step-by-step instructions, you’ll be able to accurately measure and cut zippers for any project with confidence. Now get sewing! Good luck!
Frequently Asked Questions
Q: Is It Possible to Measure a Zipper Without a Ruler or Tape Measure?
A: Unfortunately, no. A ruler or tape measure is the most accurate way to measure a zipper length. However, you can also use other tools such as pins or chalk to mark the measurements before cutting the zipper.
Q: What Is The Best Way To Secure Zipper Ends?
A: The best way to securely attach both ends of the zipper is by using either a regular sewing machine foot or a zipper foot. This will ensure that your project looks neat and professional.
Q: Can I Use Pins Instead of Scissors to Cut Zippers?
A: No, it is not recommended to use pins instead of scissors when cutting zippers. Using scissors provides more accuracy and control than using pins, which can make it difficult to get an exact measurement.
Q: How Long Does It Take To Measure A Zipper?
A: Depending on the size of the zipper and your experience level, measuring a zipper length can take anywhere from 10 minutes to an hour or more. However, with practice, you will soon become a pro at measuring zippers in no time!

Conclusion
Ultimately, measuring the length of a zipper is important to ensure it meets your needs and expectations. You need to measure the teeth, puller, and tape lengths separately so you can determine the total length of the zipper. With these steps in mind, you are now ready to find the right zipper for all your projects!
Keep exploring this helpful guide for additional tips on how to measure zippers. And if you’re looking for a new project, why not try making a rectangular fabric basket?
This is an especially great project if you already have extra fabric lying around but still want something fun and useful to make with it. With some basic sewing supplies and instructions from our blog post on how to measure a zipper length, you can make something that looks beautiful, serves its purpose, and fits perfectly with any décor. Try out these tips today for your next crafting project.