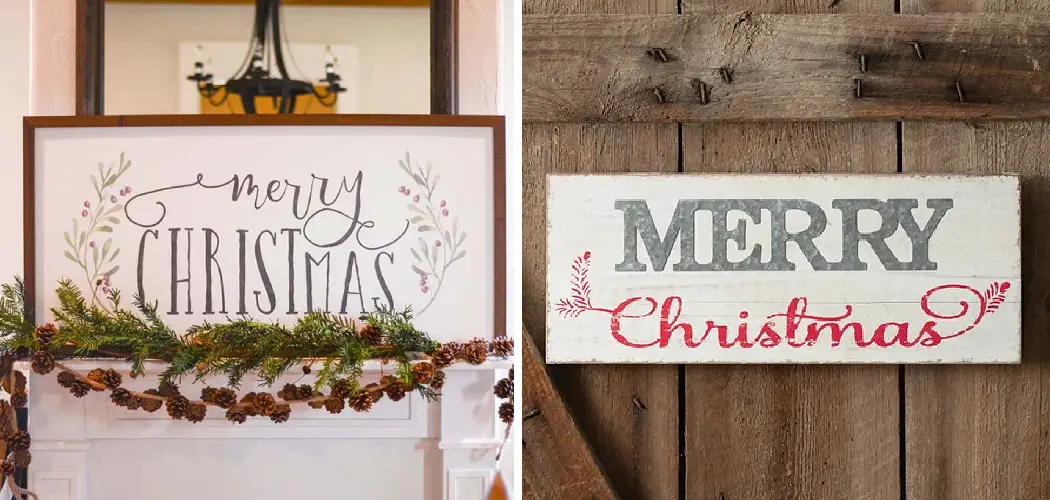
Creating Christmas signs is a wonderful way to add festive and personalized decorations to your home during the holiday season. Whether you want to make signs with joyful messages, holiday-themed images, or a combination of both, this step-by-step guide on how to make christmas signs will walk you through the process of making beautiful Christmas signs.

Materials Needed
Given below Necessary Materials for this project:
- Wood Board or Sign Blank
- Sandpaper or Sanding Block
- Acrylic Paint in Various Colors
- Paintbrushes (Thin and Medium-sized)
- Chalk or Pencil
- Stencils or Letter Stickers
- Transfer Paper
- Clear Sealer or Varnish
- Ribbon or Twine (Optional)
- Hot Glue Gun (Optional)
- Protective Gear (Gloves, Goggles)
Step By Step Guidelines How to Make Christmas Signs
Step 1: Choose a Design
Decide on the design or message you want your Christmas sign to convey. This could be a simple “Merry Christmas,” a holiday-inspired quote, or an image like a snowflake or Christmas tree. Consider the size and shape of your sign as you select your design. But always remember to maintain safety precautions during this project.
Step 2: Prepare the Wood Sign
If you are using a raw wood board or sign blank, start by sanding it smoothly. Use sandpaper or a sanding block to remove any rough edges or splinters. Wipe away any dust or debris with a clean cloth. It is better if you clean it thoroughly during the cleaning process.
Step 3: Paint the Background
Choose a background color for your sign and paint the entire surface. Use a medium-sized paintbrush for larger signs or a smaller brush for smaller signs. Apply two to three coats of paint, allowing each coat to dry completely before applying the next. This will ensure a solid and even background color.

Step 4: Create a Layout
After allowing the background paint to dry, you can lightly sketch the layout of your design on the sign using chalk or a pencil. This will serve as a helpful guide when you paint or use stencils or stickers. After creating a layout you should be ready to add your design. Otherwise, you should not continue.
Step 5: Paint the Design
If you are confident in your painting skills, you can paint the design freehand directly onto the sign using acrylic paints and a thin paintbrush. Alternatively, you can use stencils or letter stickers to create your design. Place the stencil or sticker on the sign and carefully paint or fill in the letters or image using a contrasting color.
Step 6: Use Transfer Paper for Detailed Designs
For more intricate designs or lettering, use transfer paper. Place the transfer paper on top of the sign, followed by your design or lettering. Trace over the lines using a pencil or ballpoint pen, pressing firmly. Remove the transfer paper and you will have a faint outline of your design on the sign.
Step 7: Paint within the Guidelines
With the outline in place, paint within the guidelines using small brushes and acrylic paints. Take your time and use multiple coats if needed to achieve vibrant colors and precise lines. Allow each layer to dry completely before adding additional layers or details. But be careful, as it is easy to make mistakes or smudge paint.

Step 8: Add Highlights and Shadows
To add depth and dimension to your design, consider adding highlights and shadows. Mix a lighter shade of paint for highlights and a darker shade for shadows. Apply these accents to certain areas of your design to make it appear more three-dimensional. This will help your sign stand out and be more eye-catching.
Step 9: Seal the Sign
Once the paint is dry, protect your Christmas sign by applying a clear sealer or varnish. This will help preserve the paint and keep it looking fresh for years to come. Follow the instructions on the sealer or varnish for proper application and drying times. It is better to use protective gear such as gloves and goggles while using sealers or varnishes.
Step 10: Optional Decorative Touches
If desired, add decorative touches to your sign. You can attach ribbon or twine to the top to create a hanger or use a hot glue gun to secure small embellishments like bows, beads, or faux greenery. But remember, these touches are purely optional. If you’d like to keep it simple, your sign will still look beautiful and be ready for display.
These are the necessary steps for creating a Christmas sign. With some patience and creativity, you can make signs that will bring holiday cheer to your home! Don’t forget to use protective gear whenever needed while working on this project. Have fun and be safe! working
Step 11: Display and Enjoy
Find the perfect spot to display your handmade Christmas sign. You can hang it on a wall, prop it up on a shelf, or incorporate it into a holiday centerpiece. Admire and enjoy your creation throughout the holiday season! Always remember to use proper caution while displaying your sign and keep it away from any potential sources of danger.

Remember, creativity and personalization are key when making Christmas signs. Feel free to experiment with different designs, colors, and techniques to make unique and festive decorations that reflect your own style and holiday spirit. Following this article on how to make christmas signs.
Do You Need to Use Professionals?
Whether you need to use professionals to make Christmas signs depends on your level of skill and the complexity of the signs you want to create. If you have experience with crafts and DIY projects, you may be able to make Christmas signs on your own. However, if you lack the necessary skills or want a more intricate and professional-looking result, it might be a good idea to seek help from a professional or an experienced artist.
How Much Will It Cost?
Creating Christmas signs can be a wonderful and cost-effective DIY project. The total cost will depend on several factors, including the size and materials you choose, the complexity of the design, and any additional decorations or embellishments you add.
The cost of wood or foam board can range from $5 to $20 or more, depending on the size and type you select. Acrylic paint is relatively affordable and can cost around $1 to $5 per color tube, depending on the brand and quality. For a basic set of colors, you might spend $5 to $20.
Frequently Asked Questions
Q1: Can I Use Any Type of Wood for Making Christmas Signs?
A1: While you can use various types of wood for making Christmas signs, it’s essential to consider the durability and appearance of the wood. Opt for materials like pine or plywood, as they are easily accessible, affordable, and suitable for indoor use. Hardwoods like oak or cherry can also be used for a more premium finish, but keep in mind that they might be costlier.

Q2: Do I Need Artistic Skills to Create Christmas Signs?
A2: No, you don’t need to be an artist to make Christmas signs. Many designs can be achieved using stencils or simple patterns. You can find ready-made stencils with holiday-themed messages and images to make the process easier. Additionally, painting techniques like sponging or blending colors can create stunning effects without requiring advanced artistic skills.
Q3: What Type of Paint is Best for Christmas Signs?
A3: Acrylic paint is the most commonly used and recommended paint for Christmas signs. It is available in a wide range of colors, dries quickly, and adheres well to wood surfaces. Acrylic paint is also water-based, making it easy to clean up. Choose high-quality acrylic paint for vibrant and long-lasting results. If you want a more rustic or weathered look, consider using chalk paint.
Q4: How Can I Ensure the Glitter on My Christmas Sign Stays in Place??
A4: To ensure the glitter on your Christmas sign stays in place, apply it while the paint is still wet. Sprinkle the glitter evenly over the desired areas and gently tap off any excess. Allow the paint and glitter to dry completely before handling the sign. If you want to prevent glitter from shedding, you can also use a clear sealant spray over the sign after the paint and glitter have dried.
Q5: Can I Make Christmas Signs With My Kids as a Fun Holiday Activity?
A5: Absolutely! Making Christmas signs can be a fun and engaging holiday activity for kids and adults alike. It’s a wonderful opportunity to bond with your children while fostering their creativity. Consider using child-friendly materials, like washable paint and kid-sized brushes.
Let them choose their favorite colors and designs, and enjoy the joy of creating festive signs together. Remember to supervise younger children when using tools like hot glue guns or scissors.
Conclusion
In conclusion on how to make christmas signs, making Christmas signs is a creative and enjoyable DIY project that allows you to add a personalized touch to your holiday decor. By following the steps outlined in this guide, you can create beautiful and festive signs to adorn your home during the Christmas season.


