
Decorating a room for kids can be fun and challenging at the same time. Parents are always on the lookout for creative ways to spruce up their children’s bedrooms. Adding suncatcher stickers is an excellent way to brighten up your kid’s space. Suncatcher stickers are colorful, translucent adhesive stickers that stick on windows and other glass surfaces. Making your very own suncatcher stickers is easy and fun. In this post, we’ll show you how to make suncatcher stickers that your kids will love.

Can You Make Suncatcher Stickers?
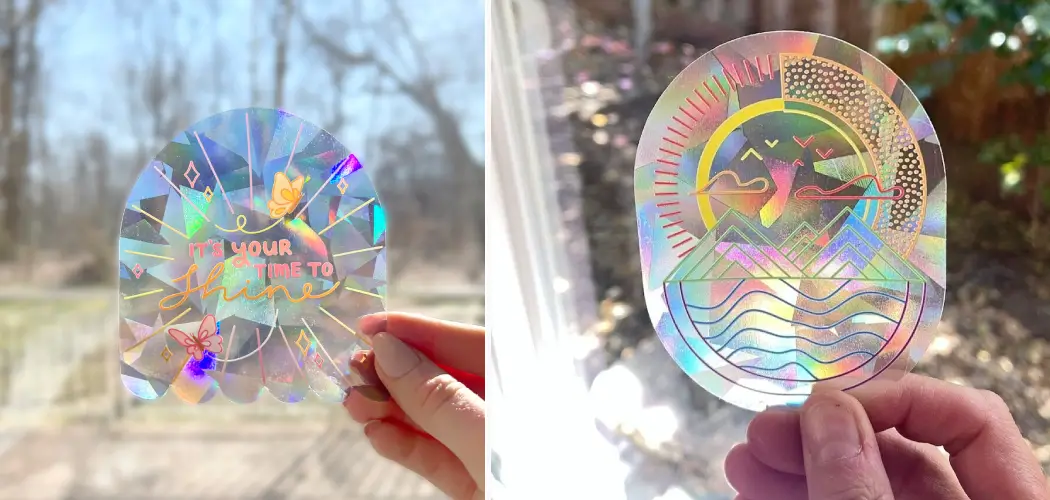
Suncatchers are beautiful and vibrant. They brighten up any space with a splash of color, reflecting dazzling patterns as they catch the light. But what if you could also make suncatchers as stickers? That’s right, you can make suncatcher stickers! This fun and easy craft is perfect for kids and adults alike. The process involves creating a design with permanent markers on a clear plastic sheet.
Once you finish drawing, adding color, and adding all of your embellishments, it’s time to stick it up! The result? An instant suncatcher to adorn your windows or walls. These make wonderful gifts or decorations for all occasions. So, grab your markers and sheets, and let your creativity shine with these amazing suncatcher stickers!
Why Should You Make Suncatcher Stickers?
Making suncatcher stickers is a fun and exciting way to pass the time and create something beautiful. These stickers can be a unique addition to any window or glass surface in your home or office, allowing the natural sunlight to shine through and create beautiful patterns.
Not only can this be a fun activity for children and adults, but it can also have meditative benefits, as the process of creating intricate designs requires focus and patience. By making suncatcher stickers, you can add a personal touch to your home decor while also enjoying the therapeutic benefits of crafting.

A Guide on How to Make Suncatcher Stickers
1. Gather Supplies
The first step in making suncatcher stickers is gathering the necessary supplies. This includes clear contact paper, craft scissors, colorful tissue paper, a ruler, and a pencil. You can find all of these items at your local craft store or online. Once you have all of the supplies, you can begin to make your suncatcher stickers.
2. Cut Contact Paper
Once you have all your supplies, you will need to cut the contact paper into circles or other shapes roughly 3-4 inches in diameter. Use a ruler to measure out the shapes and then use craft scissors to cut them out. If you plan on making multiple suncatchers, it may be helpful to trace out multiple shapes on the contact paper before cutting them out.
3. Cut Tissue Paper
Now that you have cut out your contact paper shapes, it’s time to cut out pieces of tissue paper in various colors and sizes that will be used as decorations for your suncatchers. Try to choose colors that complement each other and avoid using too many different colors, as this can make your suncatchers look cluttered and busy. When cutting the tissue paper pieces, make sure they are small enough to fit inside the contact paper shape without overlapping each other too much.

4. Arrange Tissue Paper
Once you have cut out all of the tissue paper pieces, it’s time to arrange them on top of the contact paper shape. Start by placing one piece in the shape’s center and then build outward from there with additional pieces until the entire shape is filled with colorful tissue paper decorations. Make sure not to overlap any pieces too much, as this can cause them to stick together when applied later.
5. Cover with Contact Paper
After arranging all of your tissue paper pieces on top of one of the contact paper shapes, place another piece of contact paper over the top so that it covers all of the decorations underneath it completely. Press down firmly around each decoration so that none of them move when applying pressure with your fingertips or a ruler if needed. Once everything is secure underneath, carefully trim away any excess contact paper around the edges using craft scissors or an X-Acto knife if necessary.
6. Peel off Backing
Now that your suncatcher sticker has been created, it’s time to peel off its backing so that it can be applied wherever desired! Carefully peel back one corner at a time while pressing down firmly around each decoration with your fingertips until its entire backing has been removed completely without any issues or snags occurring along its edges or corners during the removal process. Once this is done, you should now have a beautiful, vibrant, hand-crafted suncatcher sticker ready for application!
7. Apply Suncatcher Sticker
The final step in making a suncatcher sticker is applying it wherever desired! Suncatcher stickers look great on windows, mirrors, walls, furniture, laptops, and more! To apply yours, simply peel off its backing (as previously described ) and place it onto any clean surface while pressing down firmly around each decoration with your fingertips. After this is done, simply stand back and admire how beautiful and unique your new hand-crafted creation looks!

Some Considerations Things When You Need to Make Suncatcher Stickers
Suncatcher stickers are a fun and creative way to add color and cheer to any room or surface. When considering making your own, there are a few things to remember to ensure success. The first is choosing the right materials. High-quality stickers and vibrant colors go a long way in achieving a stunning result.
Next, consider the design – simplicity is key, as intricate designs may be harder to cut and apply. Also, when choosing a surface to stick the suncatcher on, ensure it is clean and dry to avoid imperfections. Finally, display your masterpiece where the sun can shine through and enhance its beauty. Considering these considerations, you will surely create a stunning and mesmerizing suncatcher sticker.
5 Benefits of Making Suncatcher Stickers
1. Stress Relief
Making suncatcher stickers can be a great way to reduce stress and anxiety. The creative process of designing and crafting the stickers helps to take your mind off of any worries or troubles you may have, allowing you to relax and enjoy yourself. Additionally, the bright colors and shapes used in the design of the stickers can help lift your mood and create a sense of calmness.
2. Develops Fine Motor Skills
Making suncatcher stickers is also a great way to develop fine motor skills. As you craft your sticker designs, you will use small tools such as scissors and tweezers to cut shapes from paper or plastic film and manipulate materials such as glue, tape, and glitter. All of these activities require precise movements with your hands and fingers, which can help improve your skill over time.
3. Enhances Creativity
Creating suncatcher stickers is also an excellent way to unleash your creativity. You can use various materials, such as paper, plastic film, fabric scraps, beads, buttons, ribbons, sequins, feathers, etc., to make unique designs that reflect your style. Furthermore, you can experiment with different techniques, such as layering materials or using different colors and patterns to create interesting effects.
4. Affordable Activity
Making suncatcher stickers is also an affordable activity that requires minimal supplies. All you need are some basic art supplies such as scissors, tweezers, glue sticks or tape runner adhesive, plastic film or contact paper, and glitter. Most of these items are inexpensive and easy to find at any local craft store or online retailer.

5. Fun for Everyone
Finally, making suncatcher stickers is enjoyable for people of all ages. Kids will love creating their own designs, while adults can appreciate the therapeutic benefits of crafting. It’s also a great group activity since everyone can work together on one project.
Some Common Mistakes People Make When Trying to Make Suncatcher Stickers
Suncatcher stickers are a favorite among those looking to add some color and charm to their windows. Creating these beautiful decorations requires some skill and patience. However, many people still make some common mistakes that hinder the final result. One of the most significant errors is not thoroughly cleaning the surface. This can prevent the stickers from adhering properly and result in them slipping off. Also, not allowing the paint to dry before peeling off the stencils can ruin the design. Another mistake is using too much paint, making it challenging to peel off the stencil. Avoiding these common errors can make the creation of suncatcher stickers a more enjoyable and satisfying experience.
Conclusion
Making suncatcher stickers is an excellent activity for parents and kids. It’s affordable, fun, and easy to make. Making suncatcher stickers can be a way to bond with your kids while they create beautiful art that they can display in their rooms.
With tissue paper, contact paper, markers, and scissors, you can make endless possibilities of suncatcher stickers to brighten up your kids’ space. Follow these simple steps, and you’ll be amazed at how easy it is to make impressive suncatcher stickers. Thanks for reading our post about how to make suncatcher stickers.