
Are you planning a special occasion that requires you to have an elegant sash? Or maybe you just like making crafts and would love to learn how to create a beautiful sash in no time at all. Whatever the reason, it’s easy and rewarding to make your own custom-made sashes. With just a few materials, some creative know-how, and our easy-to-follow tutorial on “how to make sash in a dash,” you’ll be outpacing those store-bought versions in no time!
Sashes are an ideal way of making sure you look your absolute best. From elegant weddings and formal dinners to relaxed get-togethers with friends, this stylish accessory can complete any ensemble. In this blog post, we will show you how to make sash in a dash – it’s simpler than you think! Keep reading to find out our tips on creating your own stunning statement piece.

Why May You Want to Make Sash in a Dash?
1 . To Make Your Own Unique Sash
By learning how to make a sash in a dash, you can create a unique and personalized sash for yourself or others. Whether it’s for a special event like a wedding or graduation ceremony, or just for fun, making your own sash allows you to choose the design, color, and materials that best suit your style.
2. To Save Money
Making a sash in a dash can also be a cost-effective option compared to buying one from a store or getting it custom-made. With some basic materials and tools, you can create a beautiful sash at a fraction of the cost.
3. To Express Your Creativity
Making a sash allows you to let your creative juices flow. You can experiment with different materials, colors, and techniques to create a unique sash that truly reflects your personality and style.
4. To Have Fun with Friends
Making sashes in a dash can be a fun activity to do with friends. You can get together and make matching sashes for an event or have a crafting party where everyone makes their own personalized sash.

5. To Add a Personal Touch to Gifts
A handmade sash can be a thoughtful and personal touch to add to gifts for special occasions like birthdays, baby showers, or bridal showers. By making the sash yourself, you can add a heartfelt message or inside joke to make the gift even more meaningful.
How to Make Sash in a Dash in 5 Easy Steps
Step 1: Gather the Materials
Before you can make your sash in a dash, you will need to gather all of the necessary materials. You will need:
- Fabric of your choice
- Measuring tape or ruler
- Scissors
- Sewing machine (or needle and thread)
- Pins
Make sure to choose a fabric that is sturdy enough to hold its shape, but not too thick that it will be difficult to work with.
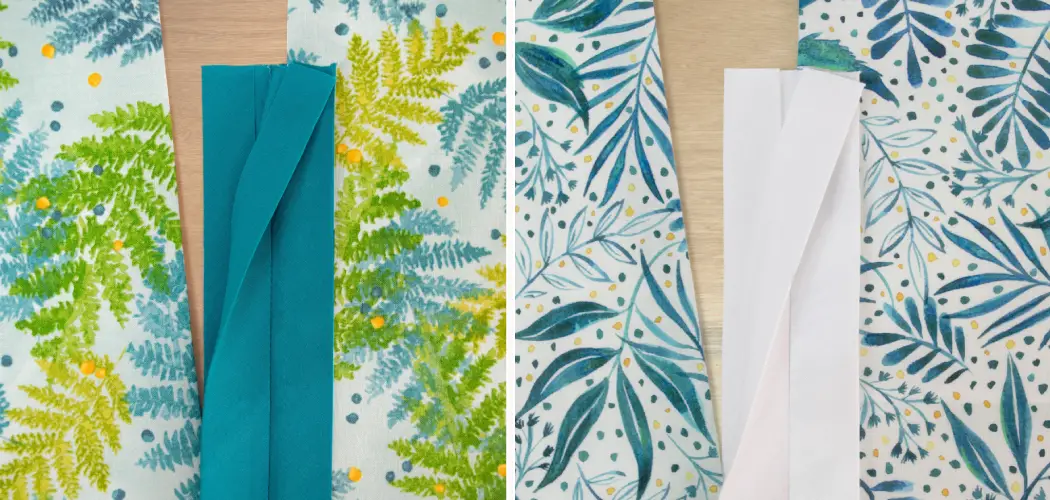
Step 2: Measure and Cut the Fabric
Using your measuring tape or ruler, measure out a long strip of fabric in the desired length and width for your sash. Make sure to add an extra inch on each side for seam allowance. Once you have your measurements, use your scissors to cut out the fabric strip.

Step 3: Sew the Ends Together
Take the two ends of your fabric strip and place them right sides together. Pin in place and then sew along the edge with a straight stitch, leaving about half an inch seam allowance. Once you have finished sewing, turn the sash right side out.
Step 4: Create Fringe (Optional)
If you want to add a fringe detail to your sash, now is the time to do so. Using your scissors, make cuts along the length of the fabric strip, stopping about half an inch from the sewn edge. This will create a fringed effect.
Step 5: Finish and Wear Your Sash
To finish off your sash, iron the edges for a clean and polished look. Then, simply tie your sash around your waist or wherever desired for a stylish and chic accessory.
Some Extra Tips to Make Sash in a Dash
1 . Use High-Quality Fabric
One of the key elements in making a perfect sash is to use high-quality fabric. This not only makes your sash look more professional but also ensures that it is durable and will last for multiple uses. Also, the high quality fabric will give a better finish and make your sash stand out.

2 . Choose the Right Color
The color of your sash is an important factor to consider. You want it to stand out but also complement the outfit it will be worn with. Choosing a color that contrasts or complements the outfit is crucial in making a statement with your sash.
3 . Pay Attention to Sizing
Sashes come in various sizes, so it’s important to choose the right size for your needs. If you’re making a sash for yourself or someone else, make sure to measure accurately and cut accordingly. A too small or too-large sash can ruin the overall look and fit of an outfit.
4 . Add Personalization
To make your sash even more unique, consider personalizing it with embroidery or iron-on letters. This adds a special touch and can also be a great way to incorporate a team or event name onto the sash.
5 . Don’t Forget the Finishing Touches
The finishing touches are what truly make a sash in a dash. Consider adding decorative trim, beads, or tassels to elevate the look of your sash. Also, make sure to neatly hem and press the edges for a clean finish.
6 . Experiment with Different Styles
While the classic long and straight sash is always a popular choice, don’t be afraid to experiment with different styles. You can try using different types of fabric, such as chiffon or satin, and play around with length and width to create a unique sash that stands out.
Frequently Asked Questions
Can I Make Sash in a Dash?
Yes, you can! Sash in a Dash is an easy-to-follow process that requires no special skills or equipment. All you need is fabric, scissors, and a little bit of creativity.
What Kind of Fabric Should I Use?
The beauty of Sash in a Dash is its versatility. You can use any type of fabric that you like, whether it’s cotton, silk, or even velvet. Just make sure that the fabric is not too thick so that it will be easy to work with. Also, consider the colors and patterns of your fabric to ensure that it will complement your outfit.
How Long Does It Take to Make a Sash in a Dash?
It really depends on your sewing skills and the complexity of the design you choose. However, on average, it should only take about 30 minutes to an hour to complete.
Do I Need Any Special Equipment?
No, you don’t! As mentioned before, all you need are basic sewing supplies like scissors and a needle and thread. However, you can also use a sewing machine if you have one for faster results.
Can I Customize the Design?
Absolutely! Sash in a Dash is all about creativity and self-expression. You can choose any style, color, or pattern that you like. You can also add embellishments like beads, sequins, or lace to make your sash unique.
How Do I Tie the Sash?
There are many ways to tie a sash, and it often depends on the type of outfit you are wearing. Some popular styles include a bow, knot, or wrap around the waist. You can also experiment with different tying techniques to find the one that suits you best.
Is Sash in a Dash Suitable for All Ages?
Yes, it is! Sash in a Dash can be enjoyed by people of all ages, from kids to adults. It’s a fun and easy way to add some flair to any outfit, and anyone can do it!
Can I Use Sash in a Dash for Special Occasions?
Definitely! Sash in a Dash is perfect for special occasions like weddings, proms, or even costume parties. You can create a sash that matches the theme or color scheme of the event to make your outfit stand out.

Conclusion
Overall, sashes are great to spice up an outfit. Whether you want to dress up for a special event or just accessorize your daily look, they are an easy yet elegant way to do so. There are many different methods to make your own sash, and we hope this guide on how to make sash in a dash has been handy in giving you the tools necessary for creating one – even in a hurry!
Now that you have the know-how, next time someone is asking how to make sash in a dash, you can be the star of the party and share this guide with them too! Start creating yours today for a fashionable finishing touch tomorrow.