

Whether you’re looking to create a 3D model for your next art project or build a sculpture for your home decor. Simply craft something with your kids on the weekend, paper mache is an easy and popular choice. You must know how to make paper mache harder.

Using everyday materials like newspapers and glue, you can make all kinds of shapes – from holiday decorations to school projects – that look great and last long if done right. But as any experienced paper crafter will tell you, making paper mache is hard and takes technique.
In this blog post, we’ll explore how to properly prepare the materials so your creations are extra durable!
Tools You Will Need
- Paper (newspaper, tissue paper, etc.)
- Water
- Glue or flour paste
- Bowls for mixing ingredients
- Paintbrush
6 Steps Guide on How to Make Paper Mache Harder
1. Tear the Paper Into Small Strips
The more paper you soak, the thicker and harder your paper mache will be when it dries. Paper mache is a versatile, cost-effective craft material that is used to create almost any item imaginable.
Making the clay even harder and sturdier can be achieved with a few simple steps. To start, tear the paper into small strips or pieces and soak them in a bowl of water until they are completely saturated. This will help ensure that the paper is thoroughly moistened before it is added to your mixture.
Additionally, incorporating flour or salt into your mix will also make it stronger and last longer when drying. After adding your materials, form shapes out of newspaper strips dipped in a paste made from the flour and water mixture until you achieve the desired outcome, and let it dry in an environment where there are no extreme temperatures and humidity levels. With these tips, your paper mache project can turn out just as hard as plasticine!
2. Mix Glue or Flour Paste With Water
Once you’ve soaked your paper securely in a mixture of water and glue, it’s time to make the papier mache stiffer. To do so, you’ll need to create some paste! Mix glue or flour paste with water until the consistency is like that of yogurt.
This is the perfect recipe for ensuring your papier mache will remain sturdy and resilient when drying and shaping – a must for any project you might have in mind. Additionally, adding a small bit of salt can lead to an even stronger and more lasting finish. So there you have it – the essential steps required to make your papier mache stiffer!
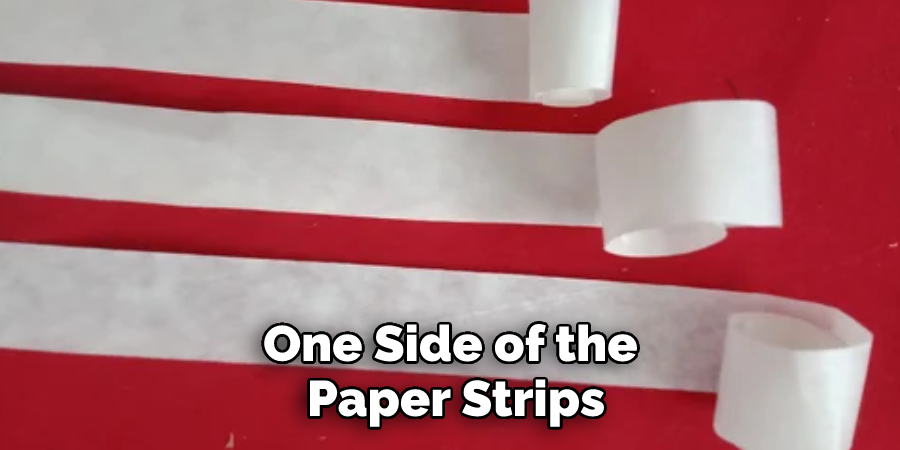
3. Spread the Paste Onto One Side of the Paper
Achieving a strong, sturdy paper mache craft begins with a quality paste. Simply use a paintbrush to evenly spread the paste onto one side of the paper strips or pieces, and then carefully lay them on the surface in the desired shape. The key to solid, durable paper mache crafts is taking the time to layer enough material evenly over your armature.
It allows each layer of paste-drenched paper to dry completely before adding more layers. Make sure to press down gently but firmly with your hands as you’re placing each strip so that there are no air pockets left between any of the pieces of paper mache for added strength.
4. Continue Layering More Strips and Paste
To make your paper mache stronger and harder, it is helpful to keep adding layers of strips. Each layer should be thoroughly covered in the paste so that it can stick to the layer beneath it. As you go along with layering more strips, press down firmly on each layer so that all the layers are bonded well together.
This will ensure that your paper mache product maintains its shape and stability as you continue adding more layers. Different projects require different thicknesses, so take into consideration how thick your project should be before beginning and adjust the number of layers accordingly.
5. Allow Your Paper Mache Project to Dry
For a paper mache project with some added resilience, all you need to do is allow the paper strips and paste to dry overnight. After that, you’re ready to apply one or two more rounds of mixture for an extra strong finish.
Applying layers over several days allows each coat of glue and paper to bond effectively, so your object can withstand any pressure it may face. To speed up the process, try using a fan on the lowest setting and make sure the room is well-ventilated. You’ll have a sturdy craft ready in no time!
6. Paint the Paper Mache
After preparing the paper mache pliable and dry, it’s now time to give it a nice finish with a layer of acrylic paint or sealant. Acrylic paint is a great option as it adheres well to the paper mache and provides vibrancy of colors.
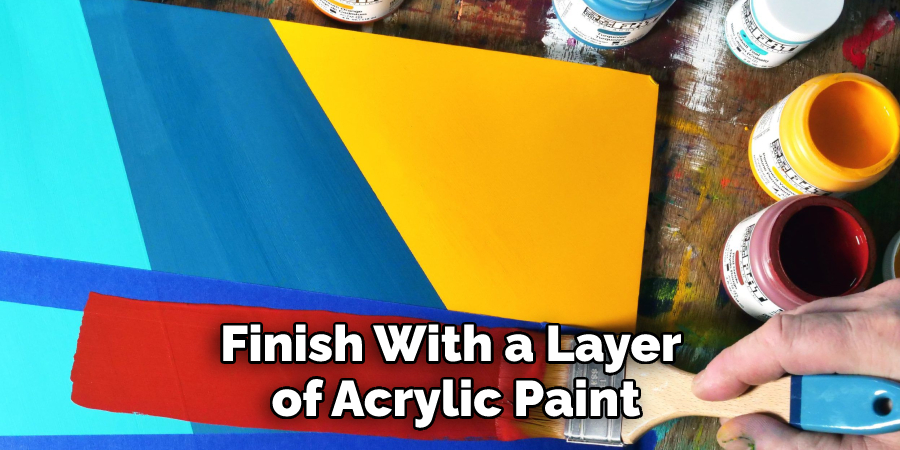
Besides, you can also use a coat of sealant that not only gives a glossy finish but also protects the paper mache project from moisture and other damages. The thicker the coat on your project, the more rigid and durable it will become making your paper mache project last longer.
With these steps, you can easily make paper mache projects that are stronger and more durable than ever before! With a little practice, you’ll be able to create lasting works of art with ease. Enjoy your new-found crafting skills!
Tips to Make Paper Mache Harder
- If you want your paper mache to be harder, you will need to use more glue. This means that you will need to add more glue to your water and flour mixture or use a stronger glue such as Elmer’s Glue.
- Another important tip is to make sure that your paper mache dries thoroughly before you start working with it. If it is not completely dry, it will be much harder to work with and will not be as strong.
- One way to make paper mache harder is to use fewer layers of paper. This means that you should not add too many layers of newspaper or tissue paper to your project. Instead, focus on using fewer, thicker layers.
- If you want your paper mache to be stronger, you will need to use a stronger adhesive. This could mean using a hot glue gun instead of white glue or using something like Mod Podge.
- Another tip for making paper mache harder is to keep your design simple. The more complex your design is, the more likely it is that it will fall apart. So, try to stick with simple shapes and avoid adding too many details.
- When you are working with paper mache, you will want to avoid creating any thin areas. Thin areas are much weaker and are more likely to tear or break. So, make sure that all of your layers are evenly thick, and avoid any areas that are too thin.
- Once you have finished your project, it is important to let it cure completely before using it or displaying it. This means letting it sit for several days or even weeks in a warm, dry place. The longer it cures, the harder it will be.
- If you want your paper mache to last long-term, you will need to store it properly. This means keeping it in a cool, dry place out of direct sunlight. You may also want to consider sealing it with a clear sealant such as Mod Podge.
How to Create Long-Lasting Paper Mache Projects?
Paper Mache is a great way to make unique craft projects that can last for years if done correctly. The key to creating long-lasting paper mache works of art is preparation and materials. First, it’s important to use the right kind of paper and glue to create a surface that won’t tear or crack easily when dry. If a toilet paper-based mix is used, then multiple layers should be applied and allowed time to dry before adding additional layers.

Once the project has been constructed, let it sit undisturbed for several days or even weeks so that the glue bond can be properly set. Sometimes an extra coating of acrylic sealer can help extra protection against wear and tear over the years. With these tips in mind, you will be sure to create lasting paper mache projects that are worth showing off!
How to Strengthen Paper Mache Projects with Glue, Paint, and Sealant?
Strengthening paper mache projects with both glue and a sealant is an important step in creating lasting, durable works of art. It all starts with preparation—use a brush to apply white glue to the entire project, then let it dry for about 24 hours.
For an added layer of protection, apply a sealant like mod podge on top of the dried glue using the same method. Once the sealant is dry, your project is ready to be painted!
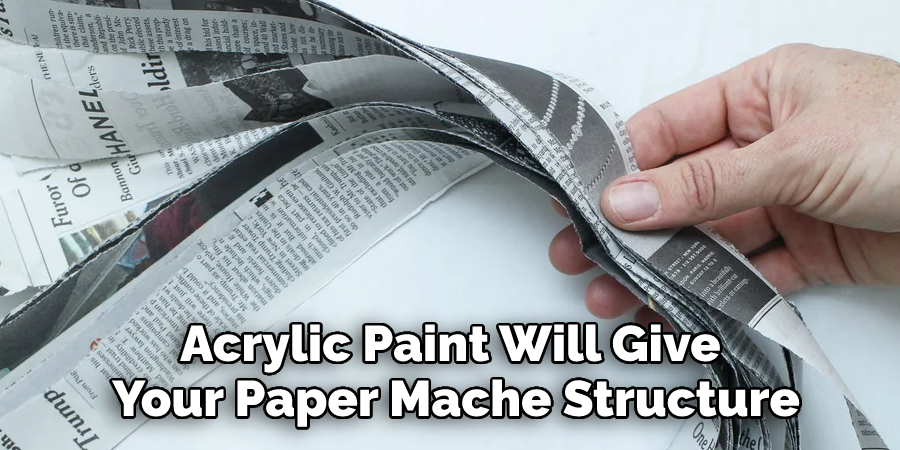
Acrylic paint will give your paper mache structure a rich texture and beautiful colors that can be easily blended. Even better, you can use this same method to make any type of paper mache craft even stronger—from masks and boxes to flowers and figures. Whether you’re an experienced crafter or just starting, adding glue, paint, and sealant ensures that your projects won’t lose their shape no matter what life throws at them!
Conclusion
Applying a hardener to paper mache can make it more difficult, allowing you to keep your projects in better shape for longer. You should carefully determine how to make paper mache harder.
You can buy hardeners at most craft stores, or mix up a batch of homemade hardeners with common household ingredients. Whichever method you choose, be sure to follow the instructions carefully and allow plenty of time for drying to avoid any accidents. With a little bit of effort, you’ll have a strong and sturdy paper mache that will last for years to come.
You Can Check It Out to Fix a Slipped Stitch in Knitting