
If you’re looking for an innovative, creative way to spruce up your home decor this holiday season, look no further! Making a unique origami wreath is a wonderful craft project that will add color and personality to any space.

This simple tutorial on how to make origami wreath will show you how to make your very own paper flower-filled origami wreath in just a few easy steps. It’s the perfect combination of old-fashioned creativity and modern flair — plus it costs almost nothing! So get out some construction paper or wrapping paper in your favorite colors, follow the instructions below, and start crafting away.
What is an Origami Wreath?
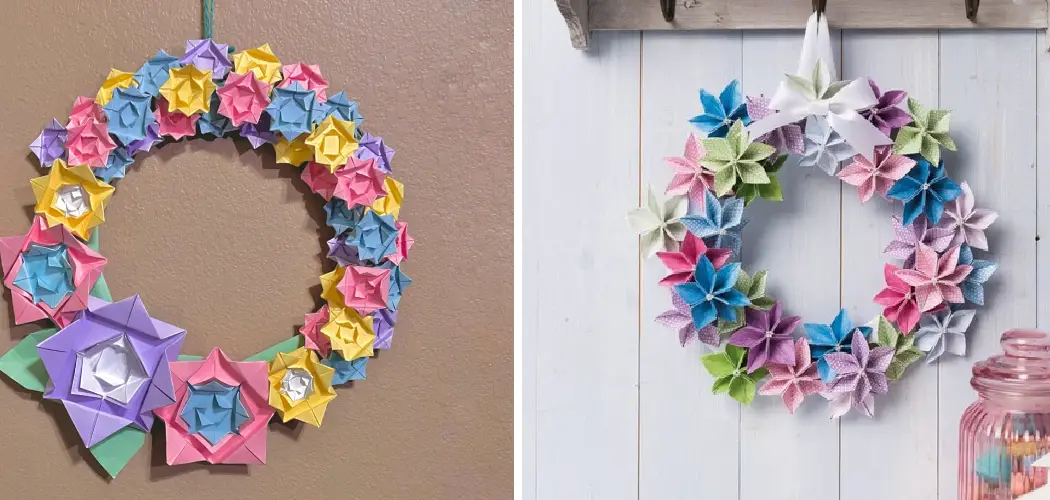
An origami wreath is a decorative wreath made up of paper flowers or other shapes folded out of colorful paper. It’s a great way to add some holiday cheer to your home — without the mess and cost of real plants and flowers!
Origami wreaths can be as simple or complex as you want them to be, depending on the types of flowers and shapes you choose to fold. You can make a basic circle or star wreath, with simple paper flower petals for a more traditional look. Or opt for something more intricate like lilies, roses, daisies and other special shapes that will impress your family and friends.
Needed Materials
Given below are the materials you will need to make your own origami wreath:
Paper:
You can use any kind of paper, such as construction paper, wrapping paper, or even cardstock. The thicker the paper, the easier it is to fold and shape.
Scissors:
Cut out your flower shapes.
Glue or Tape:
To assemble your wreath.
Ribbon or String:
To hang the wreath from a hook or door handle.
8 Step-by-step Instructions on How to Make Origami Wreath
Step 1: Cut Out Your Paper Flowers or Shapes
You can use a flower template, create freehand designs of your own, or take inspiration from classic origami patterns such as the tulip, lily, and rose.

For a more modern look, you can also create abstract shapes such as triangles, squares, and stars. Just make sure to leave a small tab at the top of each shape so that you can attach them all together later.
Step 2: Fold the Paper
Fold each of your paper shapes in half lengthwise. Then fold them several more times to make different shapes and sizes for your wreath. The more creative you get, the better! It’s up to you how intricate you want the wreath to look.
But remember, the fewer folds you make, the easier it will be to attach them together. You can also use a bone folder or ruler to press down the edges of each shape for a crisp, clean look.
Step 3: Create Different Sizes and Shapes
Once you have folded all of your paper shapes, arrange them into different sizes and shapes. Try to make at least five of each size and shape so that you have plenty of variety when it comes time to put the wreath together. It’s also a good idea to use different colors and patterns to give the wreath more texture and depth. But feel free to mix it up as much or as little as you like!
Step 4: Glue or Tape the Shapes Together
Take one paper shape and use either glue or tape to attach it to another piece of paper. Repeat this process until all of your shapes are connected together in a circle shape. You can also use the tabs at the top of each shape to make attaching them together easier. It’s important to make sure that all of the shapes are connected securely, as otherwise, the wreath won’t hold its shape.

Step 5: Create the Center Circle
To add some extra flair to your origami wreath, create a center circle with smaller paper shapes or flowers. Glue or tape these pieces onto the center of the wreath and let them dry completely before continuing on to the next step. But if you want to keep things simple, you can skip this step and just leave the center of your wreath open. It’s up to you!
Step 6: Add Some Color
Once your wreath is assembled, add a pop of color with various paint or ink pens. You can draw on flowers, leaves, and other designs that will make your origami wreath truly unique. This is a great way to make the wreath your own and give it an extra special touch. If you want to keep it simple, just a few simple lines or dots will do the trick.
Step 7: Hang It Up!
Now that your origami wreath is complete, you’re ready to hang it up! Take a piece of ribbon or string and tie it into a loop so that the wreath can be hung from a hook or door handle. But make sure that you tie it securely so that the wreath stays in place. This is also a great way to add some extra color and texture to your origami wreath. It’s totally up to you how simple or complex you want the ribbon to be.

Step 8: Enjoy Your New Decor
Admire and enjoy your new paper flower-filled origami wreath! It’s a great way to show off your creativity and add a little holiday cheer to any space. But of course, you don’t have to wait for the holidays to make your own origami wreath. You can create one any time of year in any colors or shapes that you like. So get out some paper and start crafting away! Always remember, the more creative you get, the better!
Following these 8 steps on how to make origami wreath will help you make your own origami wreath in no time! It’s a fun and creative project that will add a bit of style and personality to any room. Plus, it costs next to nothing — so what are you waiting for? Get out some paper and start crafting away!
Tips for Making Origami Wreaths
- If You Want an Easier Time Folding the Paper, Choose Thicker Paper Like Cardstock or Construction Paper.
- Use Colorful Paper and Bright Paint Pens for a Vibrant Look.
- Have Fun Experimenting With Different Flower and Shape Combinations.
- Don’t Be Afraid to Get Creative! The More Unique Your Origami Wreath is, the Better It’ll Look.
Now that you know how to make an origami wreath, why not try making one for a friend or family member? It’s the perfect gift for any occasion, and it won’t cost you a cent! With just a little time and creativity, you can make someone special a truly unique and heartfelt gift.
Frequently Asked Questions
Q: Is It Difficult to Make an Origami Wreath?
A: No, making an origami wreath is easy and fun. All you need are some colorful papers or cardstock, a few basic tools, and some creativity. Once you’ve mastered the basics, it gets easier and faster each time you make one.
Q: How Long Does an Origami Wreath Last?
A: Depending on the materials used and how well it is taken care of, an origami wreath can last anywhere from a few months to several years. If you use high-quality materials and keep them out of direct sunlight, they should last much longer.
Q: What Else Can I Do With an Origami Wreath?
A: Besides using an origami wreath as a decoration, you can also use it as a centerpiece for a wedding or other special event, or even as a gift for a friend. The possibilities are endless!

Q: Is Making an Origami Wreath Expensive?
A: No, making an origami wreath is actually quite affordable. The materials you need are usually inexpensive and can be found at most craft stores. Plus, it’s a great way to recycle old greeting cards or other paper products that would otherwise go to waste. So if you’re looking for a budget-friendly project, making an origami wreath is definitely a great option.
Conclusion
Crafting an origami wreath can be a great way to bring some warmth and joy into your home. It’s surprisingly easy to make, and with some practice, you’ll be creating beautiful wreaths of all shapes and sizes.
Once you have the basics down, you can use creativity to create pieces that are truly unique and one-of-a-kind. It will bring color to any room, and provide hours of fun for those who want to spend time honing their origami skills.
Whether you give it as a gift or keep it in your own home – there’s no denying the beauty and craftsmanship that is oozing from the paper whose corners you so carefully creased. Unleash your inner artist and put together an origami wreath that will truly stand out amongst the rest! Thanks for reading this article on how to make origami wreath.