
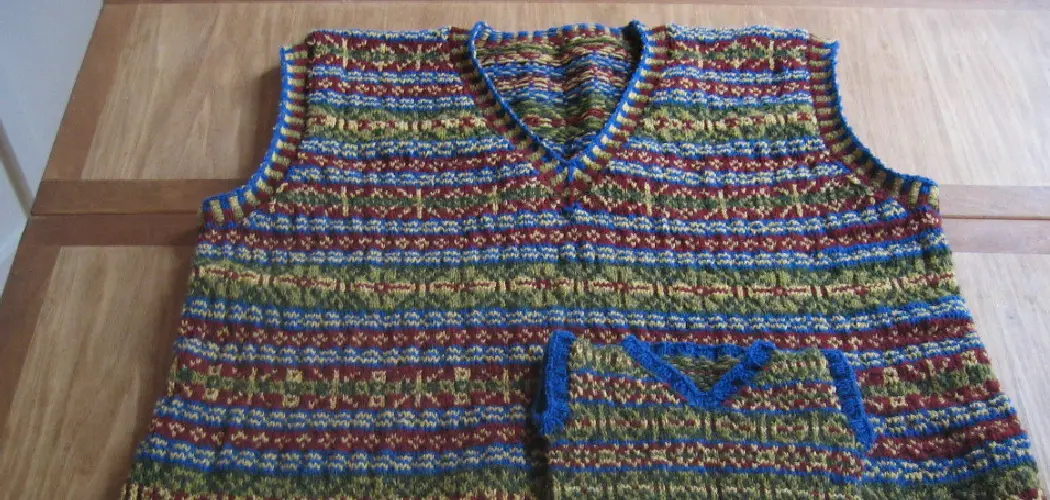
Are you looking for something creative to add to your wardrobe this season? Are you ready to start knitting? Whether you’re a beginner or an experienced knitter, creating your own vest is both fun and rewarding. Knitting is a timeless art form that has endured through the ages, and it can be an incredibly rewarding experience if you take the time to learn how.
With some patience and determination, mastering knitwear can give rise to beautiful customized garments like vests or wraps! In this blog post, we’ll explore pattern and yarn options, offer tips on creating even stitches, as well as provide instructions on how to knit a vest for knitting a stylish vest of your own. So grab those needles – you’re in for an exciting journey!

Choosing the Right Yarn and Pattern
1. Type of Yarn
Before you begin knitting, it’s important to choose the right yarn for your project. Depending on your desired outcome, you may opt for wool or cotton blends if you’re looking for a lightweight garment. For something a bit heavier, like an open-front vest or wrap, try using bulky weight yarn, as this will hold its shape well.
It’s also important to consider the color and texture of the yarn – for a classic look, opt for solid colors; if you want something more vibrant, choose variegated or striped yarn.
2. Pattern
Once you’ve chosen your yarn, it’s time to decide on a pattern. There are several ways to go about this you can either purchase a knitting pattern online or in a store, or you can create your own. If you’re an experienced knitter, you may want to try creating something from scratch.
But if this is your first time knitting a vest, consider using an existing pattern as a starting point. There are many free patterns available online that will give you the basics and allow you to customize it to suit your taste.
Required Items
Once you’ve chosen your yarn and pattern, it’s time to gather the necessary materials. The most important item is
- A pair of knitting needles: these come in different sizes, but for this project, you’ll want to use a size 8-10.5 (4.0mm – 6.5mm) needle
- A tapestry needle, which is used to weave in the ends of your stitches
- Scissors
- Stitch markers (optional): these are small rings or clips that are used to mark the beginning and end of a row
- A measuring tape
10 Ways How to Knit a Vest
1. Cast on & Shape Armholes
The first step is to cast on your stitches. This will determine the width of your vest, so make sure you measure carefully and accurately. Once you’ve cast on, it’s time to shape the armholes. This is done by decreasing the number of stitches on one side and increasing them on the other. Take your time to get this right, as mistakes here can result in an ill-fitting vest!
2. Begin Working in Stockinette Stitch
Now that you’ve shaped your armholes, it’s time to begin working in stockinette stitch. This is one of the most popular knitting stitches and is achieved by alternating between knit and purl rows. It’s a great stitch to use for vests as it creates a nice, even finish.
3. Increase & Decrease Stitches
Once you’ve been working in stockinette stitch for a while, you may want to add some shaping to your vest. To do this, you’ll need to increase and decrease stitches in certain areas. Increasing involves adding extra stitches while decreasing involves removing them. This will give your vest a fitted look and feel.
4. Create the Back of the Vest
Once you’ve finished increasing and decreasing, it’s time to work on the back of the vest. This is the part that covers your shoulders and is usually worked in a series of rows. Make sure to measure as you go to ensure an even fit.
5. Create Necklines & Armholes
After completing the back, it’s time to move onto the neckline and armholes. The neckline will be shaped by working decreases and increases along the edge of the fabric. For the armholes, you’ll be using a similar technique to shape them into their desired size.

6. Sewing Seams
Once you’ve finished knitting your vest, it’s time to sew the seams together. This is done by using a tapestry needle to weave the ends of the stitches together. Make sure to take your time and double-check that all seams are sewn properly before moving on to the next step.
7. Attach Fasteners
Now it’s time to attach fasteners! Depending on what type of vest you’re making, you may opt for buttons, snaps, or a hook-and-eye closure. Make sure to measure and place the fasteners in the correct positions for a secure fit.
8. Weave in Remaining Ends
Once you’ve attached all the fasteners, it’s time to weave in any remaining ends. This is done with a tapestry needle and ensures that your vest looks neat and professional.
9. Block & Press
Now that your vest is finished, you’ll want to give it a good blocking and pressing. Blocking will help open up the stitches and make them even while pressing will help set the fabric in place. This step isn’t always necessary, but it will definitely give your vest a polished finish!
10. Enjoy!
The last step in knitting a vest is to simply enjoy it! Wear your new garment with pride and show off your hard work – you deserve it. Knitting can be an incredibly gratifying experience, so savor every moment of the process. And once you’ve mastered this project, why not try knitting a shawl or cowl? The possibilities are endless!
Following these steps, you can now make a stylish vest of your own. Now that you’ve learned how to knit a vest, why not try experimenting with different yarns and patterns? You could create an open-front cardigan or a long wrap – the options are endless! Have fun exploring the possibilities, and happy knitting!

8 Common Mistakes to Avoid When Knitting a Vest
Knitting a vest can be an enjoyable and rewarding experience, but it’s important to remember that there are some common mistakes that you need to avoid in order to make sure your project turns out great. Here are eight of the most common mistakes to look out for when knitting a vest:
- Not having enough yarn is a common mistake. Yarn is like the foundation of your vest, so make sure you have enough to complete your project. Yarn weight and gauge can vary, so be sure to research your pattern before you begin knitting.
- Not reading the instructions carefully can lead to confusion and frustration. Take time to read through each step of the pattern and make sure you understand what it’s asking for before proceeding.
- Not keeping track of your stitches is an easy mistake to make, but it can cause a lot of problems in the end. Keep track of where you started and stopped so that you don’t have to rip out your work later.
- Using the wrong size needles is another common problem when knitting a vest. Different materials require different-sized needles for the best results, so be sure to double-check your pattern for the right size.
- Not checking your tension regularly can result in a finished product that looks nothing like you intended. Take time to check and adjust your tension as needed throughout your project so that it stays consistent.
- Not blocking your piece before sewing it together can make the finished garment appear sloppy. Make sure to block each piece of your vest before sewing it together for the best results.
- Not joining your pieces correctly can lead to an unevenly finished garment. Take time to learn how to properly join your pieces so that they look great when all is said and done.
- Not being patient with yourself during the process is important too! Remember, knitting takes time and practice. Have patience with yourself as you move through your project and don’t be afraid to take breaks when needed.

Following these tips will help ensure that your vest turns out perfectly! Happy knitting!
Conclusion
To complete a knitting project, there are many tools and techniques of how to knit a vest to learn. With practice and patience, mastering these techniques will make the process of knitting a vest much easier. Once you have completed your vest, enjoy wearing it proudly for years to come. Every time you do, remember to take a moment to appreciate all the hard work that went into creating it.
Whether this was your first knitted project or one of many, enjoy being able to create such beautiful pieces of clothing and the pleasure of having made something with your own hands.
Knitting is an enjoyable craft that can be used both creatively and therapeutically as a mindful exercise in physical strides and mental health. Build on your success by trying different patterns for gloves, cushions or even larger garments like sweaters!