
It’s the holiday season and while you may be shopping for presents, wrapping them up with care, or decorating your tree, one beloved tradition of days past can’t help but make a resurgence – mistletoe! The romantic symbol of love has been around since ancient times and has been used to signify good luck.

If you want to add some festive cheer this year by making your own homemade mistletoe out of paper, look no further. In this blog post, we’ll show you how to make mistletoe out of paper that is perfect for any occasion! From crafting tools to instructions, everything you need will be provided in order to kick-start the fun craft time ahead!
Why Do People Hang Mistletoe in Their Doorways?
Mistletoe is an iconic holiday decoration. It’s traditionally associated with Christmas and other winter holidays, with its bright red berries adorning doorways, archways, and mantles. But did you know that mistletoe has origins in ancient European mythology?
The tradition of hanging mistletoe in the home dates back to ancient times. The druids believed that mistletoe had magical powers and could bring luck and prosperity to those who hung it in their doorways. They even performed sacrificial rituals beneath mistletoe trees!
In Norse mythology, the myth of Balder’s death tells us that there was a sacred plant–the mistletoe–that was given to the gods by Frigga. It was believed that Balder could not be harmed as long as he was under the protection of this plant, and so it became a symbol of safety and good luck.

What You’ll Need
- White paper
- Green paper
- Scissors
- Tape
- Glue
- Ribbon or string
9 Methods How to Make Mistletoe Out of Paper
1. Cut a Circle Out of the White Paper:
Cut out a large circle from white paper. This will be the background of your mistletoe. If you don’t have a white paper, you can use any other kind of colored paper. The circle should be big enough to cover the entire area you are going to make your mistletoe out of. However, make sure it’s not too big, or it won’t fit in the area where you want to put it.
2. Create Green Leaves:
Cut a bunch of leaf shapes from green construction paper or cardstock and glue them to the top of the white circle. If you make the leaves thicker, you can create a 3-D effect by folding them in half.
You can also use green ribbon or strips of green paper to create leaves if you don’t want to cut out individual leaf shapes. You can use a glue stick or hot glue gun for this step. However, hot glue will give you a more secure hold.
Once the leaves are attached to the white circle, spray paint or brush on some green paint to make the leaves look more realistic. You can add some glitter or sequins to the leaves to give them a festive sparkle.
3. Form Mistletoe Berries:
Cut red circles, hearts, or stars to make the mistletoe berries. Glue them onto the green leaves. If you want to add a little extra sparkle, you can sprinkle glitter onto the glue before it dries. Let the glue dry completely before moving on to the next step. While you’re waiting, you can hang your mistletoe from a ribbon to make it look more festive.
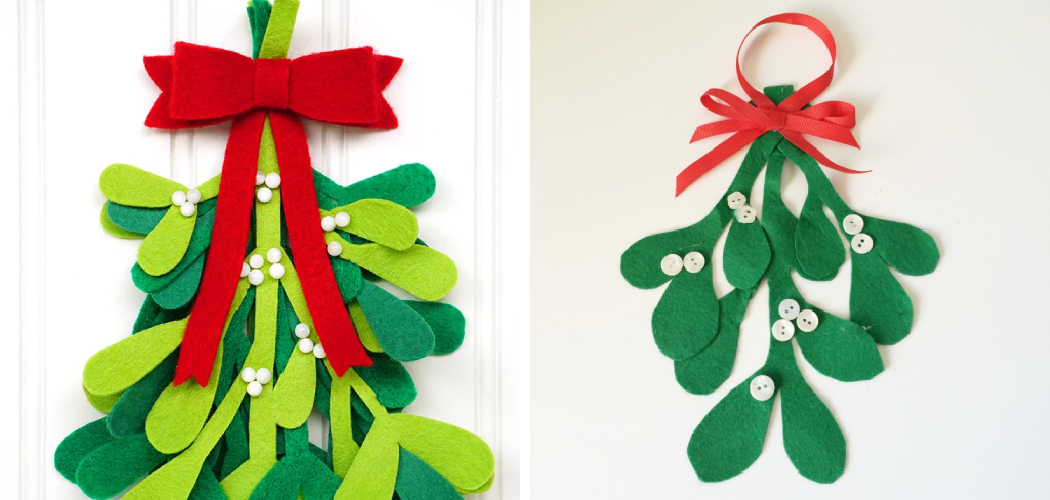
4. Make a Bow:
Cut out a large bow shape from red paper and glue it onto the top of your mistletoe. Make sure you leave enough room to add a bit of tinsel and ribbon for added decoration. You can also write out the words “Kiss Me” and glue them to the center of your bow. To make the bow look more realistic, you can use a pair of scissors to cut small curves into the edges of your bow. If you would like to add more detail, you can also use different shades of red paper to create a pattern.

5. Outline with Ribbon:
Outline your mistletoe with a thin ribbon for added detail and dimension. To do this, cut a length of ribbon that is slightly longer than the outline of your mistletoe. Thread the end of the ribbon through the end of a large-eyed needle and tie a knot to make it easier to thread.
Starting on one side, push the needle into the top layer of paper and pull the ribbon through until you reach the other side. Tie a knot at the end of your outline and cut away the excess ribbon. Your mistletoe is now complete! Hang it up and enjoy the holiday season.
6. Cut Out a Base:
Cut out a small rectangle from cardboard or foam board to serve as the base for your mistletoe to rest on. Cover it with the decorative paper if desired. This can be used to hang the mistletoe from or simply set it on a shelf. While making sure the paper doesn’t tear, use scissors to make small notches in the corners of the base. This will help hold your mistletoe in place. When finished, you can add a thin layer of craft glue on the back if desired to hold it in place.
7. Attach Ribbon and Tie in Knots:
Securely attach two pieces of ribbon at either end of the base and tie them together in knots to create a loop. This loop will be used for hanging the mistletoe. You can use any color or style of ribbon to suit your taste. While the ribbon is still attached to the base, you can begin attaching the mistletoe leaves. Make sure to leave a little bit of extra ribbon on each end for better hanging and ease of use.
8. Attach Mistletoe to the Base:

Glue or tape your mistletoe onto the base and add extra ribbon loops around it for decoration if desired. You can also add a few extra paper leaves around the top of your circle to increase the size of your mistletoe and give it an even more realistic look. When you are finished, your mistletoe is ready to hang. Add a ribbon or cord to the back of the base so that you can hang your mistletoe on a wall, doorframe, or other location. Enjoy the holiday cheer that your mistletoe brings to your home!
9. Hang Up Your Mistletoe:
Hang up your mistletoe in a doorway or window, or attach it to a wall with removable adhesive hooks. You can also simply place it on a table or other flat surfaces. Once your mistletoe is in its desired location, you’ll be able to enjoy its festive beauty. When someone walks under it, you can give them a kiss—or just smile and wish them a happy holiday!
By following these steps, you can easily create a beautiful mistletoe decoration with paper. Not only will it add some holiday cheer to your home, but it’s a fun and creative way to get into the festive spirit. So, gather your supplies and get ready to craft!
Things to Consider When Making Mistletoe Out of Paper
1. Type of Paper:
Depending on your desired look, you can use any type of paper, from construction paper to cardstock. Consider the color, pattern, and thickness of the paper to ensure that it will be able to hold its shape.
2. Adhesives:
Choose an adhesive that is strong enough to keep your paper pieces in place. Glue sticks are a great option for adhering paper together. You can also use craft glue, double-sided tape, or hot glue for added durability.
3. Finishing Touches:
Once you have finished assembling your mistletoe, consider adding some finishing touches such as ribbons, bows, glitter, or paint. These embellishments will give your mistletoe a more festive look and make it even more eye-catching!
4. Hanging:
When it comes time to hang up your mistletoe, make sure that you are using the proper hooks or cords for the job. Depending on where you will be hanging your mistletoe, make sure that it is secure enough to stay in place.
By taking these factors into consideration when making paper mistletoe, you can create a beautiful decoration that will spruce up any holiday space! Plus, you’ll have an extra special piece of holiday decor that you can take pride in creating. Enjoy your homemade mistletoe and happy crafting!
You Can Check It Out To Crochet a Four Leaf Clover

Where Do You Hang Mistletoe?
Mistletoe is traditionally hung in doorways and other entryways to signify a warm welcome and holiday cheer. It’s also believed to bring luck and joy when displayed as part of holiday decor, so hang it wherever you want – it’ll make the room look festive! You can also use mistletoe for romantic purposes by hanging it in a bedroom or living room. Just make sure to keep it well out of reach of children and pets, as the berries are toxic if ingested.
Conclusion
Whether you want to make a paper mistletoe for yourself or as a present, this is a great and easy project. All in all, making mistletoe out of paper is a fun and easy activity that can get you into the holiday spirit. It’s a great way to add a personal touch to your Christmas decorations, and it only takes a few supplies and some time.
With just a few supplies and following the instructions on how to make mistletoe out of paper, you can have your own handmade mistletoe that will last for years to come. So gather up your supplies, find a comfortable spot, and get started!
You Can Check It Out to Make a Dr Seuss Hat Out of Paper