
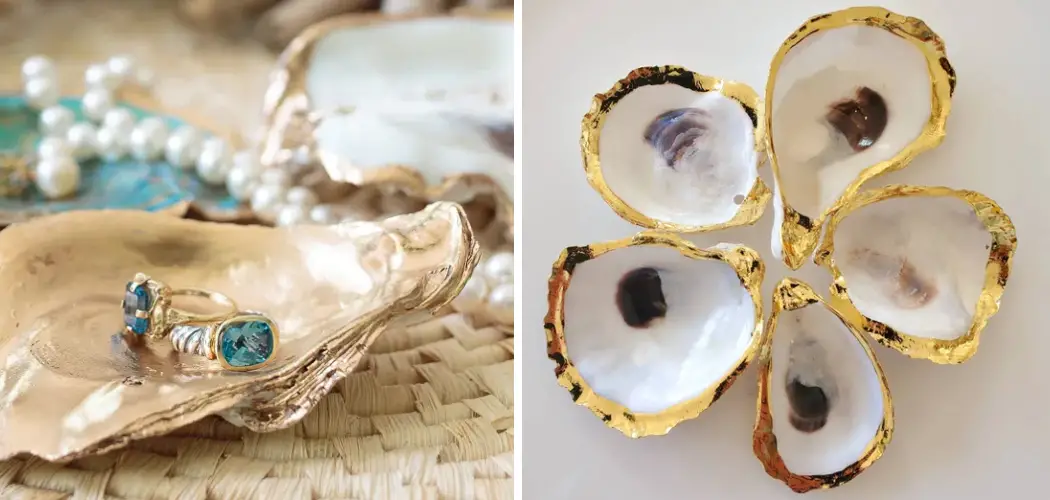
Discovering the art of gilding oyster shells is a delightful endeavor that marries nature’s coastal beauty with artistic flair. Gilding involves adorning these unique shells with a thin layer of precious metal like gold or silver, transforming them into exquisite pieces of art or functional decor.
The process encapsulates creativity and craftsmanship, allowing you to elevate humble oyster shells into elegant adornments for your home or special events.

In this guide, we will explore the step-by-step process of how to make gilded oyster shells, from preparing the shells to applying the gilding technique. Unleash your artistic spirit and let’s embark on this journey to create beautifully gilded oyster shells, merging the beauty of the sea with a touch of opulence.
Locating and Cleaning Oyster Shells
Oyster shells are a beautiful, natural material that can be used for various crafting projects. They have a unique texture and shine, making them perfect for gilding. However, before you start the gilding process, it’s important to properly prepare your oyster shells.
The first step in creating gorgeous gilded oyster shells is to locate and collect them. Oyster shells can be found on beaches, in seafood markets, or even in your local grocery store. Make sure to choose shells that are clean and free of any dirt or debris.
Once you have collected your oyster shells, it’s important to clean them thoroughly before starting the gilding process. Begin by rinsing them with water to remove any excess dirt or sand.
Then, mix a solution of equal parts water and white vinegar and soak the shells for about 15 minutes. This will help remove any bacteria or lingering odors.
10 Methods How to Make Gilded Oyster Shells
1. Prepare the Oyster Shells
The first step to making gilded oyster shells is to prepare the shells. Start by washing the shells with a mild soap and then drying them thoroughly with a soft cloth.

Once they are dry, use sandpaper to lightly sand the surface of each shell until it is smooth and free of any dirt or debris. This will help the paint and gold leaf adhere better to the surface of the shell.
2. Apply a Base Coat
Once the shells are prepared, apply a base coat of paint or primer to each one. This will help ensure that the gold leaf adheres properly and creates an even finish when it is applied.
Allow the base coat to dry completely before moving on to the next step. However, if you want to achieve a more rustic or weathered look, you can skip this step and go straight to applying the gold leaf.
3. Cut Gold Leaf Sheets
Next, cut sheets of gold leaf into small pieces that are slightly larger than the oyster shells you are working with. You can use scissors or an X-Acto knife for this step, but make sure you wear protective gloves as gold leaf can be sharp and difficult to handle without them. Cut enough pieces to cover all the shells you have prepared.
4. Apply Gold Leaf
Once your gold leaf pieces have been cut, carefully place one onto each oyster shell and press down gently until it adheres firmly in place. Use a soft brush or cotton swab to remove any excess gold leaf from around the edges of each shell if necessary. Allow the gold leaf to dry completely before moving on to the next step.
5. Seal with Varnish
Once all of your oyster shells have been covered in gold leaf, seal them with a layer of varnish or sealant for extra protection against moisture and wear-and-tear over time.

Allow this layer of varnish to dry completely before handling your gilded oyster shells further. However, be careful not to apply too much varnish, as it can dull the shine of the gold leaf.
6. Add Glitter
For an extra sparkly effect, add glitter to some or all of your gilded oyster shells once they have been sealed with varnish or sealant. To do this, simply sprinkle glitter over each shell while holding it over a piece of paper so that any excess glitter can be collected easily afterward for reuse if desired.
Allow this layer of glitter to dry completely before proceeding further with your project. To add an additional layer of glitter, and to ensure that it stays securely in place, spray a light layer of hairspray over the shell once the first layer of glitter has dried.
This will act as an adhesive for the second layer of glitter. Repeat this process until you have achieved your desired level of sparkle on each shell.
7 . Add Beads
You can also add beads onto some or all of your gilded oyster shells for added texture and visual interest. To do this, simply glue small beads onto each shell using craft glue or another type of adhesive suitable for use on porous surfaces such as wood or paper mache.
Allow this layer of beads to dry completely before proceeding further with your project if desired. While this step is not necessary, it can add an extra touch of elegance to your gilded oyster shells.
8 . Paint Details
To give your gilded oyster shells extra detail and dimension, use acrylic paints in various colors to add details such as swirls, lines, dots, etc., onto some or all of them according to your own preferences and style choices.

Make sure you allow any layers of paint you apply onto each shell enough time to dry completely before moving forward with additional steps in your project if desired.
You can also experiment with different techniques such as dry brushing or using a small paintbrush to create intricate designs. If you are feeling extra creative, consider using metallic gold or silver paints to add a touch of luxury and elegance to your gilded oyster shells.
9 . Add Ribbon
You can also add ribbon onto some or all of your gilded oyster shells for added texture and visual interest if desired. To do this, simply tie thin ribbons around each shell using knots at either end so that they stay securely in place.
You can also glue ribbons onto each shell using craft glue if preferred instead. Make sure you allow any layers of ribbon you apply enough time to dry completely before proceeding further with additional steps in your project if desired.
If your ribbon doesn’t seem to be sticking well, you can also try securing it in place with a small strip of double-sided tape or by gently sewing it onto each shell instead.
Ribbons are particularly lovely when used on gilded oyster shells that have been hung up as part of decorative garlands, wreaths, or other similar home decor items.
10 . Attach Hanging Strings
Finally, attach hanging strings onto some or all of your gilded oyster shells so that they can be hung up as decorations when finished. To do this, simply tie thin strings around each shell using knots at either end so that they stay securely in place.
You can also glue strings onto each shell using craft glue if preferred instead. Make sure you allow any layers attached enough time to dry completely before displaying them proudly!

Things to Consider When Making Gilded Oyster Shells
Once you have decided to make gilded oyster shells, there are a few key things that you should consider before diving into the project. This will help ensure that your end result is not only beautiful, but also durable and long-lasting.
1) Type of Shell: The type of shell you choose is crucial in determining the overall success of your project. Not all shells are created equal, and some may not hold up well to the gilding process. It is best to choose larger, stronger shells such as oyster or scallop shells.
2) Cleanliness: Before beginning your project, be sure to thoroughly clean your shells. This will remove any dirt or debris that could interfere with the adhesion of the gilding materials. You can use soap and water or a mild bleach solution to clean the shells.
3) Gilding Materials: There are various materials you can use for gilding, such as gold leaf, metallic paint, or even gold foil sheets. Each has its own unique application process and finish. Consider which material will best suit your project and desired end result.
4) Adhesive: The type of adhesive you choose will also affect the outcome of your gilded oyster shells. Gold leaf and metallic paint typically require a specialized adhesive, while gold foil sheets can be adhered with regular craft glue.
Conclusion
Crafting gilded oyster shells is an easy and fun way to decorate your home and enhance your living space. Whether you’re looking for a special gift, a unique keepsake, or simply something interesting to do, DIY oyster shell projects are bound to produce stunning results. Now that you’ve read about how the process works, it’s time for you to give it a try!
Get creative with your own designs and experiment with different materials — try out a metallic paint or incorporate jewel-like charms into the mix. With some patience and attention to detail, you’ll be proudly displaying gorgeous gilded seashells in no time.
So why not use your newfound knowledge to embark on this exciting project and show off your beautiful creations? Follow these steps on how to make gilded oyster shells and get started today!