
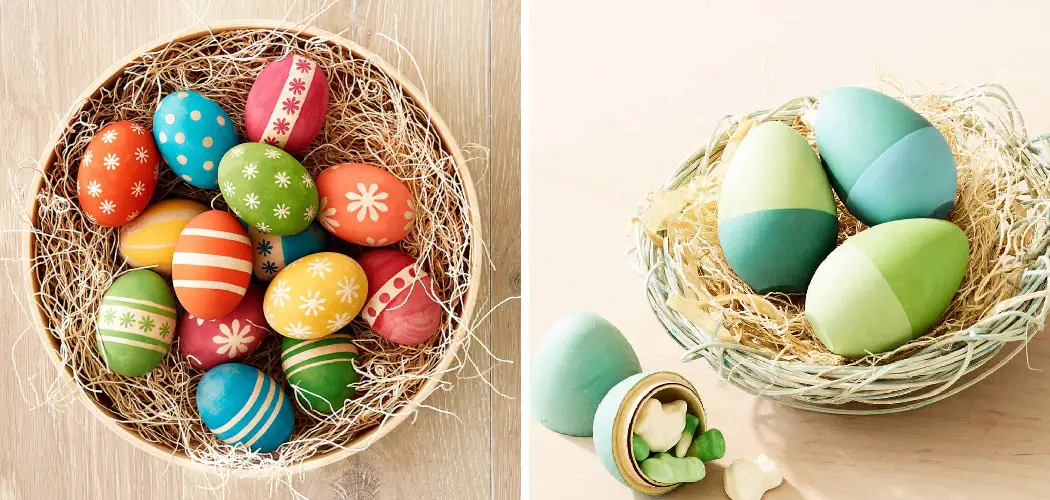
Adding a crafty twist to an already beloved holiday tradition, wooden Easter eggs are popping up everywhere – from home décor stores to arts and crafts specialty outlets. With Easter on its way, it’s the perfect time to experiment with decorating wooden Easter eggs.
Wooden eggs can be used as an alternative to regular hard-boiled and plastic eggs when creating your own magical Easter egg hunt or make a perfect decoration for any festive tablescape!
Whether you’re looking for a festive addition to your own holiday decorations or simply want a gift idea that stands out from the rest, learning how to decorate wooden Easter eggs is the perfect place to start!
Whether you want painted wooden eggs that are vibrant and full of color or engraved designs for added texture, there are plenty of ways to use these fantastic little items in your craft projects. Discover how you can get creative with delicious spring colors and design techniques while learning how to do it properly.
Why is a Wooden Easter Egg is a Great Idea?
1. Durable
Wooden Easter eggs are a great alternative to traditional hard-boiled and plastic eggs when creating your own magical Easter egg hunt. Not only are wooden eggs more durable than their real counterparts, they also make for fun and creative decorations that can be used year after year! Wooden Easter eggs can be painted, engraved, or wrapped with ribbon for an added decorative touch.
2. Eco-Friendly
Wooden Easter eggs are a great option for environmentally-conscious crafters. Not only are wooden eggs reusable, but they also help reduce plastic waste by eliminating the need to buy and throw away plastic eggs each year.
3. Customizable
If you’re looking for something special and unique, wooden Easter eggs are a great way to show off your creativity. With the right techniques, you can make painted wooden eggs that are vibrant and full of color or engraved designs for added texture.
Required Items
- Wooden Easter eggs
- Paint
- Paintbrushes
- Pencils
- Woodburning tools (optional)
- Decorative ribbon, beads, or other embellishments (optional)
10 Ways on How to Decorate Wooden Easter Eggs
1. Paint
Painting wooden Easter eggs is the perfect way to add a splash of color and creativity to your Easter decorations. Choose from traditional colors, such as pastels, or go bold with bright primary colors for a more modern look. Use paintbrushes and stencils to create intricate designs, or simply dip the entire egg in one color for a solid look.
2. Stain
Wood staining is a great way to customize wooden Easter eggs without having to worry about intricate details or precise designs. Use wood stain to achieve a dark, weathered look, or add an antique feel by mixing together stains of different colors and shades.
3. Carve
Carving your own unique designs into wooden Easter eggs is a great way to create decorations that are truly one of a kind. Use woodburning tools or sharp knives to carve out intricate patterns and shapes for an added decorative touch.
4. Engrave
Engraving is the perfect way to add text, monograms, or inspirational quotes to your wooden Easter eggs. Use a woodburning tool to etch out words and phrases into the egg’s surface for an added personal touch.
5. Bead
Adding beads to wooden Easter eggs is a great way to add texture and visual interest. Beads come in a variety of colors, shapes, and sizes, so you can mix and match to create your own unique look.
6. Embellish
Embellishing wooden Easter eggs with ribbon or fabric is a great way to add texture and color. Cut strips of ribbon or fabric into small pieces and glue them onto the egg for a festive look. You can also use fabric to cover the entire egg and stitch or glue it together for a more uniform appearance.
7. Decoupage
Decoupage is an easy way to add color and texture to wooden Easter eggs without having to use paint or stain. Use decoupage medium and tissue paper, fabric scraps, or pieces of scrapbook paper to create beautiful designs on the egg’s surface.
8. Stencil
Stenciling is a great way to add intricate details and patterns to wooden Easter eggs without having to freehand draw or paint. Choose from an array of stencils, such as animals, flowers, and other fun shapes, to make your own custom designs.
9. Glitter
Adding glitter to wooden Easter eggs is a great way to make them sparkle and shine! Use a paintbrush or sponge to spread on a thin layer of glue, then sprinkle with glitter for an extra special look.
10. Wrap
Wrapping wooden Easter eggs in decorative ribbon or fabric is a great way to add texture and color. Use strands of ribbon or strips of fabric to create patterns, like braiding or weaving, for a unique look. You can also use tissue paper or scrapbook paper to wrap the eggs for added visual interest.
Decorating wooden Easter eggs is an easy and fun activity that can be enjoyed by kids and adults alike. With just a few simple supplies and some creativity, you can make beautiful wooden eggs that will add some extra fun to your Easter celebrations!
Don’t be afraid to experiment with different techniques and materials—you never know what kind of unique creations you might come up with!
8 Tips to Make the Egg Special
Decorating wooden Easter eggs is an enjoyable and creative way to prepare for the holiday. With a few simple steps, you can transform plain wooden eggs into unique works of art! Here are 8 tips to make your wooden Easter egg decorations stand out:
1. Paint with bright colors. Start by painting the surface of the egg with bright colors like pink, yellow, blue, and green. Use thin layers of paint for a more even finish. Painting can be a fun and creative way to express yourself.
2. Add glitter. Adding some glitters, sequins, and rhinestones can make your wooden Easter eggs sparkle! Mix different colors of glitter for an eye-catching effect. Glitters can also be used to highlight the design of the eggs.
3. Use fabric scraps. If you have some scrap pieces of fabric, why not use them to decorate your wooden Easter eggs? Cut out small shapes such as stars, hearts, and circles and glue them onto the egg surface for a unique look. You can even draw patterns on the fabric before gluing it onto the egg.
4. Create 3D effects. Use hot glue gun to build up different structures on your eggs, such as flowers, polka dots, and stripes. You can also use foam balls or other small objects to create a 3D effect.
5. Paint with metallic colors. Metallic paints can be used to create stunning effects on wooden Easter eggs. Use a black base coat and then layer the metallic paint for extra sparkle. Metallic colors also look great when used in combination with glitter and rhinestones.
6. Create a personalized message. Why not write a special message on one of the eggs? Use a white paint pen to create your own custom messages such as “Happy Easter” or “Easter Blessings.” This is a great way to make your eggs meaningful and personal.
7. Add ribbon or lace. Using ribbons or laces is another way to give your wooden Easter eggs a unique look. You can tie the ribbon around the egg or glue it in place for a more permanent decoration. You can also use the same technique with some colorful laces for an elegant touch.
8. Create a unique design. If you want to make your wooden Easter eggs look extra special, why not create a unique design? Use stamps, rubber bands, or any other material that you have at hand to make your own original designs!
By following these 8 tips, you can easily decorate wooden Easter eggs in creative and unique ways. Have fun experimenting with different colors, textures, and techniques to make your eggs stand out!
How Long Will It Last Long?
Wooden Easter eggs are designed to be long-lasting and durable. With proper care and handling, they can last many years. To ensure the longevity of your eggs, try to keep them away from moisture and direct sunlight as much as possible.
Additionally, make sure that you clean the eggs regularly with a damp cloth to remove any dirt or dust. With the right care, your wooden Easter eggs will be a lasting reminder of your holiday celebrations for many years to come!
Conclusion
Crafting wooden Easter eggs is a fun and creative project for all ages. With the help of some simple supplies, you can make your own beautiful wooden decoration in no time. Not only are they great for your holiday decor, but they also double as keepsakes that can hold a special memory from the season. You can even save them and reuse them every year!
And the best part — once you make it, you’ll be able to continue to use it for years to come.
Thus, creating these beautiful pieces of art is sure to bring joy not only during the holidays but throughout the entire year!
So why wait? Get started on your piece today and add something extra special to your Easter décor this season. Now that you know how to decorate wooden easter eggs, start gathering the supplies needed and whip up an amazing craft item!