
Making Easter baskets out of milk jugs is a great way to save money and create something unique. With only a few materials, you can craft a special basket for your loved ones that will last long after the holiday has passed. Not only are they cost-effective, but they also provide an opportunity to get creative and have fun with coloring and decorating.

Using milk jugs to make Easter baskets is a great way to reuse materials and reduce waste. With just a few supplies, you can easily create an eco-friendly Easter basket that your little ones will love. Making these Easter baskets out of milk jugs gives them an extra fun twist that everyone will enjoy. In this blog post, You will learn how to make easter baskets out of milk jugs.
Materials You Will Need
- Milk jug
- Scissors
- Hot glue gun
- Ruler or measuring tape
- Pencil
- Markers or paint (optional)
- Burlap or other fabric (optional)
- Ribbon (optional)
- Basket filler (optional)
- Craft foam (optional)
- Buttons, beads, or other decorations (optional)
- Easter grass (optional)
Step-by-Step Processes for How to Make Easter Baskets Out of Milk Jugs
Step 1: Inspect the Milk Jug
Start by inspecting the milk jug. Ensure there are no cracks or holes that could compromise the integrity of the basket you’re about to create. If so, consider using a different container for your Easter basket. Using a pencil, trace out the outlines of your desired shape onto the front and back of the milk jug. This will serve as your guide for cutting out the shape you wish to create.
Step 2: Cut Out Shape from Milk Jug
Carefully cut along the lines traced onto the milk jug using scissors or a craft knife. Once finished, do another inspection of your work to make sure all edges are clean and straight. Use a craft knife to cut two small holes at the top of your basket.

This will serve as the handles for carrying the basket around. Then, using string or twine, make two loops which you can use to pull up on the handles when needed.
Step 3: Design the Milk Jug
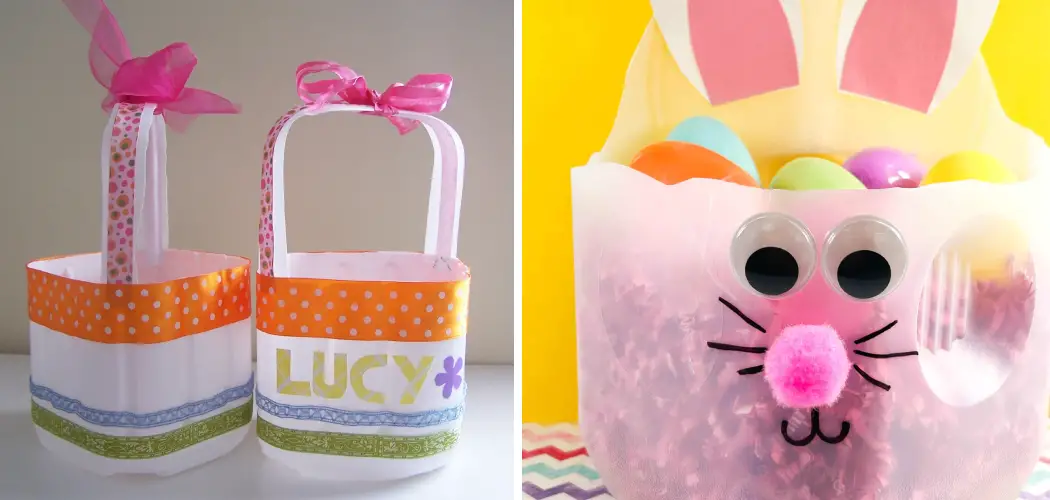
Decorate your milk jug however you, Consider adding paint, glitter, ribbons, or other decorations of your choice. Let your creativity shine, and make a unique Easter basket that will stand out from the rest. Now it’s time to fill up your Easter basket with treats!
Consider adding candy, chocolate eggs, stuffed animals, or any other goodies you choose. Feel free to get creative and make a one-of-a-kind Easter basket for someone special.
Step 4: Add Finishing Touches
Top off your Easter basket by adding ribbon around the handles and other finishing touches that will make your basket look extra special. Gently tug on both handles to test their strength and ensure they can hold your Easter basket’s weight when filled with treats. If needed, add more string or twine for added support.
Step 5: Make It Personal
Personalize your Easter basket even further by adding a special message or note for the recipient. Consider using a permanent marker to write directly onto the milk jug or create an additional card you can tuck away in the basket. Your handmade Easter basket is now complete and ready to be gifted. For an extra special touch, consider wrapping it in cellophane or a festive Easter-themed bag.
With just a few simple supplies and a bit of time, you can create a unique Easter basket made out of milk jugs that will put smiles on the faces of your family and friends!

Tips for How to Make Easter Baskets Out of Milk Jugs
- If working with small children, it’s important to supervise them while making the Easter baskets. Ensure they are old enough and can safely handle sharp scissors and a hot glue gun.
- Use caution when handling a hot glue gun, as the glue bottles get extremely hot. It is best to wear protective gloves if possible.
- When cutting out the circles for the bottom of the basket, it’s important to use sharp scissors carefully and keep fingers away from any blades.
- Make sure to work in a well-ventilated area when using paints or markers, as these can be harmful if inhaled.
- Wash milk jugs thoroughly before beginning the project, as leftover milk or other residue may be inside the jug.
- When cutting holes in the sides of the jugs, make sure to use a sharp knife and do so only when an adult is present.
- Do not leave any tools or materials unattended around small children while working on the Easter basket project. Keep all scissors, hot glue guns, knives, and paints away from them.
How Long Should Each Step Take in Terms of Time and Effort?
Making Easter baskets out of milk jugs is not complicated, but it takes some time and effort. Generally speaking, you should spend about one hour per basket. This includes the time needed to cut up the jug, paint or decorate it, and add additional decorations, such as ribbons or bows.

Additionally, you may want to add grass or candy to the basket, which can take additional time depending on how much you want to include. The time and effort spent will depend on how intricate your designs are. If you don’t have a lot of experience with crafting, this could be a great opportunity to learn a new skill. There are a variety of online tutorials and videos that can teach you the basics and provide ideas for decorations.
Are There Any Creative Ideas for Decorating Your Basket?
Once you’ve finished constructing your Easter basket from the milk jug, it’s time to get creative and think about how best to decorate it. You can customize the look of your basket in various ways, depending on what you have available. For example, you could use colorful ribbons or fabric scraps for a festive look.
You could also use markers to draw a design or glue on some buttons for a more 3-dimensional texture. You can also choose to add Easter decorations like bunnies or eggs or hang small bells from the handle of your basket.
When it comes time to fill your Easter basket with goodies, you’ll be impressed at how much fits inside! You can fill it up with all sorts of treats, like chocolates and candy, small toys and trinkets, or even some plastic Easter eggs filled with surprises. Whichever way you decide to decorate your basket and whatever you choose to put in it, you’ll surely have a one-of-a-kind Easter treat.
What Common Mistakes to Avoid When Creating a Basket Out of a Milk Jug?
When it comes to crafting with milk jugs, there are a few mistakes you’ll want to avoid. The most important thing is to ensure that your basket’s opening is wide enough to fit treats and other items inside easily. You don’t want to create something too small or narrow – no one wants a basket they have to struggle to get things in and out of.

Another mistake to avoid is cutting the holes too close together. If the cuts are too close, your basket will be weak and unable to open. Try to keep an even distance between your cuts for a sturdy structure. Finally, make sure you use strong, durable materials when creating a basket from a milk jug. Using thin materials that can easily rip or tear when constructing your Easter treat holder isn’t ideal.
What Are Some Other Ideas for DIY Easter Baskets?
If you don’t feel like working with a milk jug, many other ways exist to create a unique Easter basket. For example, you could use fabric to sew together an adorable mini-bag with your favorite design or pattern.
You could also repurpose an old shoe box and turn it into a fun treat holder with the help of some paint and decorations. Another idea is to take a paper plate and fold it up like an envelope, then fill it with goodies.
You can also cover a small cardboard box with wrapping paper for a festive look. No matter what you choose, your finished basket will be an adorable DIY Easter treat holder. These ideas are for making Easter baskets from milk jugs and other materials. With a bit of creativity and imagination, you can create something truly unique and special.
Conclusion
One of the main disadvantages of creating an Easter basket out of a milk jug is that it can be difficult to ensure it’s sturdy and stable. Since milk jugs are made from thin, lightweight materials, they are only sometimes ideal for holding heavier items or more treats.
Additionally, if you don’t cut the holes evenly and in the right size, your basket may be too weak or unstable to maintain shape. Taking the time and ensuring the cuts are precise before constructing your finished product is important.
In conclusion, making Easter baskets out of milk jugs is a great way to save money and create something special for your family. With just a few simple supplies, you can make beautiful Easter gifts that will be cherished for years. Making these baskets also allows you to get creative and make unique shapes and designs to express your creativity.
I hope this article has been beneficial in learning how to make easter baskets out of milk jugs. Make Sure the preventive measures are followed chronologically.