
Are you looking for a creative and fun way to add beauty to your home? If so, it may be time to dive into the world of Cricut flowers! This crafting trend is growing in popularity as it allows anyone with access to a Cricut machine (or someone willing to borrow one) to easily create beautiful flower shapes with cardstock, vinyl, fabric and other materials.

With simple instructions on how to make cricut flowers and the right accessories, anyone can create gorgeous Cricut flowers in no time – whether you are giving them away as gifts or using them as wall decor.
Plus, when you make it yourself, the possibilities for customizing color combinations and designs are practically limitless! So what are you waiting for? Let’s get started on your flower-making journey today!
Needed Materials
Given below is a list of the few materials you will need to create your own Cricut flowers. These materials are easily accessible in local craft stores or can be purchased online:
- Cricut Machine
- Cardstock/fabric/vinyl
- Scissors/cutting Mat
- Hot Glue Gun/glue Dots
- Floral Wire (Optional)
- Floral Tape (Optional)
- Pearl Beads/rhinestones (Optional)
11 Step-by-step Guidelines on How to Make Cricut Flowers
Step 1: Choose a Flower Design
First and foremost, choose the type of flower you want to create from the Cricut Design Space. Whether it’s a rose, daisy, sunflower or any other flower – there are plenty of designs available for you to choose from.
It’s best to start with a simpler design if you are new to Cricut as it will be easier to follow along. This will also give you a better understanding of how the machine works and help you get more comfortable with the process. You can also use templates available on the internet or create your own design.
Step 2: Select Your Material
Once you have selected your flower design, choose the material for your flowers. Cardstock, fabric, and vinyl are some popular options – each giving a different feel and look to the flowers. Make sure to use materials that are specially designed for cutting with the Cricut machine.

It’s best to experiment with different materials to see which you prefer and what works best for the flower design you have chosen. You can also mix and match materials for a unique look!
Step 3: Prepare Your Material
Before you start cutting, make sure your material is adhered to the cutting mat. This will ensure that it stays in place while the machine is in use and prevents any tearing or shifting of material during the process.
This step is particularly important if you are using delicate materials like tissue paper or vellum. It’s also a good idea to use a brayer tool to smooth out any air bubbles and ensure proper adhesion. It’s always better to be safe than sorry!
Step 4: Load Your Cutting Mat
Insert your cutting mat into the machine and make sure it is loaded correctly. The arrows on the machine will guide you to place the mat in the right direction. It’s also important to adjust the white rollers on the machine to match the size of your mat.
You can do this by moving them closer or further apart using the corresponding numbers on the machine. You can also refer to your Cricut machine manual for specific instructions.
Step 5: Choose Your Settings
On your Cricut Design Space, select ‘Make It’ and choose your material setting. This will set the appropriate blade depth and pressure for cutting your material precisely.
But, if you are using a material that is not listed in the options, do a test cut to determine the correct settings. It’s better to start with slow cutting speed and low pressure as you can always increase these settings if needed. It’s also important to mirror your image if you are using heat-transfer vinyl.

Step 6: Cut the Material
Once your settings are adjusted, press ‘Go’ and watch the Cricut machine work its magic! But, make sure to keep an eye on the machine at all times during the cutting process. This will allow you to intervene if any errors occur or if the blade needs to be adjusted.
Once the cut is complete, unload your mat by pressing the button with two arrows. It’s always a good idea to wait until the machine has stopped moving completely before unloading.
Step 7: Assemble Your Flowers
Remove your cut material from the mat and carefully remove any excess pieces with a weeding tool or scissors. You can also use a lint roller to remove any small pieces that may be stuck. Gently fold or curl the petals of your flowers to give them a more natural look.
Then, layer and glue the pieces together using a hot glue gun or dots. You can also use a needle and thread to sew the petals in place for a more durable hold. It’s also a great time to add any embellishments like beads or rhinestones! It’s your flower, so let your creativity shine!
Step 8: Curling Petals (Optional)
If you want to add a more realistic touch to your flowers, use a pen or pencil to curl the edges of the petals slightly. It’s a small step, but it can make a big difference in the overall appearance of your flowers.
You can also use tweezers to shape and bend the petals for more precision. But be careful not to damage or rip the petals in the process. It’s best to practice on scrap material before working on your actual flowers.

Step 9: Glue Your Flowers Together
Use hot glue or glue dots to assemble the layers of your flower according to the design in the Cricut Design Space. You can also use a floral wire and tape to attach the flowers to create a stem if you prefer.
This will make it easier to arrange them into a bouquet or use them as decor in a vase. However, if you are using a cardstock or vinyl material, you can skip this step as they will be sturdy enough to stand on their own.
Step 10: Add Embellishments (Optional)
To add a little extra sparkle or dimension to your flowers, you can use pearl beads, rhinestones or other embellishments of your choice. It’s best to use a hot glue gun or tweezers for more precise placement.
You can also paint the edges of your flowers with acrylic paint or add glitter for an extra touch! It’s all up to your creativity and personal preference. This step is also a great way to get kids involved in the process and let them unleash their creativity.
Step 11: Display Your Cricut Flowers
And that’s it! You now have your very own DIY Cricut flowers ready to be displayed. Use them as home decor, gift to family and friends, or add them to your hair accessories – the possibilities are endless!
Always remember to have fun and experiment with different designs, materials, and techniques. With practice, you will become a pro at making Cricut flowers! So what are you waiting for? Get your Cricut machine out and start creating beautiful flowers today! Happy crafting!
Follow these simple guidelines on how to make cricut flowers, and you will be a pro at making Cricut flowers in no time. With practice, you can experiment with different materials, designs, and embellishments to create unique and beautiful flowers that will surely impress!
Do You Need to Use Professionals?
The best part about making Cricut flowers is that you do not need to be a professional. With access to a Cricut machine and the right materials, anyone can create these stunning flowers.
It’s a great activity for kids and adults alike, providing endless possibilities for creativity and fun. So why not give it a try today? It’s a perfect way to add a personal touch and beauty to your home without breaking the bank.
Frequently Asked Questions
Q1: Can I Use Materials Other Than Cardstock, Fabric or Vinyl to Make Cricut Flowers?
A1: Yes, you can experiment with different materials such as felt, crepe paper or even wood veneer to create unique and interesting flower designs. It’s best to test the material on a small scale before cutting an entire flower.
Q2: Can I Use Scissors Instead of a Cricut Machine?
A2: While it is possible to create flowers by hand, using a Cricut machine ensures precise and professional-looking cuts. Plus, it saves time and effort! It’s certainly worth considering investing in a Cricut machine for all your future crafting needs.

Q3: How Can I Adjust the Size of My Flower Design?
A3: In the Cricut Design Space, you can easily adjust the size of your flower design by clicking on it and dragging the corner handles to resize it according to your preference. You can also change the size of your design before cutting it by using the ‘Customize’ option.
Q4: How Do I Care for Cricut Flowers?
A4: Cricut flowers are relatively low maintenance. Avoid exposing them to direct sunlight or excessive moisture, and they will last for a long time. To clean them, gently dust off any dirt using a soft cloth or brush.
Conclusion
So as you can see, anyone can make beautiful Cricut flowers with just a few simple steps and a little bit of creativity.
Making them is as easy as finding and cutting out the images, arranging the flowers together on your project surface, and adding them to whatever it is you are making. Whether it’s for a scrapbook page or to decorate home décor items, these artificial flowers are sure to look stunning.
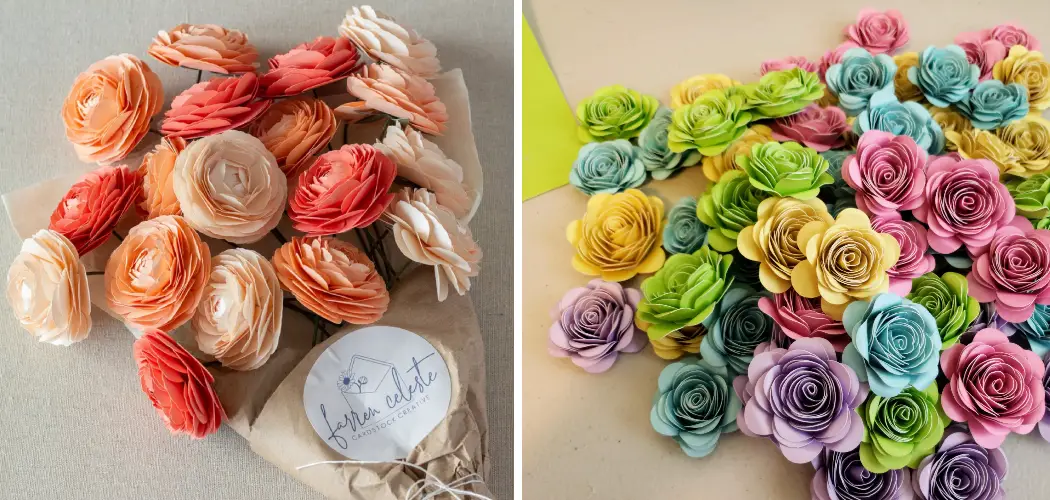
Let your imagination run wild by mixing and matching different kinds of cardstock and colors together to create unique bouquets. So grab that Cricut machine and get started on crafting those amazing paper flower arrangements! Now, let’s get creating—you won’t be disappointed by the results! Thanks for reading this article on how to make cricut flowers.