
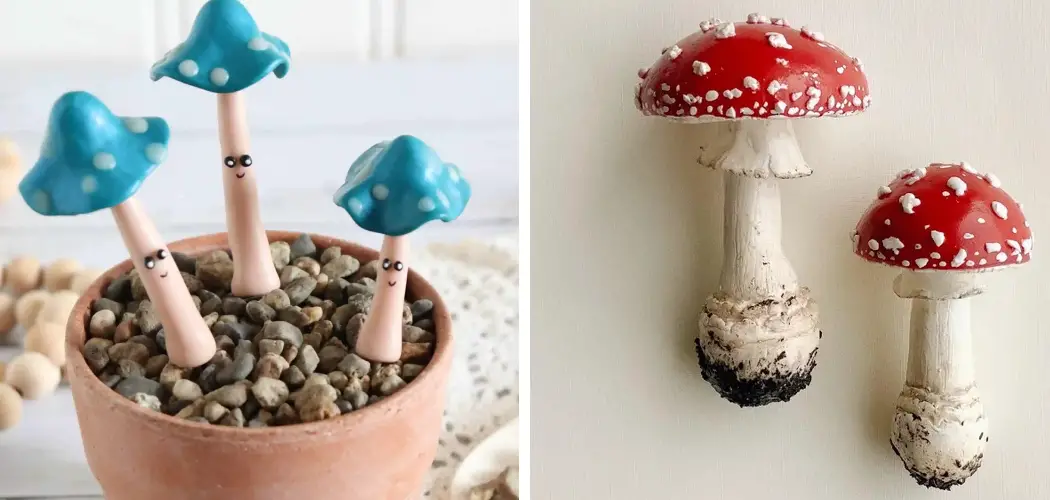
Are you looking for a creative way to express yourself? Have you ever thought about crafting with clay? If so, then the art of making clay mushrooms is something that should be explored.
It’s an easy and enjoyable activity that can produce some eye-catching results. In this blog post, I will discuss how to make clay mushrooms in simple steps so you can show off your latest creations!
Whether you’re looking for a fun craft activity to occupy yourself with or something special to add as decor in your home, creating clay mushrooms is an easy and enjoyable way to do so.
Not only that but these 3-dimensional works of art can even be customized to make them truly unique! In this blog post, we’ll take a look at the tools and materials necessary, along with step-by-step instructions on how you can create your own clay mushroom sculptures right from the comfort of your home.
Why Do You Want to Clay Mushrooms?
1. To Add as Decor in Your Home
One of the main reasons people make clay mushrooms is to use them as decoration in their homes. They can be placed on tables, hung from the wall, or used as part of an outdoor garden display. These mushrooms bring bright colors and whimsy to any space and will add a unique touch that your friends and family are sure to appreciate.
2. To Create Gifts
Nothing says I care like a handmade clay mushroom. Whether you want to give it as a gift for a holiday, birthday, or just because these mushrooms will be sure to bring a smile to anyone face. Plus, because they can be made in different shapes and sizes, you’re sure to find one that fits the occasion perfectly.
3. To Learn a New Craft
Clay mushrooms also offer an opportunity for you to learn and practice new crafting skills. From learning to mix clay, shaping the mushrooms with tools, and controlling your texture and colors to glazing and sealing them; there are plenty of ways to challenge yourself as you explore the world of clay.
No matter why you choose to make clay mushrooms, these little handmade creations will bring a sense of joy and satisfaction every time you look at them. So grab some clay and get started!
How to Make Clay Mushrooms in 5 Easy Steps
Step 1: Gather All the Materials
The very first step is to gather all the materials needed to make a clay mushroom. You’ll need air-dry clay, craft paint, acrylic sealer, and a paintbrush. Also, you can use a rolling pin, cookie cutters, and a modeling tool for crafting the mushroom cap.
Step 2: Make the Mushroom Cap
Take some air-dry clay and roll it into a flat sheet of about 0.25-inch thickness with a rolling pin. Cut out your desired shape with cookie cutters, or you can use your hands to shape the mushroom cap.
Step 3: Make the Stem of the Mushroom
Once you are done with the mushroom cap, it’s time to make the stem. Take a small piece of air-dry clay and roll it into a cylindrical shape. Then attach this stem to the bottom of your mushroom cap, making sure it’s secure.
Step 4: Paint the Mushroom
Now that both the mushroom cap and stem are ready, it’s time to give them their distinct colors. Use craft paint to color the mushroom in whatever hue you like. Once you’re done with painting, seal the colors with an acrylic sealer.
Step 5: Dry and Display
After you finish painting, leave the mushrooms to dry for 24 hours. Once they are completely dried out, proudly display them in your hom
e or garden! Make sure to place them in a spot where they won’t be exposed to moisture.
Making clay mushrooms is an enjoyable and simple project that can easily turn into a fun family activity. So go ahead, gather all the materials, and get creative with your mushroom designs! Once you’re done crafting, don’t forget to display your colorful creations for everyone to admire. Enjoy!
Some Additional Tips to Make Clay Mushrooms
1. Use High-Quality Clay
Make sure to use high-quality clay as this will ensure that your mushrooms are strong and durable. It is very important to avoid air bubbles that are created from using lower-quality clay, as these can cause cracking or crumbling of the mushrooms.
2. Roll Clay Evenly
Before you start shaping your mushrooms, make sure to roll out your clay evenly so that it is easier to work with. This will help create a uniform shape for all of your mushrooms and will help them look more realistic.
3. Create Details
When you are shaping your mushrooms, be sure to create details like stalks and gills that can make the mushroom more realistic looking. Using tools such as knives and toothpicks can help create texture and depth in your clay mushrooms.
4. Bake Mushrooms Correctly
Once you have finished shaping your mushrooms, you will need to bake them. Make sure to follow the baking instructions for your type of clay and only bake them for as long as is suggested in order to ensure that they come out correctly.
5. Finish with Glaze
Finally, once your mushrooms are cooled down and hardened, you can finish them with a glaze. This will help to protect and preserve your mushrooms, as well as give them an extra glossy finish. You can find glazes in craft stores or online.
Following these tips can help you create realistic clay mushrooms that are sure to impress! With a bit of practice, you’ll be able to make beautiful mushrooms in no time! Good luck with your clay mushroom-making and have fun!
Frequently Asked Questions
What Precautions Should I Take When Working with Clay Mushrooms?
When working with clay mushrooms, it is important to take the proper safety precautions. Make sure you are wearing gloves and a mask to protect yourself from any particles or fumes that may be released during the creation process. Additionally, always work in a well-ventilated area and wear appropriate clothing such as long sleeves and pants.
It is also important to keep small children away from any area where you are working with clay mushrooms as they can be a choking hazard. Finally, it is wise to use tools such as clay cutters or knives when shaping the clay into mushroom shapes.
What Types of Clays Can I Use for Making Clay Mushrooms?
When making clay mushrooms, you can use a variety of clays. The most popular types are air-dry clays, polymer clay, and oven-baked clay.
Air-dry clays do not require any heat to harden and simply need to be left out in the open until they are completely dry. Polymer clays should be baked in an oven to cure them clay. Oven-baked clays need to be fired in a kiln for it to become hard and durable.
What Tools Will I Need When Making Clay Mushrooms?
When making clay mushrooms, you will need some basic tools such as a rolling pin, a knife, or clay cutters. You can also use other tools such as sculpting tools, paintbrushes, and stamps for more intricate designs.
Additionally, you will need some kind of sealant such as varnish to protect the clay from moisture damage. Finally, depending on the type of clay you are using, you may need an oven or kiln to harden the clay.
How Do I Store Clay Mushrooms?
When not in use, it is best to store your clay mushrooms in an airtight container with a desiccant packet. This will help keep the clay from drying out and cracking. Additionally, you can also wrap them in tissue paper or bubble wrap for extra protection.
It is also important keep them away from any moisture or direct sunlight as this can lead to discoloration. Finally, for long-term storage you can freeze the clay mushrooms in an airtight bag or container. This will help preserve their color and shape.
What Are Some Tips for Making Clay Mushrooms?
When making clay mushrooms, it is important to start with a firm and smooth base. This will make it easier for you to shape the clay into mushroom shapes. Additionally, try using two different colors of clay for your mushrooms – this will add texture and depth to them.
Finally, if you are having trouble shaping the mushrooms or adding intricate details, use sculpting tools or paintbrushes to help you get the look you want. With a little practice, you will be able to create beautiful clay mushrooms!
Conclusion
Making clay mushrooms can add the perfect amount of whimsy and charm to any craft project. Whether you are making garden ornaments, fairy houses, mushroom decorations, or mushrooms for a terrarium, the techniques used to make any type of clay mushroom are relatively simple and require minimal supplies that can be purchased at most craft stores.
Now that you know how to make clay mushrooms, you can unleash your creativity by exploring different designs and techniques to bring unique and exciting elements to any project! And once complete, these charming little creations will be sure to put a smile on anyone’s face. So go forth and create some magical mushrooms with your own clever clay-crafting hands!