
Are you looking for a fun and creative project to add a unique touch of homemade charm to your bedroom or living room? Punch needle pillows could be the perfect option – not only are they eye-catching, but they’re also easy to make with minimal supplies.
Whether it’s adding color accents or creating a beautiful multi-colored design, learn how to make a punch needle pillow by following these simple step-by-step instructions. With just some felt pieces in various colors, some thread, and stuffing, you can craft the perfect handmade pillow for any space!
Punch needle pillow making is an easy craft that can help you add some style, color, texture, and warmth to any room in your house. Not only are punch needle pillows beautiful and inviting, but they’re also incredibly easy to make with no sewing required!
In this post, we will cover everything you need to know about punch needle pillow making – from what materials are needed, the various techniques used throughout the process, and helpful tips on how to create a truly unique finished product. Keep reading if you’re ready to turn your home into a haven of cozy vibes with handmade punch needle pillows!
Why Do You Want to Make a Punch Needle Pillow?
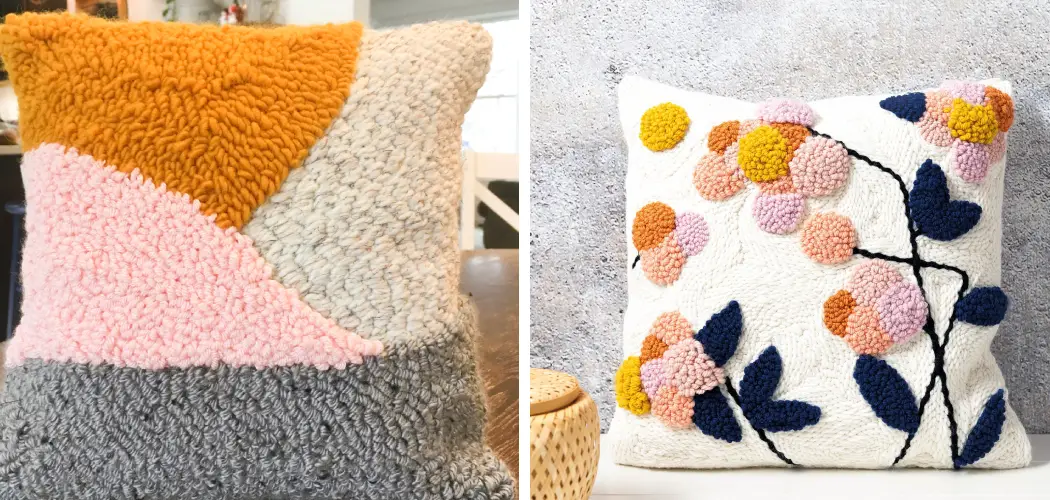
1. To Add Some Style
One of the main reasons to make a punch needle pillow is to add a bit of style and personality to your room. Punch needle pillows are fun and unique, so they can be the perfect way to make any room look more interesting.
2. To Show Off Your Creativity
Making something with your hands can be an incredibly satisfying experience, especially if you make something as fun and creative as a punch needle pillow. By making your own, you can showcase your creativity to anyone who visits your home.
3. To Save Money
Punch needle pillows are often much cheaper than store-bought ones, so you can save some money by making them yourself. The best part is that you don’t need a lot of expensive materials to make one, so you can be sure that you won’t break the bank.
4. To Get a Unique Gift
If you’re looking for a unique gift for someone special, why not make them a punch needle pillow? Not only will they love the thoughtfulness behind it, but they will also have a one-of-a-kind item that nobody else has.
How to Make a Punch Needle Pillow In 5 Easy Steps
Now that you know why you should make a punch needle pillow, it’s time to learn how to do it. Here are the steps:
1. Gather Your Supplies
First, you need to gather all of the supplies you will need for your project. This includes a punch needle, cloth or rug backing fabric, yarn, scissors, and an embroidery hoop. Also, consider getting a punch needle pillow pattern to make the process easier.
2. Prepare Your Fabric
Cut your fabric into two pieces that will fit on top of the embroidery hoop, making sure that they’re slightly larger than the hoop itself. Then, iron them both so they’re wrinkle-free and place them in the hoop, making sure that they’re stretched tightly.
3. Thread Your Punch Needle
Next, you need to thread your punch needle with yarn. To do this, put one end of the yarn through the eye of the needle and pull it through until both ends are even. Then tie a knot at the end so that the yarn doesn’t slip out.
4. Start Punching
Now it’s time to start punching! Begin by slowly pushing the needle in and out of the fabric, making sure that you don’t push too hard or too deep. Keep going until you have created a pattern all over your fabric.
5. Finish Up
Once you have finished punching, take your fabric out of the hoop and cut off any loose threads. Then, flip the fabric over and stitch together both sides with a sewing machine or by hand to create your punch needle pillow.
And that’s it! You now have a beautiful handmade punch needle pillow. Enjoy!
Some Additional Tips to Make a Punch Needle Pillow
1. Do Not Pull the Fabric Too Tight
The fabric used for punch needling needs to be able to move slightly with the needle when it is being punched. If you pull the fabric too tightly, it won’t be easy to make precise loops and there is a risk of damage to the fabric itself.
2. Use Threads of Varying Textures and Colors
Combining different types of threads can add depth and texture to your punch needle pillow. Consider experimenting with different thread textures and colors for a unique look. Also, select colors of threads that will match the decor of your home.
3. Make Sure You Have Enough Thread
It is best to have an extra thread on hand, as it can be difficult to match colors if you need more thread during punch needling. It is always better to have too much than not enough.
4. Choose the Appropriate Needle Size
Needles come in various sizes and shapes, so selecting one that fits your project correctly is important. Generally, a larger needle size will create a thicker finish and more loops per inch, while a smaller needle will create thinner loops with less coverage.
5. Show off Your Work!
Once you have finished your punch needle pillow, why not display it proudly in your home? If you’re feeling especially adventurous, you can even add some embellishments like beads or sequins to give it extra flare. No matter what you decide, you’re sure to be proud of your work.
These tips should help you create a beautiful piece of art that will last for years to come! Have fun and enjoy the creative process that comes with making a punch needle pillow. Good luck!
Frequently Asked Questions
What Precautions Should I Take Before Starting?
Before beginning your project, make sure you wear clothes that can get messy and have adequate space to spread out the fabric. It is important to use sharp scissors when cutting the fabric, as dull ones may cause fraying.
In addition, lay down a protective sheet or cloth to protect your furniture from any dye or residue from the fabric. Lastly, choose a hoop that fits your pillow form snugly so your design will transfer properly to the fabric.
What Materials Do I Need?
To make a punch needle pillow, you will need a punching needle, some yarn or embroidery thread, a piece of monk’s cloth or rug warp, a pillow form insert, an embroidery hoop, and scissors. Additionally, you may need some fabric dye to color the monk’s cloth or rug warp prior to beginning your project.
How Do I Transfer My Design Onto the Fabric?
Using a permanent marker or fabric pen is the easiest way to transfer your design onto the fabric. You can also use a transfer paper or printed pattern, tracing it onto the fabric with a pencil or disappearing ink marker. Finally, you can use a dressmaker’s carbon paper to trace your design onto the fabric.
How Do I Start Punching?
Begin by threading your needle and tying a knot at the end of the thread. Next, insert the needle into your fabric and pull it out again through one or two loops in the fabric. To create a higher loop, you can use multiple strands of yarn or thread and tie them together at the end.
Once you have completed your design, you can add any decorative elements such as beads, sequins, or ribbons to the surface of your pillow. Finally, gently remove the hoop and slip in your pillow form insert. Your punch needle pillow is now ready to enjoy!
How Much Yarn Do I Need?
The amount of yarn you need will depend on the size and complexity of your design. You may only need one or two skeins of yarn for a basic pillow. However, for more complex designs, you may require multiple skeins in several different colors.
It is best to err on the side of caution when purchasing yarn for your project, as it is easier to return extra skeins than it is to find more of the same color after you have begun working.
Conclusion
Now you know how to make a punch needle pillow! Overall, making a punch needle pillow is surprisingly fast and easy. You can customize it any way you like, such as using different colors for the fabric or trying out a variety of yarns for the surrounding design. This craft does require some creativity and patience, but if you give it your best effort, you’ll create something truly unique and beautiful.
This project will engage your creative side and give your living space some new life that’ll easily draw the attention of friends and family alike! So grab those supplies, find a quiet place to let your creative juices flow, and make something special that won’t be found anywhere else in the world.