
Have you ever been looking for a creative way to spruce up this year’s St. Patrick’s Day celebration? Look no further! This blog post will show you step-by-step instructions on how to make an origami shamrock, perfect for decorating your living space or gifting to a loved one.
Not only is it fun and easy enough for kids of all ages to craft, but you can also customize the paper color and design depending on your taste! Don’t worry if you don’t have any prior experience with Origami – by the end of this guide, we’ll have you creating stunning masterpieces in no time at all! So let’s get started.

Tools and Materials You Will Need to Make an Origami Shamrock
- Origami paper (preferably green)
- Scissors
- Glue or a glue stick
- Ruler
- Pencil
Step-by-Step Guidelines on How to Make an Origami Shamrock
Step 1: Cut the Paper
Start by cutting your origami paper into a 6-inch square. Make sure to use sharp scissors and keep the edges neat and crisp. Cutting the paper before folding it will make the process much easier. While green paper is typically used to make an origami shamrock, feel free to get creative and try different colors or patterns!
Step 2: Fold the Paper
Once your paper is cut into a 6-inch square, you will need to fold it in half. Take one corner of the square and fold it over so that the two opposite edges meet in the center. Now unfold the paper and you should have two crease lines running through your square. You will need to use these crease lines as guidelines for the next steps.

Step 3: Crease the Paper
Take one of the newly created creases and fold the corner over to the center again. Once again, you want to make sure that both corners are meeting at the same point in the middle of the paper. Unfold the paper and you should now have four crease lines running through your paper. Creasing the paper this way will make it easier to fold the shamrock.
Step 4: Fold the Corners
Take each corner and fold it in so that it meets at the center point of your square. Unfold the paper and you should see a diamond shape in the middle of your square with eight crease lines running through it. Folding the corners in this way will help create the iconic shamrock shape.

Step 5: Fold the Diamond Shape
Take the diamond shape in the center of your square and fold it up so that it is now a triangle shape. Unfold the paper, and you should have twelve crease lines running through your origami shamrock. This is the basic shape of the shamrock – you may find it helpful to go back and forth between steps 4 & 5 until everything is lined up perfectly.
Step 6: Secure the Shamrock
Once your origami shamrock has been created, use a glue stick or other adhesive to secure it in place. This will help keep all the edges and folds in place so that your shamrock will be nice and sturdy. You can also use a ruler to make sure that all the edges are lined up before you glue them down.

Step 7: Decorate Your Shamrock
Finally, it’s time to customize and decorate your shamrock! Feel free to draw designs or patterns on the shamrock or add any decorations you like. You can also use different colors of origami paper to make your shamrock even more unique and creative. Once you’re finished, display your beautiful masterpiece for all to see!
We hope that this blog post has given you the tools and inspiration you need to make an origami shamrock of your own! With a few simple steps and some creativity, you can make a beautiful piece of art that is sure to impress. So get folding!
Additional Tips and Tricks to Make an Origami Shamrock
- To make a more intricate shamrock design, you can fold six edges of the paper and create a star shape with them. Then, fold each corner of the star into a point until you have the desired shamrock shape.
- Another way to make an origami shamrock is by folding two squares instead of one. Fold both squares in half diagonally, and then fold the sides in until both squares meet. By doing this, you will create a larger version of the traditional origami shamrock.
- If you want to make a three-dimensional shamrock that stands up on its own, you can do so by folding two squares diagonally and joining them together at their corners with a glued tab.
- You can also create a shamrock with two different colored papers! Simply fold one square in half and the other differently for a unique look.

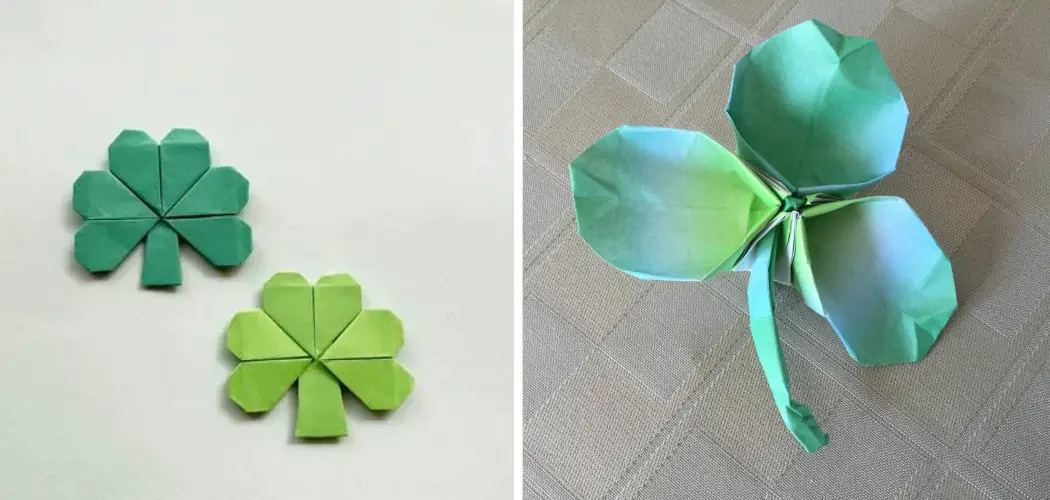
5. For a more advanced shamrock, try making a four-leaf clover! Start by folding four squares in half and then joining them together with some glue. When you have all the pieces connected, it should look like a four-leaf clover.
6. Finally, you can always add some glitter or other decorations to your origami shamrock to make it more special or festive.
Following these tips and tricks, you can easily make a beautiful origami shamrock that will add a touch of luck and happiness to your home or office. With just a few simple folds, you can create something unique and special that everyone will love! Happy folding!
Precautions Need to Follow for Making an Origami Shamrock
- It is important to handle the paper carefully while folding it for an Origami Shamrock. Rough handling can cause tearing or ripping of the paper, which defeats the purpose of creating a beautiful shamrock.
- Make sure that you have a sharp pair of scissors so that you can make precise cuts with them. A dull pair of scissors will not only make cutting difficult but can also lead to jagged edges on the finished paper shape.
- If you’re using colored origami paper, make sure that it isn’t too thin or thick for folding. Too thin a paper will not hold the creases properly and too thick a paper will be difficult to fold in different shapes.
- Keep your work area neat and tidy while making the origami shamrock. You need to be sure that there are no paper scraps lying around as this can reduce the accuracy of the finished shamrock.
- It is essential to keep your hands clean and free of moisture while folding the origami shamrock. Even a small amount of dirt or moisture can cause problems with the shape and size of the shamrock.
- Make sure that you have all the required equipment like origami paper, scissors, and a ruler to make an origami shamrock. Trying to make one without these tools can lead to disaster!
- Finally, it is important to follow the instructions carefully while making the origami shamrock so that it turns out perfect! Taking shortcuts or deviating from the instructions can lead to an imperfect shape.
Following these precautions can help you make a perfect origami shamrock that will be admired by all! Have fun folding!
Frequently Asked Questions
Is It Possible to Use Other Paper Materials?
Yes! In addition to traditional origami paper, you may also use newspaper clippings, scrapbooking paper, or magazine pages. The possibilities are endless! Be creative and have fun with the project.
What Other Holiday Shapes Can I Make With Origami?
Origami is a great way to celebrate the many holidays throughout the year! Some of our favorite holiday shapes include snowflakes, candy canes, hearts, stars, and pumpkins. You can also create animals such as a dog, cat, or even a dragon! Have fun and get creative with your origami projects.
What Are Some Advanced Origami Projects?
Once you have mastered the basics of origami, you can start to try more advanced projects. Many famous works of art are based on origami such as Alexander Calder’s “Flying Circus” series and Robert Lang’s “The Insectarium.” You can also try making a paper crane mobile, modular origami structures, three-dimensional models, and much more. With origami, the possibilities are endless!
Does Origami Require Special Tools?
No. The traditional art of origami does not require any special tools or materials. All you need is paper and your two hands! However, there are some tools that can make the process easier such as tweezers for folding small creases or skewers for pressing large creases. You can also purchase paper squares or pre-cut shapes from craft stores or online retailers if you don’t want to cut your own paper.
How Can I Learn More About Origami?
If you’re looking to learn more about origami and all the amazing things you can do with it, the internet is full of resources. There are many websites, books, and YouTube videos that will teach you techniques and designs.
Additionally, there are many online communities dedicated to the art of origami and you can find lots of helpful advice and tips from seasoned origami masters. All in all, origami is a great way to express your creativity!
Conclusion
With the above outline, you can easily know how to make an origami shamrock with a few simple folds. Once you have mastered the basics of origami, you can start to try more advanced projects such as paper crane mobiles, modular origami structures, and three-dimensional models.
With the right tools, patience, and creativity, anyone can become an expert in creating unique origami pieces! So don’t wait any longer – get folding! Good luck!