
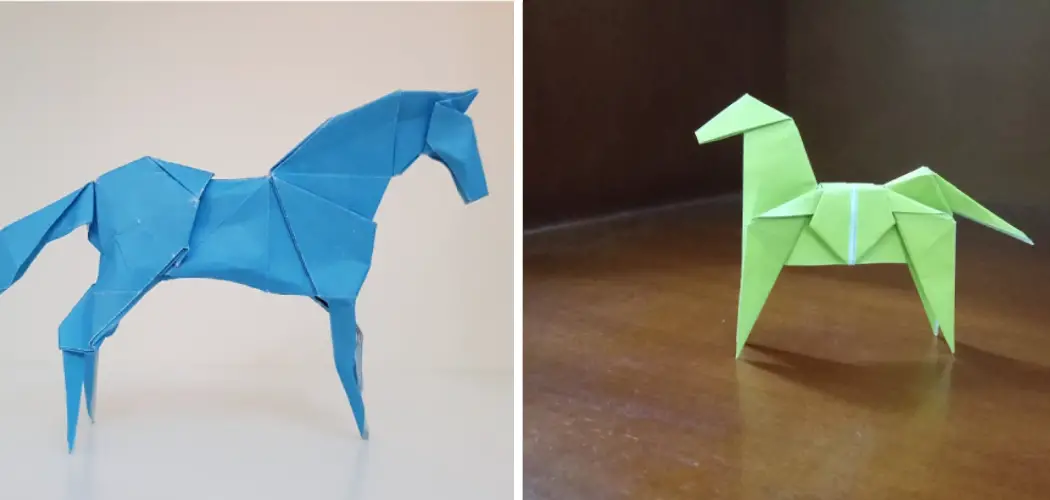
Are you someone who loves trying DIY projects? If so, have you ever tried your hand at origami? Origami is a kind of art that has been around for centuries. It’s a wonderful way to express your creativity and make something fun and unique out of paper! Today, we’re going to show you how to create an origami horse – no prior experience or supplies necessary!
This step-by-step guide will provide tips for how to make a origami horse, so whether you’re looking to impress friends with an impressive design or just start learning origami basics, there’s sure to be something here for everyone. So let’s get started as we take you on a journey through this craft — where imagination meets reality!

Supplies You Will Need to Make an Origami Horse
- 1 square sheet of paper
- Pen or marker (for drawing the guidelines)
- Scissors (optional)
- Glue (optional)
Step-by-Step Guidelines on How to Make a Origami Horse
Step 1: Preparing the Paper
Before you get into folding, make sure that your paper is cut into a perfect square. For best results, use an 8×8-inch sheet of paper and draw small guidelines on it with a pen or marker. This will help you stay on track while folding. If you want to make your origami horse look even more impressive, cut out a variety of different colors and shapes for the mane and tail.
Step 2: Begin Folding
Now it’s time for the fun part! Start by taking one corner of the paper and folding it into a triangle. Make sure that the edges of the triangle are lined up as perfectly as possible. Once you’ve achieved this shape, fold it over again to make a smaller triangle (the horse head). Folding the head will require a bit of patience and practice, but you’ll eventually get the desired shape!

Step 3: Continue Folding
Once the horse head is formed, take one corner of the triangle and fold it up. This will form the body of your origami horse. After that, you’ll need to create two small legs by folding each side of the triangle down. Finally, create a mane and tail by folding the remaining paper into small strips.
Step 4: Finishing Touches
Your origami horse is almost finished! If you’d like, you can use glue or tape to attach the mane and tail in place. You can also draw eyes onto the horse’s head with a black marker for an extra touch of creativity.
When your origami horse is all complete, it’s time to show off your amazing work! You can use it as a decoration or even give it away as a gift — the possibilities are endless.
That’s all there is to make an origami horse! With just a few simple folds, you can create something truly unique and beautiful. So why not grab some paper and give it a try? We guarantee you won’t be disappointed with the results. Happy folding!

Additional Tips and Tricks to Make an Origami Horse
- To make a more realistic-looking origami horse, use colored or patterned paper to create different shades of color across the model.
- For an extra touch of realism, you can add small details like eyes and nostrils using Sharpie markers.
- If you want to add a mane and tail, use thin strips of paper for the mane and thicker strips for the tail.
- You can also add other details such as hooves or a saddle using paper clips, pipe cleaners, fabric scraps, pompoms, or similar materials.
- When finished, you can even use your origami horse to decorate your room by attaching a loop of thread to its back and hanging it on a nail or pin.
- If you’re feeling ambitious, you can create a whole stable of origami horses in different sizes and shapes. Have fun creating your own unique horse models!
- You can even make a miniature version of your origami horse to use as a keychain for decoration or nostalgia.
- Get creative with the materials you use to make your origami horses, such as using washi tape for stripes or glitter glue for sparkles.
- Finally, don’t forget to share photos of your origami horse creations with friends and family! There’s no better way to show off your new skills!
Following these tips and tricks will help you to create a stunning origami horse that’s sure to impress everyone. With practice and patience, you can make origami horses of all shapes and sizes, so get creative and have fun! Happy folding!

Things You Should Consider to Make an Origami Horse
1. Start off by folding a piece of origami paper in half, creating a crease, and unfolding it back to its original shape.
2. Open up the paper and turn it so that the top is facing away from you. Fold the two bottom corners up towards the center line so they meet in the middle. This creates a triangle shape with four points.
3. Fold the triangle in half, creating a smaller triangle shape. Turn the paper over and fold it in half again. You should now have a diamond-shaped piece of paper with four layers on each top corner.
4. Flip the paper over and fold the bottom left corner up to meet the right side of the diamond, creating an even smaller triangle. This is the head of your horse!
5. Lift up the two bottom corners and spread them apart to form the ears of your origami horse.
6. Lastly, fold down each side of the diamond inwards towards the middle so that they meet each other at a point at the center, forming four legs for your origami horse to stand on.
Following these considerations, you should be able to make an origami horse in no time. With some practice and creativity, you can also start making more complex origami animals such as tigers, elephants, or even dragons! Aim high and have fun folding with origami! Enjoy the process of making something beautiful from something so small. Happy folding!

Frequently Asked Questions
Is It Difficult To Make an Origami Horse?
Making origami horses is actually quite simple! With the right instructions and practice, anyone can learn how to fold an origami horse. As with any origami project, however, it is important to take your time and focus on each step.
How Can I Add Details To My Horse?
Adding details to an origami horse can be done in several ways. You could use a marker or colored pencils to draw additional features like eyes, mane, and tail onto your model. Additionally, you could use small pieces of paper to create accessories like a saddle or bridle and glue them onto the horse.
Where Can I Learn More About Origami Horses?
There are many great resources available to learn more about origami horses. You can find tutorials online, or even look for some books in your local library. Additionally, there may be classes held at craft stores or art centers in your area where you can learn more about origami.
What Are Some Other Fun Origami Projects?
Origami can be used to create all sorts of fun and creative objects! You could make a simple bird or a complex dragon. A butterfly or a boat are also popular possibilities. The sky’s the limit when it comes to origami projects – the only limit is your own imagination!
Is Origami Only Used For Fun?
No, origami can be used for much more than just fun! Crafts like paper airplanes and boats are popular tools in science experiments. Additionally, origami art has been used to design furniture or structures in architecture. So while origami can definitely be a lot of fun, it can also be used for more practical purposes as well.
Are There Any Other Tips For Making Origami?
Yes! When working with paper, make sure to use the right kind of paper. The thickness and texture of the paper will affect how your model turns out. Additionally, if you are having trouble following instructions, try looking for a video tutorial.
Videos can be really helpful when it comes to origami projects. Finally, practice makes perfect – the more you fold, the better your models will be! Good luck and have fun with origami!
Conclusion
Congrats! You’ve just completed an origami horse. Making this project is a fun activity for both adults and children alike, but you might want to consider more complicated shapes if you’re looking for a greater challenge. Taking part in origami also encourages creativity and coordination, as you seek detours to make your own unique horse.
Origami art isn’t only great fun: it’s therapeutic and helpful for mindfulness, concentration, and organization skills. Do share your results with the people around you – first-timers will be amazed by how something so small can come to life from two paper sheets!
Best of luck and please take some time to explore all the amazing things that you could do with origami! And don’t forget about our tutorial on How to Make a Origami Horse – so don’t hesitate to grab some paper and make one yourself.