
The art of sewing often involves not only creating strong and functional seams but also achieving a polished, seamless finish. When it comes to achieving an impeccable result, the invisible stitch, also known as the blind stitch, is an essential technique to master.

Whether you’re working on a garment, home decor, or craft project, the invisible stitch allows you to join fabric pieces with concealed, nearly invisible seams. This article serves as your comprehensive guide on how to make an invisible stitch.
From choosing the right needle and thread to understanding the step-by-step process of creating this hidden seam, you’ll gain the knowledge and skills needed to elevate the quality and aesthetics of your sewing projects. Whether you’re a seasoned seamstress or a beginner eager to learn, mastering the invisible stitch will undoubtedly enhance your sewing repertoire.
Importance of Invisible Stitches in Sewing
Sewing is a popular hobby for many people around the world. It allows for creative expression and can result in beautiful, functional items. However, one aspect of sewing that often goes unnoticed but is essential to achieving professional-looking results is invisible stitches.
Invisible stitches are used to join two pieces of fabric together without leaving any visible traces of thread or knots on the surface. They are commonly used in garment construction, especially for delicate or sheer fabrics where visible stitches would detract from the overall appearance.
But why exactly are invisible stitches so important? Here are a few reasons:
Achieving a Clean and Professional Finish
Invisible stitches allow for a clean and professional finish to any sewing project. The absence of visible stitching lines creates a seamless appearance that gives off the illusion that the fabric pieces are fused together rather than sewn. This is especially beneficial when working on garments or accessories where visible stitches can distract from the design.

Durability and Longevity
Invisible stitches also contribute to the durability and longevity of a sewing project. Because there are no visible stitches on the surface, there is less risk of them getting snagged or pulled out, which can weaken the fabric and compromise the integrity of the garment. This is particularly important for items that will be worn or used frequently.
Versatility in Design
Another advantage of using invisible stitches is their versatility in design. These stitches are often used to create invisible hems, seams, and closures, allowing for a clean and seamless look on both the inside and outside of a garment. This opens up possibilities for more intricate and unique designs that may not be achievable with visible stitches.
Precision and Neatness
Invisible stitches require a high level of precision and skill to execute properly, but when done correctly, they can result in an incredibly neat and polished finish. This is because invisible stitches often involve working with very small and delicate stitches that are barely visible to the naked eye. The use of these stitches also allows for more control over the tension and appearance of the seam, resulting in a more polished look.
10 Methods How to Make an Invisible Stitch
1. Gather Your Supplies
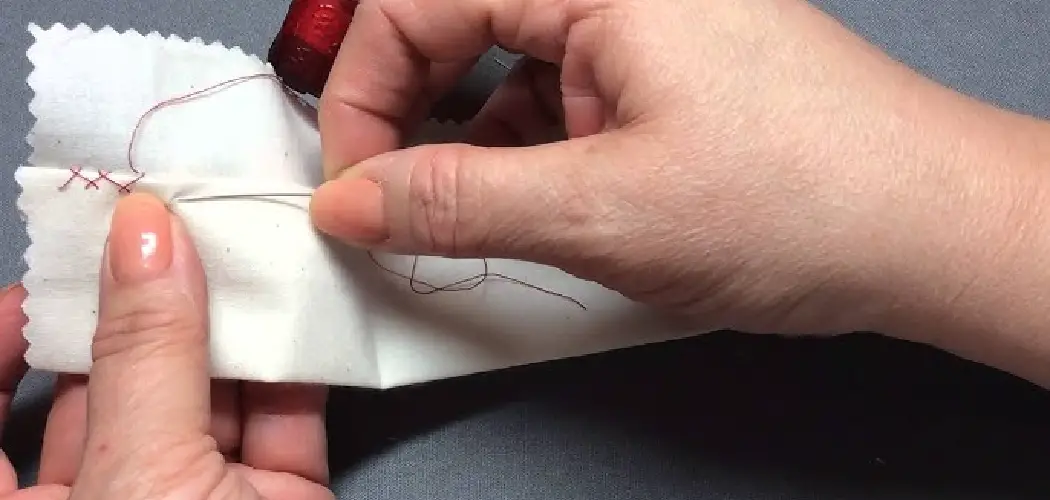
Before you can begin making an invisible stitch, you will need to gather all of your supplies. You will need a needle, thread, scissors, and the fabric that you are working with. Make sure that the thread is the same color as the fabric so that it blends in and is not visible. It is also helpful to have a thimble to protect your finger while sewing.

2. Thread Your Needle
Once you have gathered all of your supplies, thread your needle with the thread that matches your fabric. Make sure to tie a knot at the end of the thread to keep it from slipping out of the needle while you are stitching. You can also use a needle threader to help you thread the needle if needed.
3. Start Stitching
Now that your needle is threaded, it’s time to start stitching! Begin by pushing your needle through one side of the fabric and then pulling it back through on the other side. Make sure to leave a small loop at the end of each stitch so that they will be invisible when finished. This loop will be used to create a knot that will secure your stitch in place.
4. Keep Stitching
Continue stitching in this manner until you have reached your desired length or pattern for your invisible stitch. Make sure to keep each stitch even and consistent so that they blend together and look like one continuous line when finished.
However, be careful not to pull the thread too tightly as this can cause puckering or bunching in your fabric. If you do notice any unevenness in your stitching, don’t worry! You can always go back and adjust the tension of your stitches later on.
5. Tie Off Your Thread
When you have reached your desired length or pattern for your invisible stitch, tie off your thread by looping it around one of your stitches several times before cutting off any excess thread with scissors.

This will help keep the stitches secure and prevent them from coming undone over time. Although you might be tempted to just cut off the thread, taking this extra step will ensure that your invisible stitch stays in place for as long as possible.
6. Trim Any Excess Threads
Once you have tied off your thread, trim any excess threads with scissors so that they do not show on either side of the fabric when finished. This step is important for making sure that no threads can be seen once you’ve completed your invisible stitch project! However, be careful not to cut any of the actual fabric threads.
7. Press The Seam
Once all of your excess threads have been trimmed away, press down on the seam with an iron to flatten it out and make sure all of the stitches are secure even before moving onto the next step in creating an invisible stitch project! You may also want to add some additional stitching at this point just to reinforce the seam and ensure its longevity.
Newer sewers might be afraid of pressing their seams, but it’s an important step in creating a professional-looking finished product. Pressing helps to flatten out any bumps or creases that may have formed during sewing, allowing for a smoother and more polished appearance. It also helps to set the stitches in place and reinforces them, adding strength to your project.
8. Secure The Seam With A Backstitch
To make sure that all of your stitches stay in place over time, use a backstitch technique to secure them in place along both sides of the seam line before moving on to finishing touches, such as topstitching or decorative embroidery work if desired!

9. Add Finishing Touches To Your Project
If desired, add finishing touches such as topstitching or decorative embroidery work along both sides of the seam line for extra security and visual appeal! These techniques can help give any project a professional-looking finish and will help ensure that all stitches remain securely in place over time!
10. Enjoy Your Invisible Stitch Project!
Once all steps have been completed, enjoy showing off your newly created project featuring an invisible stitch technique! Making an invisible stitch may seem intimidating at first but with practice comes perfection – soon enough, you’ll be creating beautiful projects featuring this timeless technique!
Things to Consider When Making an Invisible Stitch
Fabric Type
When making an invisible stitch, it is important to consider the type of fabric you are working with. Some fabrics, such as knit or stretchy materials, may require a different approach compared to woven fabrics. Knit fabrics tend to have more give and flexibility, which can make the stitching process trickier. It is important to adjust your stitching technique accordingly to ensure that the stitch stays hidden and does not pull or pucker the fabric.
Thread Color
Choosing the right thread color is crucial when making an invisible stitch. The goal is for the stitch to blend seamlessly into the fabric, so choosing a thread color that matches as closely as possible is necessary. If you are unable to find an exact match, go for a shade that is slightly darker rather than lighter. This will help the stitch blend in better and be less noticeable.

Needle Size
The size of your needle can also play a role in the success of an invisible stitch. Finer fabrics may require a smaller needle to create small stitches that are less visible, whereas thicker fabrics may require a larger needle to create stronger and more secure stitches. It is important to test out different needle sizes on a scrap piece of fabric before starting your invisible stitch.
Conclusion
Congratulations! You have finished your project with a beautiful looking invisible stitch. This stitch is especially beneficial when using thin fabrics as it allows the seam to be held closed without leaving any visible tracking. The invisible stitch technique is also quite versatile and can be used for mending, hemming, and attaching lace or fabric trim to a garment.
With practice, even complex designs such as the Berolzheimer Technique can be mastered. As you continue to explore this useful art of stitching, you will find an endless array of possibilities and techniques you can apply in your projects.
Start mastering this skill by exploring our video tutorials on how to make an invisible stitch and find inspiration in top sewing patterns online. Have fun as you experiment with different stitches to bring beautiful design elements into life!