
Spring is in full bloom and that means Easter is just around the corner. While candy, baskets, and gift-giving are longstanding Easter traditions, I wanted to craft something a little more unique to celebrate the season this year—an Easter egg wreath! Adding a festive wreath to your front door or inside your home is a charming way to welcome guests and spread the Easter cheer.

In this tutorial, we will walk you through the simple steps on how to make an Easter egg wreath using items you likely already have around the house. From die-cutting the eggs to artfully arranging them on the wreath form, we’ll have you feeling crafty in no time as you create this beautiful spring decoration. Let’s get started dyeing, decorating, and assembling your new Easter egg wreath!
Supplies You Will Need to Make an Easter Egg Wreath
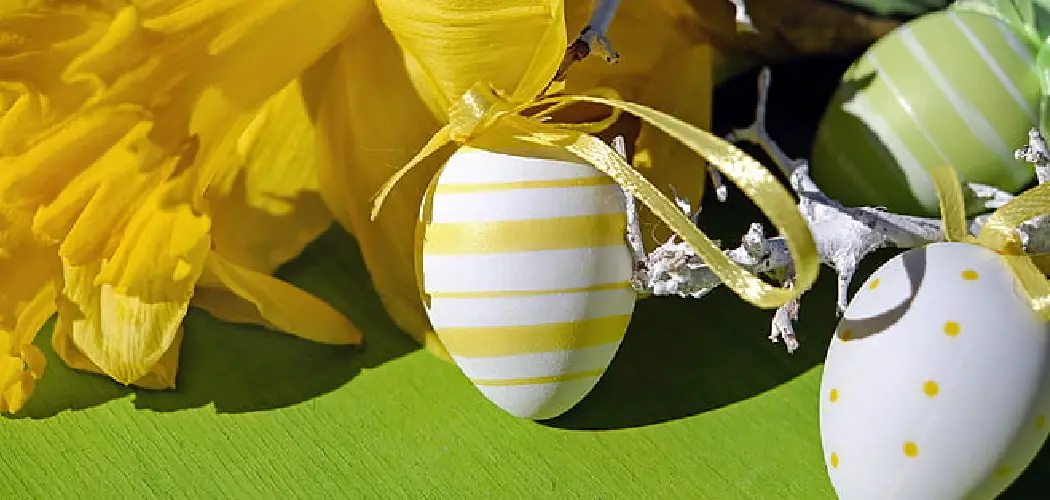
- 12-14 plastic Easter eggs (various colors and sizes)
- Hot glue gun and glue sticks
- Wreath form (can be purchased at craft stores or made from a wire hanger)
- Ribbon or twine for hanging
- Scissors
- Optional: paint, glitter, stickers, markers for additional decoration
Step-by-step Guidelines on How to Make an Easter Egg Wreath
Step 1: Die-cut or Decorate Your Eggs
The first step in creating your Easter egg wreath is to prepare the eggs. You can either purchase pre-dyed plastic eggs or dye them yourself using food coloring and vinegar. For a more personalized touch, you can also decorate the eggs with paint, glitter, stickers, or markers. Another option is to use die-cutting machines to cut out patterns or shapes on the eggs. This is a great way to add texture and interest to your wreath.

Step 2: Glue Your Eggs to the Wreath Form
Once your eggs are prepared, it’s time to start assembling your wreath. Using a hot glue gun, carefully attach each egg to the wreath form. Start at the top and work your way around in a circular motion until you fill-up the entire form with eggs. This is where you can get creative with the placement and color order of your eggs. While it’s important to cover the entire form, you can leave small gaps for the underlying wreath to show through if desired.
Step 3: Add a Bow or Ribbon
After your eggs are all securely attached, you can add a bow or ribbon at the top for hanging. Use a festive color or pattern that complements your wreath and ties everything together. You can also add a small loop of twine or ribbon to the back of the wreath for hanging on a hook or nail. Adding a bow is an optional step, but it can add an extra touch of charm to your Easter egg wreath.
Step 4: Hang and Display Your Wreath
Once your Easter egg wreath is complete, it’s time to display it for all to see! You can hang it on your front door, in a window, or even inside your home on a wall or above a fireplace. It’s sure to be a beautiful and eye-catching addition to your Easter decor. Make sure to secure the wreath securely in place using a hook or nail, as plastic eggs can be heavier than expected.

Following these simple steps, you can easily create a gorgeous and festive Easter egg wreath to celebrate the season. It’s a fun and creative way to add some holiday spirit to your home, and it’s also a great activity to do with kids. So gather your supplies, put on some music, and let your imagination run wild as you make this beautiful Easter decoration. Happy crafting!
Additional Tips and Tricks to Make an Easter Egg Wreath
1. If you want to add a personal touch to your Easter egg wreath, you can use plastic or foam eggs and decorate them using paint, glitter, ribbons, or any other materials you like. This will make the wreath unique and personalized.
2. Another way to give your Easter egg wreath a different look is by using different sizes of eggs. You can mix large and small eggs to create a more dynamic and interesting wreath.
3. Want to add some greenery to your Easter egg wreath? You can use artificial or real foliage, such as leaves or flowers, to give the wreath a natural touch.
4. To make your Easter egg wreath last longer, you can use clear acrylic spray paint on the eggs after decorating them. This will help protect the decorations and prevent them from falling off.
5. If you don’t have a wreath form or want to make a larger wreath, you can use a pool noodle as the base. Bend it into a circle and secure the ends with duct tape. Then, start attaching the eggs using hot glue or wire.
6. You can also add other Easter-themed decorations to your wreath, such as bunnies, chicks, or mini baskets. This will make your wreath even more festive and fun.
7. Consider using different textures and patterns for the eggs to create a visually interesting wreath. You can use glittery eggs, polka-dot eggs, or even lace-covered eggs.
8. Don’t limit yourself to traditional pastel colors for your Easter egg wreath. You can use bright and bold colors, or even a monochromatic color scheme for a modern twist.
9. If you want to make your Easter egg wreath stand out, try adding some lights to it. You can use battery-operated string lights or fairy lights to wrap around the wreath. This will make it a beautiful and eye-catching decoration for your home.
Following these tips and tricks will help you create a stunning Easter egg wreath that will add a festive touch to your home decor. With some creativity and personalization, you can make a one-of-a-kind wreath that will surely impress your guests. Happy crafting!
Precautions Need to Be Followed for Making an Easter Egg Wreath
1. First and foremost, make sure that you have enough eggs to cover the entire wreath. You can use plastic or hard-boiled eggs for this project. If using real eggs, be careful when handling them as they can easily break.
2. Protect your work surface with a tablecloth or some old newspapers before starting this craft. This will help keep your area clean and make cleaning up easier.

3. For safety purposes, wear gloves while working with hot glue or paint. Also, keep a bowl of soapy water nearby to clean off any excess glue or paint on your hands.
4. If using real eggs, make sure they are thoroughly cleaned and dried before painting them. This will ensure that the paint adheres well to the surface of the egg.
5. When painting the eggs, make sure to use non-toxic and washable paint. This is especially important if you have children helping with this project.
6. If using plastic eggs, consider using a primer before painting them. This will help the paint adhere better and prevent it from peeling off.
7. Be careful when handling hot glue as it can cause burns. Use a low-temperature glue gun if possible and always supervise children when using hot glue.
8. Take breaks now and then to stretch your hands and avoid any hand fatigue from repetitive motions.
Following these precautions will not only ensure a safe and enjoyable crafting experience but also help create a beautiful and lasting Easter egg wreath. So gather your supplies and let your creativity flow! Happy crafting!
Frequently Asked Questions
What is an Easter Egg Wreath?
An Easter Egg Wreath is a decorative wreath made up of colorful plastic or real eggs, typically used as a form of decoration during the Easter holiday season. It can also be referred to as an Egg Wreath or Spring Wreath.
Can I Use Different Types of Eggs for My Wreath?
Yes, definitely! You can use any type of Easter eggs to create your wreath, whether they are plastic, wooden, or real eggs. You can even mix and match different types of eggs to create a unique and personalized look for your wreath.
Do I Need Any Special Supplies to Make an Easter Egg Wreath?
Not necessarily. Most of the materials needed for this project can be found in your local craft store or even at home. The basic supplies you will need are a wreath base, eggs, a hot glue gun, and decorations such as ribbons or flowers. However, if you want to add more intricate designs or embellishments, you may need additional supplies like wire cutters, needle-nose pliers, and craft paint.
How Long Does It Take to Make an Easter Egg Wreath?
The time it takes to create an Easter Egg Wreath will vary depending on your crafting level and the complexity of your design. On average, it can take anywhere from 30 minutes to a couple of hours to complete a wreath. However, do not be discouraged if it takes you longer, as the process is meant to be enjoyable and therapeutic.
Can I Hang My Easter Egg Wreath Outside?
Yes, you can hang your wreath outside as long as it is protected from harsh weather conditions. If you plan on displaying your wreath outdoors, it is recommended to use waterproof materials and seal the eggs with a protective coating. You may also want to secure the eggs and decorations with hot glue to prevent them from falling off in windy conditions.

Conclusion
Now you know how to make an easter egg wreath, it’s time to get creative and make your own! Whether you follow a step-by-step tutorial or come up with your unique design, creating an Easter Egg Wreath is a fun and festive activity that the whole family can enjoy. So gather your supplies, put on some cheerful music, and let your creativity shine. Happy crafting!