
Creating a yarn bowl is a unique way to add storage and decoration to your home. Whether you’re an experienced knitter or just learning how to crochet, having a dedicated place for your yarn makes project management easier and keeps supplies conveniently organized.

Yarn bowls aren’t overly complicated- in fact, they are quite simple and can be crafted using common tools such as scissors, hot glue gun, sandpaper etc. In this blog post we’ll guide you through the steps of how to make a yarn bowl so that you can keep your craft supplies neatly stored away in style!
What is the Purpose of a Homemade Yarn Bowl?
A homemade yarn bowl is a great tool for any fiber artist – whether you are experienced or just starting out. Yarn bowls help to keep your yarn and tools organized in one spot, making it easier to work on projects without having to constantly search for the right supplies.
Additionally, they can also act as decorative pieces in and of themselves, adding a touch of personality and charm to your crafting area. With some basic materials and craft skills, you can create your very own unique yarn bowl that will last for years to come!
Not only will a handmade yarn bowl look great, but it’s also incredibly useful — there’s nothing worse than nonstop tangling when trying to work on a project. By using a yarn bowl, the ball of yarn will stay in place, and you can easily feed the strands through without having to untangle them every few minutes. Not only that, but when properly placed, your tools, such as scissors, crochet hooks, and needles, won’t roll off onto the floor or get lost in a mess.
A homemade yarn bowl also offers a convenient way to store multiple projects at once. This is especially helpful for crafters who often work on several projects simultaneously. With one large container in which to keep them all organized, it can make switching from one project to another much quicker and easier than before.
In addition to practical uses for a homemade yarn bowl, many people also enjoy creating these containers for their aesthetic value. With endless possibilities in terms of design, shape, and size, you can truly make a yarn bowl that reflects your personal style. Whether it’s simple and minimal or bright and colorful, a handmade yarn bowl is sure to become an eye-catching addition to any craft space.

10 Methods How to Make a Yarn Bowl
1. Find a Bowl that Is the Right Size
When you are looking for a bowl to use, it is important to find one that is the right size. If the bowl is too small, the yarn will not fit inside. If the bowl is too large, the yarn will not be able to stay in place and may end up tangled.
A medium-sized bowl, such as one that is 6-7 inches in diameter, should work well. To make sure the bowl is the right size, measure the circumference of your yarn ball and compare it to the inner circumference of the bowl.
2. Choose a Smooth Bowl
It is also important to choose a bowl that is smooth. A smooth bowl will allow the yarn to slide in and out easily without snagging. Harder, glazed bowls are usually better than softer bowls. Check to make sure there are no cracks or chips that could catch the yarn and cause it to break.
If the bowl has a lip, make sure that it is not too sharp or jagged in order to avoid any issues with your yarn. If you are purchasing a bowl specifically for making a yarn bowl, look for one with a wide opening and smooth surface.
3. Decide on the Type of Yarn You Want to Use
There are many different types of yarns available, so it is important to decide on the type of yarn you want to use before you start looking for a bowl. Do you want to use a wool yarn or a synthetic yarn? Do you want a light-weight yarn or a heavy-weight yarn? Once you have decided on the type of yarn, you can narrow down your search for a bowl.

If you are looking for a specific color or texture, you can find a bowl that will match. To get a better idea of the type and amount of yarn you need for your project, it is always helpful to check out local craft stores or online resources which provide information about the types of yarn available.
4. Find a Bowl with a Wide Opening
When you are looking for a bowl, it is important to find one with a wide opening. A wide opening will make it easier to put the yarn into the bowl and also make it easier to take the yarn out when you are finished using it.
You will also want to make sure that the bowl is wide enough to fit your ball of yarn. This way, it will stay in place and not move around when you are working with it. Once you have found the perfect bowl, make sure to clean it before using it with your yarn. This will help ensure that no dust or dirt gets into your yarn and keeps it clean.
5. Look for a Bowls with No Sharp Edges
It is also important to look for bowls with no sharp edges. Sharp edges can snag the yarn and cause it to break or become tangled. You want to make sure that the bowl you choose has smooth, rounded edges. Additionally, if possible, you should look for a bowl with a wide enough opening to fit your hand so you can easily pick up the yarn as needed.
While you are looking for a bowl, be sure to measure the circumference of your yarn skein so that you can make sure it fits comfortably in the bowl. To be safe, you should look for a bowl that has at least a few inches of extra space.
6. Avoid Using Plastic Bowls
Plastic bowls can static electricity, which can cause the yarn to become tangled. It is best to avoid using plastic bowls if possible. It is best to use a bowl made from either wood or ceramic since these materials don’t hold static electricity.

If you must use plastic, make sure to place a cloth on the bottom of the bowl to prevent static electricity build up. While plastic bowls are easier to clean, the static electricity build up can make it more difficult in the long run. Although yarn bowls are not difficult to make, it is important to ensure you are using the right materials.
7. Do Not Use Bowls Made from Metal or Glass
Metal and glass bowls can be very slippery, which can cause the yarn to slide out easily and become tangled. It is best to avoid using these types of bowls if possible. Find a bowl made from wood, clay, or ceramic instead.
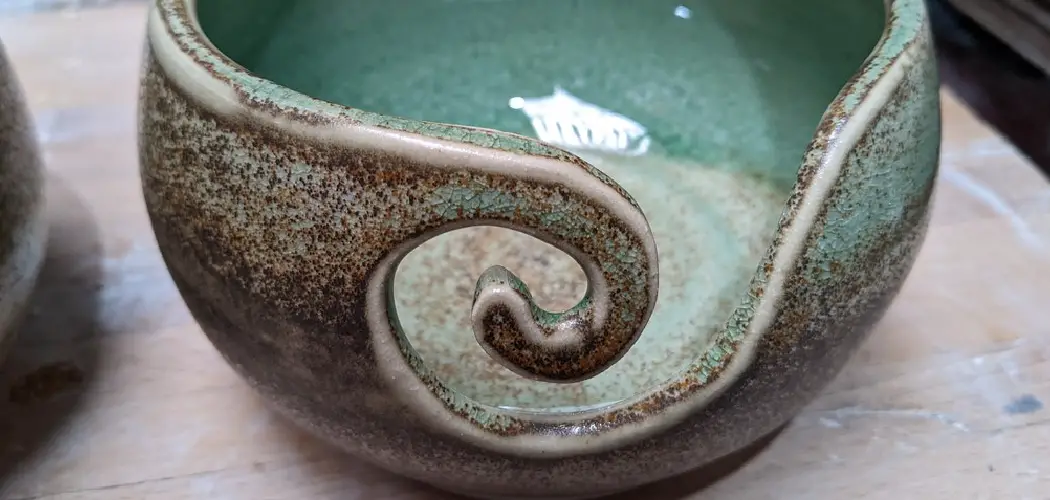
8. Use Bowls Made from Ceramic or Stoneware
Ceramic and stoneware bowls are ideal for holding yarn because they are non-porous and smooth. Additionally, these materials do not static electricity, so there is less risk of the yarn becoming tangled. To make a yarn bowl out of ceramic or stoneware, you will need to use either a pottery wheel or a mold.
With the pottery wheel, you can create an interesting and unique design that is completely customized to your tastes. If using a mold, pour the clay into the mold and let it dry completely before baking in a kiln.
9. Make Sure the Bottom of the Bowl Is Flat
When you are looking for a bowl, make sure that the bottom of the bowl is flat. A flat bottom will help to keep the yarn in place and prevent it from sliding out when you are not using it. You may need to use some sandpaper or a file to get the bottom of your bowl flat. You can also purchase a specialized tool that is designed for making yarn bowls. This tool will make it easier to create a flat bottom on the bowl.

10. Do Not Use Bowls with Decorations on Them
Bowls with decorations on them can snag the yarn and cause it to break or become tangled. It is best to use a smooth bowl without any decorations or etchings on it. Additionally, make sure that the bowl has no sharp edges that could scrape the yarn or your hands.
Conclusion
Crafting a yarn bowl is a great way to store your materials so that you can work on your projects conveniently! By following the steps outlined in this blog post, you now know how to make a yarn bowl from scratch. From gathering all the necessary materials and cutting out the base of your bowl to gluing it together and decorating it, there are plenty of fun possibilities for this creative project! Not only do you now have an attractive handmade container for storing your materials, but you also have the satisfaction of having crafted something unique with your own two hands.