
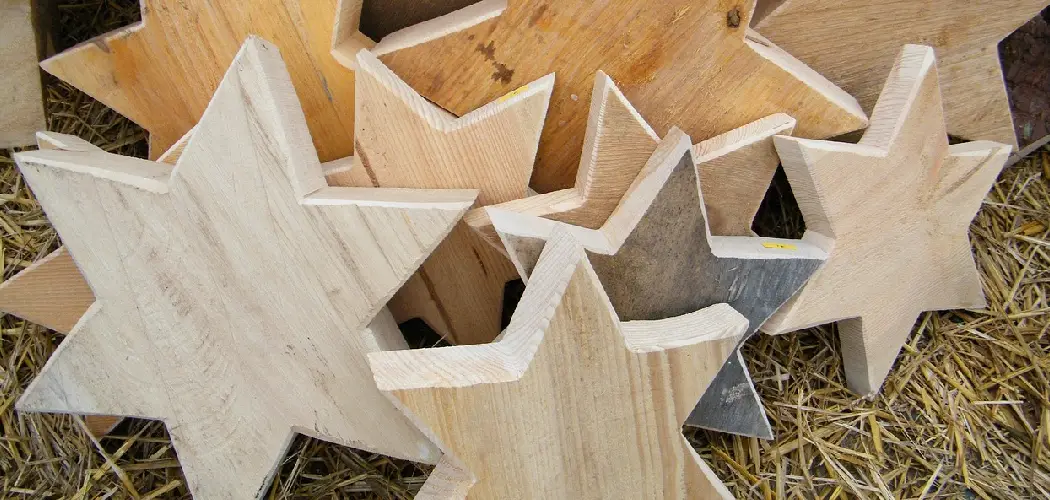
Are you looking for a unique craft project that you can make with minimal materials and tools, but will still have a substantial impact as a decoration? Then making your own wooden star might be just the thing! You’ll be pleasantly surprised at how easy this is to do: all it takes is some plywood, wood glue, and sandpaper.
It sounds simple, but providing you take your time when cutting the shapes out of the plywood, then you’ll end up with an attractive piece of art that everyone will admire. In this blog post, we’ll show you step-by-step instructions on how to make a wooden star in no time at all!

Tools and Materials You Will Need to Make a Wooden Star
- Plywood
- Pencil
- Ruler
- Jigsaw with a fine tooth blade
- Wood glue
- Clamps
- Sandpaper
Step-by-Step Guidelines on How to Make a Wooden Star
Step 1: Start by Sketching Out the Shape of Your Star
Take your pencil and ruler, and sketch out the shape of a star on the piece of plywood. Make sure that you draw it accurately so that all pieces fit together once you’ve cut them out. You can also use a template or stencil if you’d prefer. Sketching out your star on the plywood will help you to cut it accurately and quickly.
Step 2: Cut Out the Star Pieces with Your Jigsaw
Now that you’ve sketched your star shape, it’s time to get cutting! Use a jigsaw with a fine tooth blade to carefully cut away each point of the star. Make sure that you take your time with this step and cut carefully for the best results. While cutting, it’s also important to be aware of the blade direction and how it affects the finished shape.

Step 3: Glue Together The Pieces of Your Star
Once you’ve cut out all the pieces of your star, it’s time to put them together. Start by adding wood glue onto opposite sides of each piece. Then, clamp them together and leave them to dry. Make sure the pieces stay clamped until the glue is completely dried. In this step, patience is key – it’s worth waiting for the glue to dry properly so that your star won’t come apart!
Step 4: Sand Down Your Star
Once your star has been glued together, you can start sanding it down. Start with a medium-grit sandpaper and then move on to a finer one. This will ensure that all the edges are nice and smooth. Sanding also helps to get rid of any remaining wood glue residue from the surfaces of your star.
Step 5: Enjoy Your Finished Wooden Star!
Once you’ve finished sanding, your wooden star is ready for display or use in a craft project! You can choose to leave it plain or paint it with acrylic paints. Spray varnish can also be used to give your star a glossy finish. No matter how you decide to decorate it, your wooden star is sure to make a great addition to any room in the home!

Once you’ve completed these five steps, your wooden star is ready to be hung! You can stain or paint it for a more finished look if desired. Now you know how easy it is to make a wooden star, you can create one to use as a holiday decoration or give it away as a beautiful gift. Enjoy your finished craft!
Additional Tips and Tricks to Make a Wooden Star
1. Make sure to use the right tools for the job. A jigsaw with a fine tooth blade is good for cutting out star shapes, but you can also use a band saw or scroll saw if you have one available.
2. Use quality wood glue and clamps so that your star holds together properly once dried.
3. Make sure to sand your star with a grain of wood for the best results. This will help to maintain a smooth, even finish on your wooden star.
4. If you’re having trouble cutting out the pieces of your star, use a drill bit to make starter holes and then follow with your jigsaw blade. This should make it easier to cut out the shape of your star.

5. Try experimenting with different sizes and shapes for your wooden star! You can make a mini version to hang on your Christmas tree or a larger one as a wall decoration.
6. Add embellishments such as glitter, beads, or paint to give your wooden star extra character and charm.
Following these tips and tricks, you can easily create a beautiful and unique wooden star to use in craft projects or as a decorative piece. With this easy-to-follow guide, you’ll be able to make one in no time! Now all you need is to get creative and have fun with your woodworking project! Happy crafting!
Things You Should Consider to Make a Wooden Star
1. Before you start, make sure to select the right wood for your star. If you are looking for a star that is durable and long-lasting, hardwood is your best option. You can also use balsa wood for lightweight stars or pine if you need something with more strength.
2. Make sure to have the correct tools before starting. You will need saws, sanders, and files to get the right shape of your star.
3. The size of the star is also important when making a wooden star. You should decide on a specific size before you start cutting the wood for it.
4. Depending on the type of finish you want for your wooden star, consider using paint or sealant. Paint will give your star a bright and colorful look, while sealants are great for protecting it from the elements.

5. Once you have all these considerations in place, you can now start building your wooden star! Start by cutting the wood into the exact shape of a star that you need using saws and other tools. Make sure to measure correctly so that all the pieces fit together perfectly.
6. Continue by sanding and filing your star until it reaches the desired shape. If you want to add any details, use a wood burner for an extra touch!
7. Finally, finish off your wooden star with paint or sealant. This will make sure that it lasts for a long time and looks great too.
Following these considerations, you will be able to make your very own wooden star that is unique and beautiful. With a bit of patience and creativity, you can craft an amazing wooden star that you can proudly display in your home or give as a gift. Have fun creating and enjoy the process!
Frequently Asked Questions
Is It Difficult to Make a Wooden Star?
No, making a wooden star is actually quite straightforward and doesn’t require any complex tools or machinery. All you need is some wood, sandpaper, a saw of your choice (a coping saw works well), glue, and a drill.
Once you have all these materials gathered together, the process of creating your wooden star is fairly simple. With a few basic steps and a bit of patience, you can have your own unique wooden star in no time!
What Wood Should I Use?
The type of wood you should use for making your wooden star will depend on what kind of look you want to achieve. For a rustic or antique-style wood star, try using an aged-looking softwood such as cedar or pine. For a more refined look, go with hardwoods like mahogany or oak. The great thing about wooden stars is that you can make them out of just about any type of wood you can find!
Do I Have to Stain the Wood?
No, staining the wood is not necessary. You can leave your wooden star in its natural state for a more rustic look, or you can apply a light stain if desired. However, it’s important to remember that dark stains can obscure the unique patterns and texture of the wood grain.
Can I Paint My Wooden Star?
Yes! Painting your wooden star is a great way to add some fun and vibrant colors to your project. Just be sure to use high-quality paint that’s designed for wood surfaces, otherwise, it may not adhere properly or provide the desired effect.
Make sure to do any necessary sanding prior to painting, so you have a smooth surface to work with. Once the paint has dried, you can finish your wooden star off with a clear coat of sealer to protect it from the elements.
Conclusion
Hopefully, with the above outlined you will have clear knowledge on how to make a wooden star! With the right materials, tools, and patience you can create a beautiful and unique wooden star that will last for years. Whether you choose to keep it in its natural state or spruce it up with some paint, your finished product is sure to be something special that you can be proud of. Good luck!