
If you’re looking for a DIY craft project that’ll add a rustic touch to your home, making a rustic star is the perfect choice. A rustic star will look great on any wall, and you can customize it to fit your home décor to blend seamlessly into your home design.

In this blog post, we’ll go over a step-by-step guide on how to make a rustic star. Whether you’re an experienced DIY craftsperson or just starting, this project is an easy and fun way to add uniqueness to your home.
Can You Make a Rustic Star?
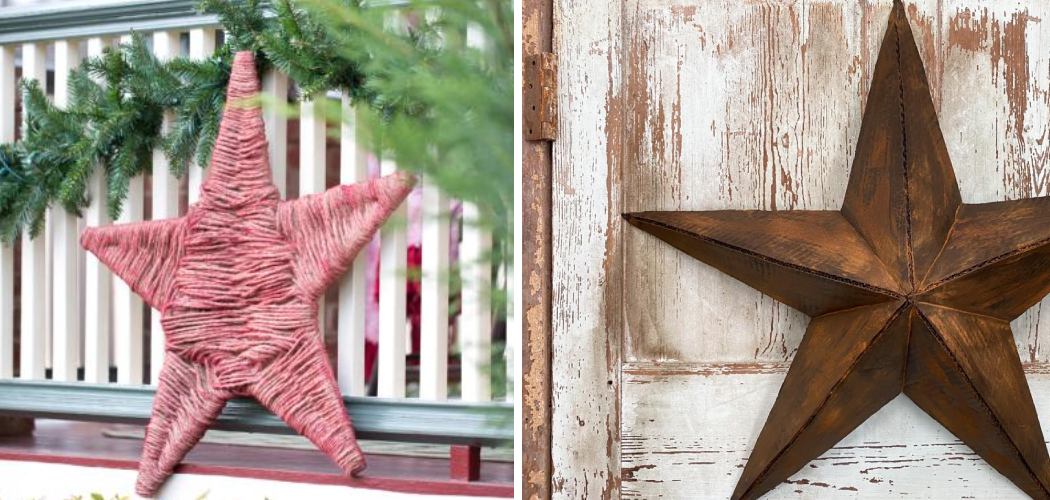
There’s something about a rustic star that screams “cozy Christmas.” Whether you want to hang it on your front door or use it as a centerpiece for your holiday dinner, making one of these charming decorations is easier than you might think. With a few simple supplies, including twigs, wire, and a glue gun, you can create a rustic star that will add serious charm to your home this season. Best of all, you don’t have to be a crafting expert to pull it off. In just an afternoon, you can have a lovely rustic star that will make everyone who enters your home feel like they’ve stepped into a winter wonderland.
Why Should You Make a Rustic Star?
Creating a rustic star may seem simple, but the benefits of making your handmade decor are endless. Not only will you have a unique piece to add to your home, but you’ll also be able to customize the colors and materials to match your desired aesthetic perfectly. Making a rustic star can also be a fun and creative way to spend time with loved ones, whether a DIY night with friends or a family crafting project. Plus, the feeling of accomplishment after creating something with two hands is priceless. So why not try it and add some rustic charm to your home?
How to Make a Rustic Star: A DIY Craft Project Perfect for Your Home
Step 1: Gather Your Materials
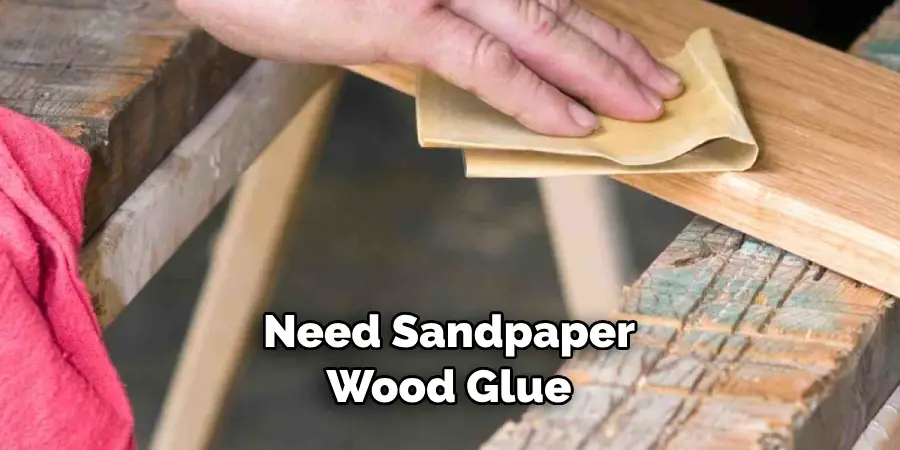
You will need six pieces of wood of the same size and shape (usually, a rectangle is good). Please make sure they’re clean and smooth. You’ll also need sandpaper, wood glue, nails or screws, and a saw. If you’d like to paint or stain your star, get the materials for that too.
Step 2: Cut the Wood
You’ll need to cut each piece of wood at a 45-degree angle so that they fit together to make a star shape. You can use a miter saw or a handsaw for this part. Most hardware stores will cut the wood for you if you’re uncomfortable with a saw.
Step 3: Glue the Pieces Together
Apply a generous amount of wood glue along the edges of the pieces and press them together firmly. Make sure to line up each edge to form a star shape. Let this dry for 10 minutes before moving on to the next step.
Step 4: Secure with Nails or Screws
Once your pieces are securely together with the glue, you’ll need to secure them further with either nails or screws. Make sure to place the nails or screws at least 1 inch apart. This will make sure that your star is strong enough to hold its shape and not come apart.

Step 5: Sand Down the Edges
Use a finer grade of sandpaper to smooth down the edges and ensure no sharp corners. This will also help ensure your star looks more rustic and won’t snag when handled.
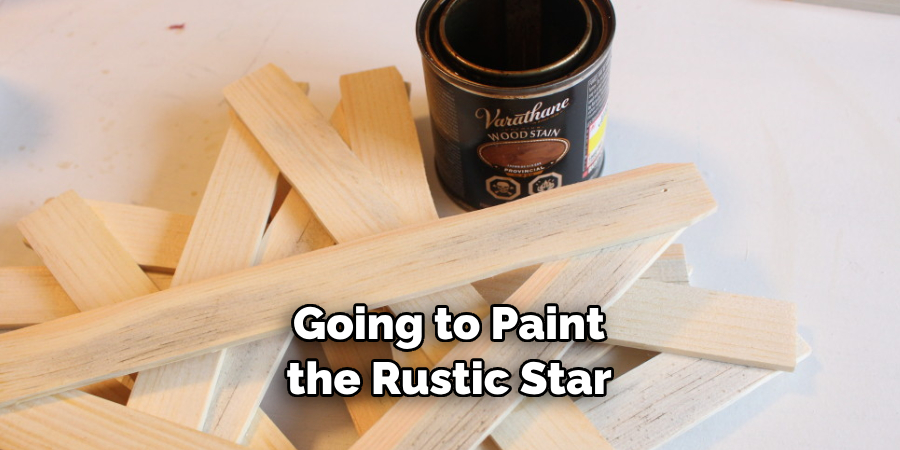
Step 6: Paint or Stain Your Star
You can paint or stain your star with a wood finish if you want to add color. You can even add a wax coating to protect the finish and give it an extra sheen.
Step 7: Enjoy Your Rustic Star
Once your star is finished, you can hang it or display it proudly! Enjoy your DIY rustic star and the great sense of accomplishment that comes with making something with your own two hands.
Now that you know how to make a rustic star, you can create unique decorations for your home or give them as thoughtful gifts to your loved ones. Get creative and have fun!
5 Considerations Things When You Need to Make a Rustic Star
1. Material
When making a rustic star, you must choose the right material. Wood is the most common material used for rustic stars, but you can also use metal or paper. If you are using wood, choose a sturdy piece that will not break easily.
2. Size
The next thing to consider is the size of your rustic star. You will want to ensure that the star is large enough to be seen from a distance but not so large that it looks out of place. A good rule of thumb is to make the star about the same size as your fist.
3. Shape
Regarding the shape of your rustic star, you have a few options. You can either make a traditional five-pointed star or get creative and make a star with more or fewer points. It all depends on your personal preference.
4. Finish
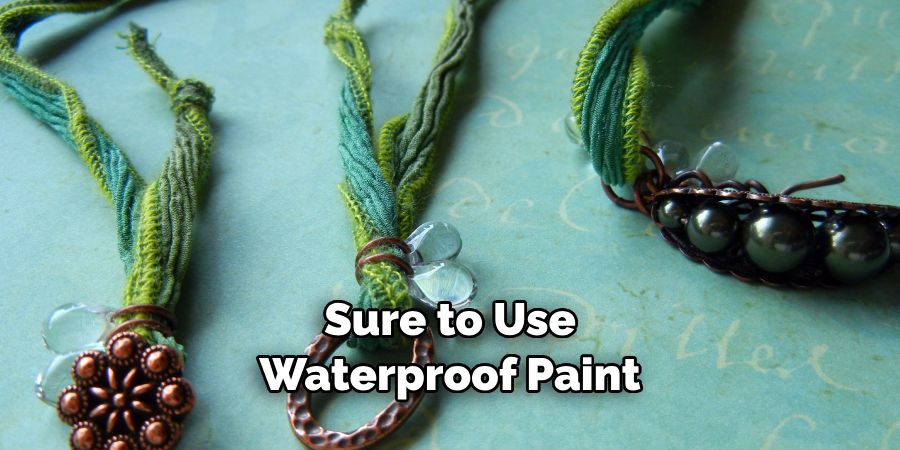
The finish of your rustic star is also important to consider. You can either leave the wood natural or paint it any color you like. If you are going to paint the star, make sure to use waterproof paint so that it will withstand the elements.
5. Hanging
Finally, deciding how to hang your rustic star would be best. The most common way is to nail it to the wall, but you could also use string or wire to hang it from the ceiling. Whichever way you choose, ensure the star is secure so it does not fall.
By considering these five considerations when making a rustic star, you can create something that looks great and stands the test of time. With just a little planning, you can make something special that adds character to any room!
5 Benefits of Making a Rustic Star
1. It’s a Unique Decoration
One of the best things about making a rustic star is that it’s a unique decoration. You won’t find many people with one, making it a great conversation starter. Additionally, it’s a great way to add some personality to your home.
2. It’s Inexpensive
Another great thing about making a rustic star is that it’s inexpensive. All you need is some wood and paint, which you can easily find at your local hardware store. If you have any leftover wood from other projects, you can also use that!
3. It’s Easy to Make
Contrary to popular belief, making a rustic star is quite easy. as long as you have the right tools and supplies. Once you have those, all you need to do is follow the instructions!
4. It’s a Great Gift Idea
If you’re looking for a unique gift idea, look no further than a rustic star. It’s the perfect gift for anyone who loves DIY projects or wants something different.
5. It Can Be Customized
Another great thing about rustic stars is that they can be customized. You can paint them any color or add embellishments like beads or ribbon. The sky’s the limit when it comes to customization, so get creative!
Some Common Mistakes People Make When Trying to Make a Rustic Star
The allure of rustic decor is undeniable, and many are eager to decorate their homes with handcrafted pieces. One popular item that many folks attempt to make on their own is the rustic star. It seems simple at first glance, but many common mistakes can lead to disappointment. One of the most frequent issues is cutting the pieces too small or too large, resulting in a disproportionate star.
Not sanding the edges enough can also leave rough spots that detract from the overall aesthetic. Lastly, using low-quality materials can make the star look cheap and tacky. While making a simple rustic star may seem easy, it’s important to take the time to avoid these common mistakes and create a beautiful, polished piece.
Conclusion
Making a rustic star is an easy and fun DIY craft project that anyone can do. With just a few materials and tools, you can create a unique piece of decor that will add some rustic charm to your home. This rustic star will look great on any wall, whether you paint or leave the wood natural. So why not try it and see how easy it is to make your rustic star? Thanks for reading our post about how to make a rustic star.