

Embarking on a journey to create your very own skirt can be an exciting and fulfilling endeavor. One of the essential steps in this creative process is mastering the art of making a skirt pattern.
Whether you’re a seasoned sewing enthusiast or a beginner eager to delve into the world of dressmaking, learning how to make a skirt pattern empowers you to design a perfectly tailored garment that suits your style and fit preferences.
In this comprehensive guide, we’ll explore step-by-step instructions and valuable tips to make a skirt pattern. From taking accurate measurements to understanding various skirt styles, this article will equip you with the skills needed to unleash your creativity and bring your dream skirt to life.
So, let’s dive into the world of pattern-making and craft a skirt that celebrates your unique personality and fashion flair!
The Versatility of Skirts in Fashion
Skirts are a staple of women’s fashion. They can range from mini skirts for a night out, to midi skirts for work or school, and long skirts for formal occasions or special events. Skirt styles have evolved in recent years to include more playful designs like frilly ruffles and pleats, along with modern cuts like asymmetrical hems and high-low layers.
No matter what style you choose, making your own skirt pattern is a great way to create a unique piece that’s all your own. With some basic sewing skills and the right materials, you’ll be able to create custom pieces tailored specifically to your style! With the right fabrics and trims, you can make any look possible – from casual and relaxed to formal and chic.
Whether you’re looking for a skirt to wear everyday or something special for an occasion, making your own is a great way to get the perfect fit and look just right! With a few basic tips and tricks, you can start creating beautiful one-of-a-kind skirts that will last you for years to come.

With the ability to customize fabrics, colors, shapes, and embellishments, making your own skirt pattern has never been easier – or more fun! So grab some fabric and let’s get started on crafting your very own piece of fashion history!
Exploring Different Types of Skirt Patterns
Skirt patterns come in a variety of shapes and styles. A-line skirts are the most common style, as they are easy to make and wear. They have a distinct shape that flares out from the waistband to the hemline creating an A-shaped silhouette. However, there are many more types of skirt patterns available to choose from. Below is a list of some popular variations:
Pencil Skirts:
These snug fitting skirts are designed with straight lines that hug the body closely from waistband to hemline, giving it its name. It may be fitted throughout or feature slits on either side for movement.
Circular Skirts:
Also known as full circle or half circle skirts, these voluminous skirts get their shape from a large circle or semi-circle cut out of fabric which is then gathered onto the waistband.
High Low Skirts:
These are asymmetrical skirts that have a longer back hemline and shorter front hemline for added movement and interest.
Maxi Skirts:
This floor-length skirt style features a high waistband and long billowing hemline, usually with slits on either side.

Mermaid Skirts:
Similar in shape to pencil skirts, these skirts feature flare at the bottom to create a mermaid silhouette. They are often made of heavier materials like velvet or wool for added structure.
These are just some of the many types of skirt patterns you can choose to create. No matter what type of skirt pattern you decide on, be sure to take all measurements accurately and use a high quality fabric for the best results. With a few simple tools and some patience, you’ll have a perfect fit skirt in no time!
10 Methods How to Make a Skirt Pattern
Method 1: Measurements and Body Slope Analysis
Before diving into pattern-making, it’s essential to take accurate body measurements. Use a soft measuring tape to record your waist, hips, and desired skirt length. Additionally, measure your waist to hip slope, as this will determine how the skirt pattern will sit on your body. Analyzing your body slope helps in creating patterns that fit smoothly and flatteringly over your curves.
Method 2: Basic Skirt Block Drafting
The basic skirt block serves as the foundation for various skirt styles. To create a basic skirt block, start with your waist and hip measurements. Divide each measurement by 4 and add seam allowances.
Plot these points on a large sheet of pattern paper to create a rectangle representing your skirt block. From this rectangle, draw perpendicular lines at the waist and hip points to form a T-shape. Manipulate the T-shape to create darts, ease, and flare, depending on the style you want to achieve.

Method 3: A-Line Skirt Pattern
The A-line skirt is a classic and flattering style that gently widens from the waist to the hem, forming the shape of an “A.” To draft an A-line skirt pattern, use your basic skirt block as a starting point.
Extend the side seams slightly outward, creating a slight flare. Gradually widen the skirt from the waist to the desired hem width, ensuring a smooth curve. You can also add vertical darts to refine the fit if needed.
Method 4: Pencil Skirt Pattern
A pencil skirt offers a sleek and tailored look that follows the contours of the body. To create a pencil skirt pattern, modify your basic skirt block by removing excess ease and creating a slim silhouette.
For a classic pencil skirt, maintain the same width from the waist to the hips, then gradually taper it in towards the knee. Incorporate back darts for shaping and fit, and add a back vent or slit for ease of movement.
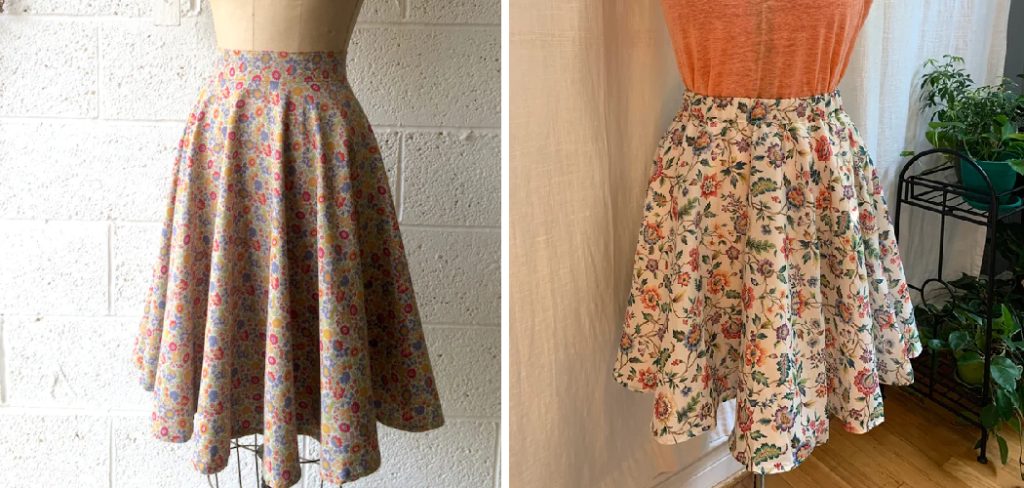
Method 5: Circle Skirt Pattern
The circle skirt is a fun and playful style known for its twirl-worthy silhouette. To draft a circle skirt pattern, you’ll need to determine the radius of the waist and the length of the skirt.
Using a compass or a string attached to a pin, draw a circle with the waist radius as the center. Cut along the circle to form a waist hole, then cut the length of the skirt. For a fuller circle skirt, cut the fabric into a full circle using the waist radius as the center.

Method 6: Pleated Skirt Pattern
Pleated skirts offer a chic and structured look with added volume and movement. Start with your basic skirt block and decide on the type of pleats you want to incorporate, such as box pleats or knife pleats.
Mark the pleat positions on the skirt block, ensuring they are evenly spaced and symmetrical. To create pleats, fold the fabric on the marked lines and secure the folds with pins. Adjust the width and depth of the pleats to achieve your desired look.
Method 7: Gathered Skirt Pattern
Gathered skirts are a feminine and versatile style that adds volume and fullness. Begin with your basic skirt block and decide on the amount of gathering you want to create. Mark the gathering points along the waistline, leaving extra fabric to gather.
Stitch multiple rows of gathering stitches between the marked points, and gently pull the bobbin threads to gather the fabric evenly. Distribute the gathers evenly and adjust the fullness according to your preferences.
Method 8: Wrap Skirt Pattern
Wrap skirts are flattering and adjustable, as they wrap around the waist and tie securely. To create a wrap skirt pattern, start with your basic skirt block. Extend the front waistline to one side, creating an overlap.
Add extra width to the other side to create the wrap portion. Decide on the tie closure, either through a waistband or ties that extend from the side seam. Add a securing button or snap to keep the skirt in place.
Method 9: Digital Pattern Making
For those who prefer a more modern approach, digital pattern making is a viable option. Utilize software or online tools designed for pattern making to draft your custom skirt patterns. Input your measurements and select the desired skirt style.
The software will generate a precise pattern that you can print, assemble, and cut. Digital pattern making offers accuracy, scalability, and the ability to store and share patterns easily.
Method 10: Draping
Draping is a creative and hands-on method of pattern making. Start with a dress form or a model, and drape muslin fabric directly on the form or body.
Experiment with folding, pinning, and shaping the fabric until you achieve your desired skirt design. Once you’re satisfied with the draping, carefully remove it from the form or body and transfer it to pattern paper. True the lines and add seam allowances to create your unique skirt pattern.

Things to Consider When Making a Skirt Pattern
When making a skirt pattern, there are several important considerations to bear in mind. One of the most important is choosing the right fabric for your project. Different fabrics have different weights, textures, and colors that can affect how your pattern looks when it’s finished. It is important to think about what kind of look you are going for and choose a fabric accordingly.
In addition to the fabric choice, another factor to consider is the length of your skirt. Depending on the type of skirt you are making, a shorter length may be more appropriate than a longer one. If you need help deciding on the best length for your pattern, consult with an experienced seamstress or tailor who can provide advice based on their expertise.
Finally, don’t forget to measure accurately before beginning your project! Taking accurate measurements will ensure that all the pieces fit together properly and create a well-fitting skirt. Use a measuring tape and mark the correct measurements on the fabric before cutting out each piece to make sure that everything lines up correctly.
By taking these factors into account, you can be sure that your finished product will look great and fit perfectly! With careful preparation and attention to detail, you can create a beautiful skirt pattern that is both stylish and comfortable.
Conclusion
With careful design decisions, clear measurements, quality materials, and following these steps, you can successfully make your own skirt pattern. The process may be a bit time consuming at first but the results will be well worth it.
Constructing a skirt pattern requires some patience from taking measurements to sourcing proper fabrics, but now you have all the tools in place for gorgeous garments right off the cutting board.
Making your own clothing allows you to be creative while offering a unique addition to your wardrobe without spending too much money in the process.
Now that you know how to make a skirt pattern, get ready to show off those curves with that custom-made piece! Remember – measure twice and cut once for optimal results. So why wait? Start getting creative and have fun making your own personal skirt pattern today!