
Joining crochet side seams is a valuable skill to have when making garments, afghans, and other items that require additional shaping or structure. It can help you achieve a seamless project finish and add stability to heavier pieces. When done correctly, joining crochet side seams will give your work a professional appearance.
The advantages of joining crochet side seams include creating a professional, neat finish to your project. When you join crochet side seams with the right technique, it creates a smooth and seamless transition from one piece of fabric to the next that looks polished.
The stitch pattern also provides strength and structure to garments or other crocheted items. In this blog post, You will learn how to join crochet side seams in detail.
Materials You Will Need
- Tapestry needle
- Crochet hook
- Scissors
- Measuring tape
- Yarn in the colors of your choice
- Pattern instructions
Step-by-Step Processes for How to Join Crochet Side Seams
Step 1: Inspect the Pieces
Ensure the pieces you are joining have the same stitch count and gauge. Place one of the seamed sections on top of the other, with the right sides facing out. Put a slip knot on your crochet hook, insert it through both ends of the sections and pull the yarn up to form a loop on your hook.
Step 2: Crochet Together
Chain one, then single crochet through both ends. Continue by crocheting a single crochet in each stitch of both pieces until the end. You should have the same number of stitches on each piece when finished.
Step 3: Finish & Secure
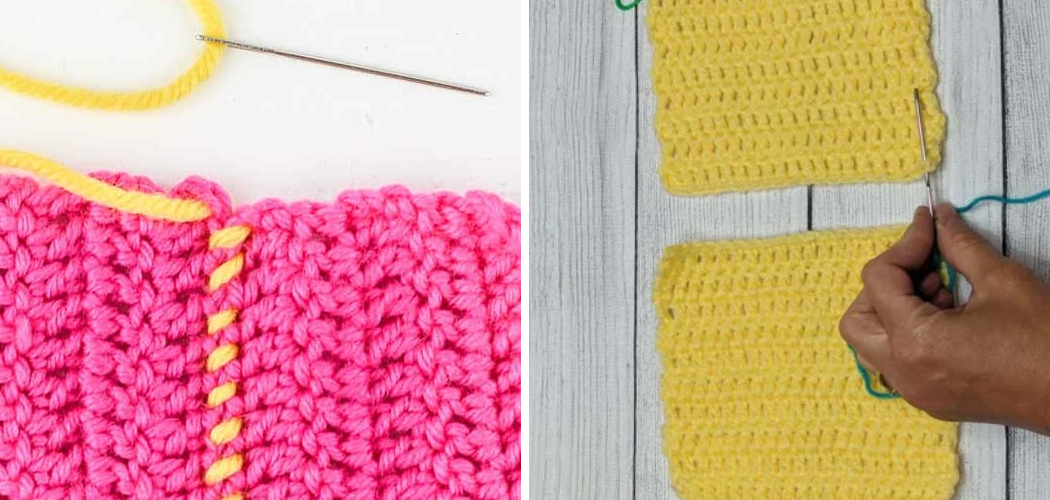
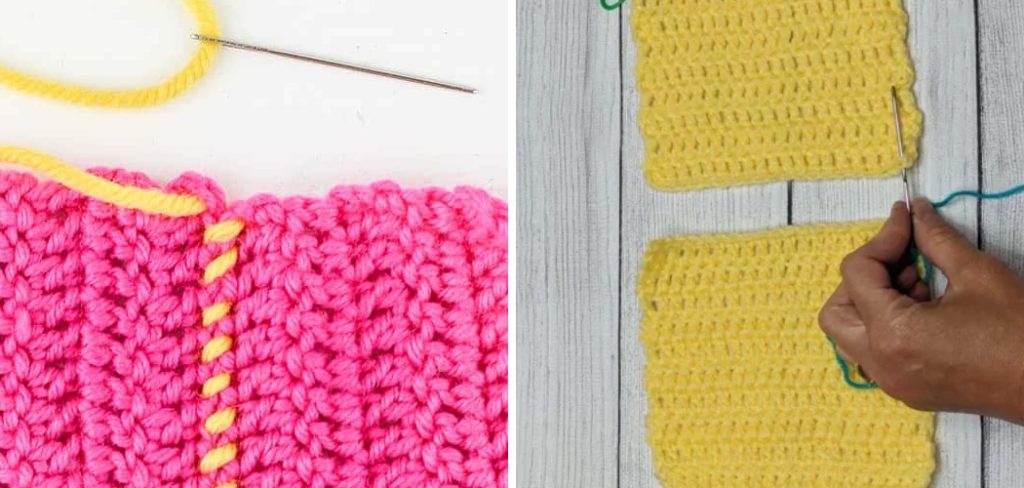
Make a slip stitch in the last two loops on your hook to secure your seam. Cut yarn, leaving an 8-inch tail, and weave it into the stitches of your seam using a tapestry needle. Press each section with a damp cloth to flatten them out. If you need to adjust the length of any piece, gently stretch and reshape the seam.
Step 4: Check for Evenness
Lay your project flat and check for evenness. Make sure there are no gaps or loose stitches in the seam. Weave in all loose ends with a tapestry needle or crochet hook to secure them in place.

Step 5: Trim Unwanted Length
Trim any extra length of the yarn or tail ends. Make sure not to cut too much but enough to have a neat and tidy seam. Gently tug on the seam to check for tightness. If the seam is too loose, go back and tighten it. If needed, re-block your project to make sure everything is even and perfect. This step is optional but recommended if you need a more polished look.
By following these steps, you can easily join crochet side seams and do beautiful projects for yourself or others. With practice, you’ll be able to join the sides of any project with ease.
You Can Check It Out To Crochet a Plastic Bag Holder
Tips for How to Join Crochet Side Seams
- Before joining side seams, make sure that the number of stitches on both sides is equal to ensure a proper fit.
- Use similar yarns and needles for the two pieces you’re working with to achieve consistency across your entire project.
- When aligning the two pieces together, take care to make sure that the edges line up properly.
- Check for any gaps or unevenness when stitching along the side seams to ensure a neat join.
- If you’re using different colors of yarns, be sure to use them consistently throughout the project so that your join won’t look out of place.
- Make sure not to tug too tightly when joining side seams, as this can cause the stitches to become distorted.
- When weaving in your ends, make sure to do so with care and pay attention to the direction of your stitch to keep it looking neat and tidy.
- Always test the seam by trying it on after it’s been joined to ensure that the fit and finish are up to your standards.
By following these simple tips and taking extra care while joining side seams, you can create beautiful projects with perfect joins every time.
How Long Does It Typically Take Complete This Task?
Joining crochet side seams can take anywhere from a few minutes to an hour or more, depending on the size of your project. How long it will take you depends on your skill level and how quickly you work. If you are a beginner, it may be a good idea to practice joining side seams using scrap yarn so that you can get comfortable with the process before working on your project.
Once you have practiced a few times, joining side seams should become much easier and quicker. To speed up the process further, you may want to use stitch markers or a row counter to know exactly where each seam needs to be joined.
In conclusion, the time it takes to join crochet side seams depends on your skill level and how quickly you work. It is important to practice first to develop speed and accuracy.
Are There Any Special Techniques You Should Use When Joining Crochet Side Seams?
Yes, you should use some special techniques when joining crochet side seams. Here’s how to do it:
- First, line up the edges of your two pieces of crocheted fabric so that the sides you’re going to join are even with one another. Make sure that the stitches on both pieces of fabric match up properly.
- Next, take a needle and thread that match the color of your fabric and begin to sew the two pieces together using a mattress stitch. This is done by taking one stitch on each seam side (in each piece) and then bringing the needle up through both sides of the fabric at once.
- Continue this process until you reach the end of your seam. Once you reach the end, tie a knot in your thread to secure it.
- To finish off your seam and make it look neat and tidy, weave in any loose ends on both sides of the fabric with a tapestry needle.
By following these steps, you can easily and successfully join two pieces of crocheted fabric using the mattress stitch. This is a great way to make your projects look professional and polished.
How Should You Store Your Finished Seam to Keep It Secure?
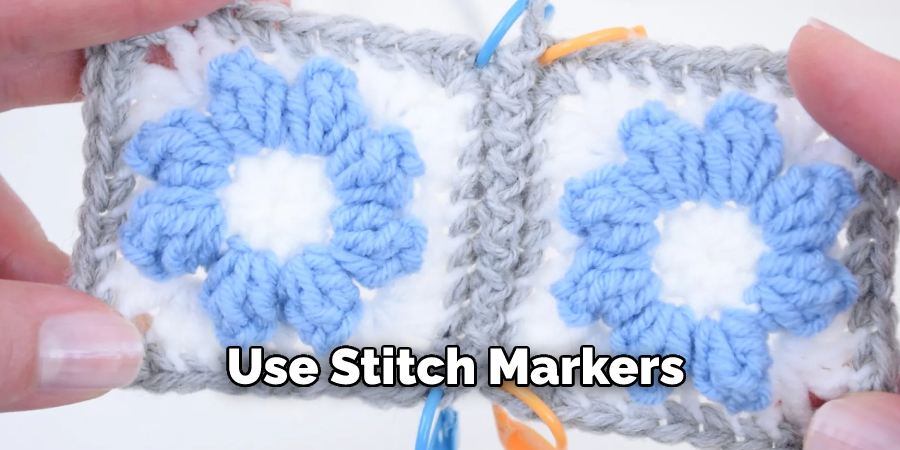
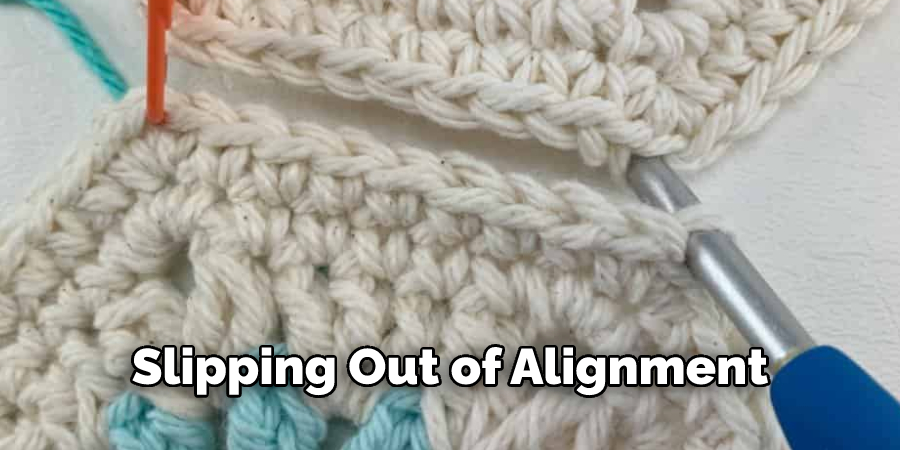
Once you’ve joined two pieces of crochet with a side seam, the best way to store your finished seam is by using stitch markers. Stitch markers can be used to keep the edges of your side seam in place and secure for storage or transport.
To use stitch markers when storing your side seams, simply insert them into each stitch along the seam. Doing this will ensure your seam stays in place without worrying about pieces shifting or slipping out of alignment.
Additionally, storing your finished seam flat, with both edges aligned and positioned properly, is always a good idea. This will help prevent any stretching or distortion of the fabric while also ensuring that your project remains securely stored until you are ready to use it.
With the right techniques, you can join crochet side seams securely and have them stay in place while they wait to be used. By following these tips, you can Use Stitch Markers and securely, allowing you to enjoy the satisfaction of a job well done.
Is There Any Way to Make This Process Easier or Faster?
Yes. With a few modifications, the process of joining crochet side seams can be made much easier and faster.
- Begin by crocheting across the first row of one piece with single crochet stitches until you reach the end. When finished, chain one stitch to turn in your work.
- On the second piece, you will be crocheting in the opposite direction. Begin by single crocheting across the row until you reach the end.
- With both pieces facing up, insert your hook into the first stitch on the left side of one piece and the last stitch on the right side of the other piece. Now, yarn over and pull up a loop.
- Yarn over again and draw through both loops to complete the single crochet stitch, joining both pieces together. Continue in this manner until all stitches have been joined.
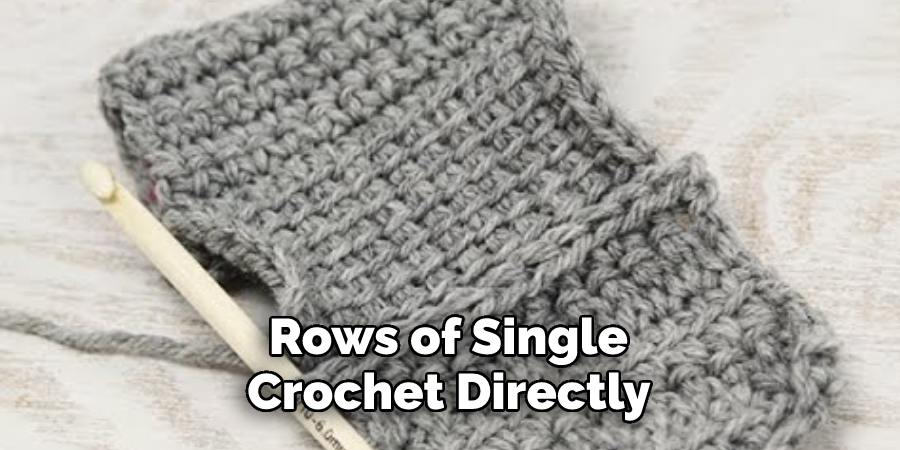
- Work one or two more rows of single crochet directly on top of the seams you have just created. This will help to secure your stitches and make the seam even stronger.
By following these steps, you can easily join crochet side seams. You’ll be amazed at how much time this technique saves.
Conclusion
In conclusion, joining crochet side seams is a valuable skill in your crocheter repertoire. By understanding how to work the seam, you can easily create beautiful and professional-looking projects.
Whether you are working on a flat piece of fabric or joining two pieces together for an item such as a pillow cover, following these steps will ensure that your project looks polished and complete. I hope this article has been beneficial for learning how to join crochet side seams. Make Sure the precautionary measures are followed chronologically.
You Can Check It Out to Cast on Extra Stitches