
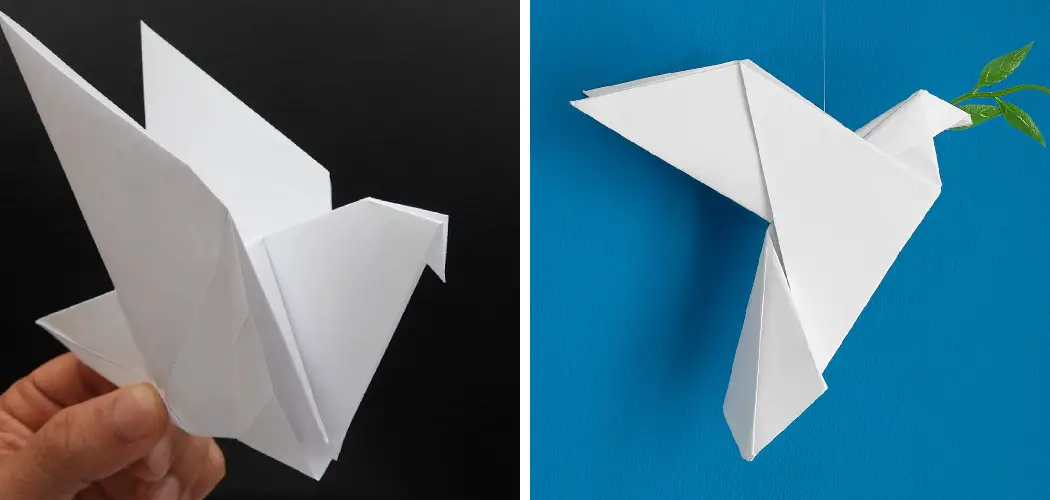
Do you want to learn how to make a paper dove? Crafting origami birds is a great way to spend your time and impress family and friends with beautiful pieces of art. Making them out of paper gives the crafting an extra level of imaginative expression, as you can choose any kind of pattern or color that strikes your fancy.

In this blog post, we will teach you the different steps involved in creating a lovely paper dove for decoration or other purposes! From folding, cutting, gluing, and finishing – start on your journey to making gorgeous doves today!
Why Make a Paper Dove?
Paper doves are not only beautiful, but they also have symbolic meaning. Doves are often associated with peace, love, and hope, making them the perfect craft for special occasions like weddings or holidays such as Christmas. They also make great decorations for your home or workspace and can be used to add a touch of elegance and charm to any event. Making a paper dove is an inexpensive and creative way to add beauty and meaning to your surroundings.
If you’re looking for a fun and relaxing activity, making paper doves can also be a great stress reliever. The repetitive folding and cutting motions can be therapeutic and help calm your mind while creating something beautiful.
Tools You Will Need:
For this project, you need some tools. Here are some basic tools to make a paper dove easily. They include:
A Rectangular Piece of Paper, Preferably a Thin Cardstock:
The paper dove is made of a standard rectangular piece of paper that is preferably thin cardstock. This type of paper is easy to fold and cut, making it easier for you to achieve the perfect shape.
A Pair of Scissors:
A pair of scissors will be needed to trim any excess paper or make small adjustments during the folding process.
Glue or Double-Sided Tape:
Glue or double-sided tape will be used to secure the different parts of the dove together.
Markers, Crayons, or Paints:
These are optional tools that you can use to decorate your paper dove. You can choose any colors and designs that you want to make your dove unique and special.
10 Steps Guide on How to Make a Paper Dove:
Step 1: Fold your Piece of Paper in Half
Creating a simple paper dove is an easy craft to do with children! Start by taking a standard piece of 8.5 x 11 printer paper and folding it in half lengthwise – you’ll recognize the mountain fold as the one you may have used to make cards or envelopes. Unfold, then press each end together to meet at the center, forming a small triangle.
Flip the paper over and again and press each of the two ends together; this creates two wings that look like mountain peaks with a valley fold in between them. Make sure both sides are equal (you can slightly adjust if needed), then tuck the tip of one peak into the valley created on the other side for your finished origami dove!
Step 2: Create a Beak Shape
Now that you have crafted the body of your dove, it’s time to make the beak! To begin, fold the top corner of the paper downwards. Gently press on the fold so that it is firmly in place. It should form a triangle shape with two straight edges at either end.

Carefully line up the two bottom edges together; then, press down on that fold once more. Your dove should now have a beak shape! You have completed this paper craft and can proudly display your very own make-believe dove in your home.
Step 3: Cut Out Two Triangular Shapes
To make a paper dove, the first step is cutting two identical triangular shapes for wings. The base of the triangle should be as wide as the folded paper and then its sides should taper towards the pointy end. Using this shape as a template, you’ll cut four wing shapes in total, giving you enough to create your paper dove.
Be careful while cutting so that you end up with two symmetrical wings! With a few simple steps and a few pieces of paper, you can quickly make your own beautiful paper dove.
Step 4: Glue Each of Them
One of the easiest ways to make a paper dove is to take a sheet of paper, fold it in half lengthwise, and glue a pair of wings onto the sides such that they are aligned with the bottom edge. Start by cutting out two wings from paper or foam sheets, each having the same size and shape.

Take those wings and apply glue on one side before attaching them to the sides of your folded paper. Make sure that you place them at even distances from each other so that your paper dove looks symmetrical in terms of its wingspan. Allow some time for the glue to settle and then you can unfold your paper dove to admire your creation – one perfect little piece of art!
Step 5: Fold the Tail
To make your paper dove flutter through the air, folding the tail into a fan shape is an important step. To do this, take one corner of the paper and fold it diagonally inwards until its straight edge meets the other side.
Repeat this process for the other corner -you should now have a two-sided triangle with a flat base. Gently press with your fingers at different points along its surface to puff out your paper dove’s tail feathers, resulting in a fan shape. Once you’ve done that, your dove is ready to take its maiden flight!
Step 6: Glue The Tail on The Body
Making a paper dove is not as hard as it looks! All you need is a sheet of paper and some patience while cutting and folding. Once you’ve cut and folded the tail, simply glue the tail onto the body of your paper dove, and you’re finished!
Use a small amount of glue on the bottom portion of your dove’s body, then gently press and hold the tail in place until it is secure. Once it is firmly attached, you can unfold the paper to reveal a beautiful fan-shaped tail behind your dove.
Step 7: Cut Out Two Eyes
To give your paper dove some personality, cut out two small circles for its eyes. You can use a hole punch or scissors to make these, and you can also experiment with different sizes and shapes for your dove’s eyes. Once cut out, glue the eyes onto the head of your dove. You can also draw on a beak or add other details to make your dove unique.
It’s important to note that if you plan on displaying your paper dove, it’s best to use non-toxic materials such as markers or colored pencils, especially if children will be handling the final product.
Step 8: Add Some Decorations
Now that you have made your basic paper dove, it’s time to add some decorations! You can use markers, stickers, or other materials to create a unique and personalized design on your dove’s body. This is also a great opportunity to get creative and add your own personal touch to the craft. You can also add a small ribbon or string to hang your dove from for display.
But, if you are satisfied with your simple paper dove, then feel free to skip this step and move on to the next!
Step 9: Let it Dry
After adding decorations, let your paper dove dry completely before handling it further. This will ensure that everything stays in place and your dove looks perfect. The drying time can vary depending on the type of materials used, so be sure to follow any instructions or warnings on the products you use.
It’s also important to remember that while this paper dove may be delicate, it can still bring joy and beauty to any space. So handle it with care and enjoy your own handmade paper dove!
Step 10: Display Your Paper Dove
Congratulations, you have successfully made a paper dove! Now, it’s time to display your beautiful creation. You can place it on a shelf, hang it from the ceiling, or even incorporate it into a larger art piece. The possibilities are endless! You can also make multiple paper doves in different sizes and colors to create a beautiful flock.
You’ve now created a unique decoration for any occasion to display around the house or in your classroom. Make sure to get creative with colors and materials for your paper doves. Who knows? You might even develop an interesting hobby from this fun craft activity!
This is a great activity for kids or adults and a perfect way to add some creativity to your crafting sessions. So why not give it a try today? For more fun origami projects, check out our other blog posts!
Tips on Making a Paper Dove
1. Gather your materials. You will need a sheet of paper, scissors, and tape.
2. Fold the paper in half lengthwise.
3. Cut along the fold to create two strips of paper.
4. Fold each strip of paper in half lengthwise.
5. Cut along the fold to create four strips of paper.
6. Take two of the strips and tape them together at one end.
7. Repeat with the remaining two strips of paper.
8. Fold one of the taped strips in half to form a triangle. Tape the triangle closed. This will be one wing of your dove.
9. Repeat with the remaining strip of paper to create the other wing.
10. Attach the wings to the body of your dove using tape or glue

Learn How To Craft A Perfectly Symmetrical Paper Dove
Making a perfectly symmetrical paper dove is a skill you can acquire with just a few simple steps. All you need is some origami paper and the ability to fold it in the right way. Begin by cutting a square piece of paper in half, then folding each piece into a triangle shape. After this, you will want to fold the bottom two corners of each triangle inward, not allowing the top corner to move.
Next, fold the left side of both triangles inward so that their points meet in the middle. Reaching this point is where your paper should look like two wings next to each other. Take special care when doing this step, as it will determine how symmetrical your dove turns out. Finally, fold down one more corner for one tail and there you have it – a perfectly symmetrical paper dove!
How to Create an Adorable and Easy Paper Dove for Decoration?
An easy paper dove is a simple craft that requires minimal materials and can add a whimsical touch to any decoration project. Start by marking out the shape of two wings on card stock–try tracing the silhouette of your hand for an organic shape. Next, cut two strips of card stock that are slightly bigger than your wings. Glue the two pieces together to form the central body of the dove.
To make sure it stands upright, use a single piece of wire or a toothpick at the base. Then, draw a small beak and cut it out with scissors before attaching it to the face of your dove. Finally, glue both wings onto each side, using pins if necessary to make sure they stay in place. With just these few steps, you can have an adorable and easy paper dove to use in any number of decorative projects!
Add Some Creativity into Your Crafting Sessions with Making A Paper Dove
Crafting projects can be a fun and creative way to spend your free time, and making a paper dove is no exception. It’s relatively easy to make and the perfect activity for all ages. All you need is a few simple materials such as paper, scissors, glue, and markers. First, trace the outline of a cardboard template or draw one out on your paper.

Next, cut it out carefully according to its lines. After that, roll the dove into a cone shape, using an adhesive to fasten the edges together. Voila! To enhance your crafted creation, add some beady eyes or even draw on feathers with colored markers or pens. With this method, you’ll have yourself an adorable winged creature in no time, so don’t be afraid to get creative and give it a try!
You Can Check It Out To Crochet Stripes
Frequently Asked Questions:
Q: What Type of Paper is Best for Making a Paper Dove?
A: Any kind of paper can be used to make a paper dove, but origami paper or cardstock tends to work best. You can also use patterned or colored paper for a more unique and decorative look. The key is to use sturdy enough paper that will hold its shape and allow you to add decorations without tearing.
Q: Can I Make A Paper Dove Without Using Tape or Glue?
A: While using tape or glue makes the process easier, it is possible to make a paper dove without them. You can try folding and tucking in the edges of the wings to secure them or use small paperclips to hold them together. Just be careful not to use too much force when handling your dove, as it may come apart.
Q: Can I Use This Paper Dove Craft for a Classroom Activity?
A: Yes! This paper dove craft is perfect for classroom activities and can be adjusted based on the age group of the students. You can also use different colors and materials to add variety to the project. It’s a great way to foster creativity and fine motor skills in students while having fun! Overall, making paper doves is a wonderful activity for anyone looking to add some creativity to their crafting sessions. With just a few simple materials and steps, you can create a beautiful decoration or piece of art that is uniquely yours.
Q: Are There Other Types of Paper Birds I Can Make?
A: Yes, there are endless possibilities when it comes to making paper birds. Some other popular options include origami cranes, swans, and peacocks. You can also experiment with different types of paper and techniques to create your own unique bird designs. The sky’s the limit when it comes to crafting with paper! So, go ahead and spread your creative wings by trying out different types of paper birds. Who knows, you may discover a new favorite craft to add to your repertoire! Get started on creating your own paper dove today and let your imagination take flight. Happy crafting!
Conclusion
Now that you know how to make a paper dove try making one yourself! They make great Art projects, as well as being wonderful gifts for special occasions like Valentine’s Day or Mother’s Day. Or, keep them year-round as lovely reminders of hope and peace.
You Can Check It Out to Make Paper Gingerbread Man