
Adding a lining to a basket is a practical and stylish way to enhance its functionality and aesthetics. Whether you want to protect delicate items, conceal contents, or create a coordinated look, making a lining for a basket is a simple and rewarding project.
In this article, we will guide you through the process of how to make a lining for a basket. From selecting the right fabric and measurements to cutting, sewing, and attaching the lining, we will cover all the essential steps.

Whether you’re a seasoned sewer or a beginner, making a lining for a basket allows you to personalize your storage solutions and elevate your home decor. Get ready to embark on a creative journey and learn how to make a lining that perfectly fits your basket, ensuring both practicality and visual appeal.
Materials Needed
- Fabric of your choice
- Scissors
- Measuring tape or ruler
- Sewing machine or needle and thread
- Pins
- Iron and ironing board
Understanding the Importance of Basket Linings
A basket lining is an essential part of any basket, as it serves to protect the contents from dirt, dust, and other elements. Without a lining, your basket items may become damaged or look less attractive. A lining can also add a decorative touch to your basket and make it look more appealing. For these reasons, it’s important to consider adding a lining when making baskets.
There are several materials you can use for creating a basket lining including fabric, paper, tissue paper and even plastic in some cases. The type of material you choose will depend on the content of the basket and its intended purpose.
For example, if you are using the basket for food items you may opt for wax paper or plastic; whereas if you are using the basket as a decorative piece for home decor, fabric or lace may be the best option.
The process for making a lining for your basket is relatively straightforward and doesn’t require any special skills or expertise. All you need is an appropriate material, scissors, glue and patience! With these supplies in hand, you can create a professional-looking lining for your basket in no time.

Exploring Different Basket Lining Materials
One of the most important steps in making a basket is deciding on an appropriate lining material. This will depend on the purpose and design of your basket, as well as the material used to construct it. Here are some of the most common lining materials:
Fabric
Fabric linings are great for making a decorative statement. Choose lightweight fabrics like cotton or polyester that will hold their shape when folded in the basket. They can be cut to fit any shape and size of basket, and you may even want to choose a fabric with a pattern or texture that is complementary to your weaving material.
Felt
Felt is another popular choice for lining baskets due to its durability and flexibility. It comes in many colors so you can easily find one that matches your basket’s color scheme. The felt also provides an extra layer of protection against wear and tear while giving your basket a softer touch.
Leather
Leather lining is perfect for protecting the interior of your basket and giving it an elegant, classic look. You can use genuine leather or synthetic leather materials to line the inside of your basket. The leather provides a protective layer that will help preserve the shape and structure of your weaving material.
Waxed Paper
Waxed paper is an inexpensive and easy-to-use lining material. It is ideal for protecting the inside of your basket from moisture and keeping it clean. Waxed paper can be cut to fit any size or shape basket, and you may even want to choose one with a pattern that matches the interior design of your weaving material.
No matter which lining material you decide on, be sure to use quality materials that will last for years to come. With proper care, your basket will look beautiful for many years!

10 Methods How to Make a Lining for a Basket
1. Measure the Basket:
Begin by measuring the dimensions of the basket. Measure the width, length, and depth, as well as the height of the sides. Use a measuring tape to ensure accurate measurements. Note them down for reference throughout the process. Though the lining needs to fit snugly within the basket, make sure to leave a small amount of extra fabric for hemming.
2. Select the Lining Fabric:
Choose a fabric that is durable, easy to clean, and complements the style of the basket. Consider options such as cotton, linen, or canvas. Take into account the size and purpose of the basket when selecting the fabric. For example, a waterproof fabric may be suitable for a laundry basket, while a decorative fabric may be ideal for a gift basket.
3. Prepare the Fabric:
Pre-wash and iron the fabric to ensure it is clean and wrinkle-free before cutting and sewing. This step is important to prevent potential shrinkage and ensure a smooth finish for the lining. However, if fabric is pre-shrunk, such as cotton or linen, then this step can be skipped. Additionally, if the fabric is lightweight then use a stabilizer on the wrong side of the fabric to ensure it holds its shape when cut and sewn.
4. Cut the Fabric:
Using the measurements of the basket, cut the fabric pieces for the lining. Cut a bottom piece that matches the basket’s dimensions and side pieces that will line the interior sides of the basket. Add a ½ inch seam allowance to the measurements to allow for sewing. While cutting the pieces, make sure to leave an edge on each piece that will be tucked into the basket when assembling.
5. Seam the Side Pieces:
With the right sides of the fabric together, sew the side pieces together to create a continuous strip that matches the length of the basket’s circumference. Use a sewing machine or needle and thread, and a ½ inch seam allowance. Reinforce the ends of the seams by backstitching or tying knots.
6. Attach the Bottom Piece:
Sew the bottom piece to the side strip, aligning the edges and using pins to secure them together. Start sewing from one end and work your way around, using a ½ inch seam allowance. Leave a small opening for turning the fabric right-side out.
7. Turn the Fabric Right-Side Out:
Carefully turn the fabric right-side out through the opening. Use a blunt tool, such as a chopstick or the rounded end of a pen, to gently push out the corners and smooth the fabric. Be gentle to avoid tearing the fabric.
8. Finish the Opening:
Hand stitch or use a sewing machine to close the opening in the lining. Thread a needle and use small, neat stitches to sew the opening closed. Alternatively, you can fold the raw edges inward and use a sewing machine to stitch the opening closed.

9. Test the Fit:
Place the lining inside the basket to check for proper fit and adjust if necessary. The lining should sit snugly against the sides and bottom of the basket without any excess fabric or sagging. Trim any excess fabric if needed.
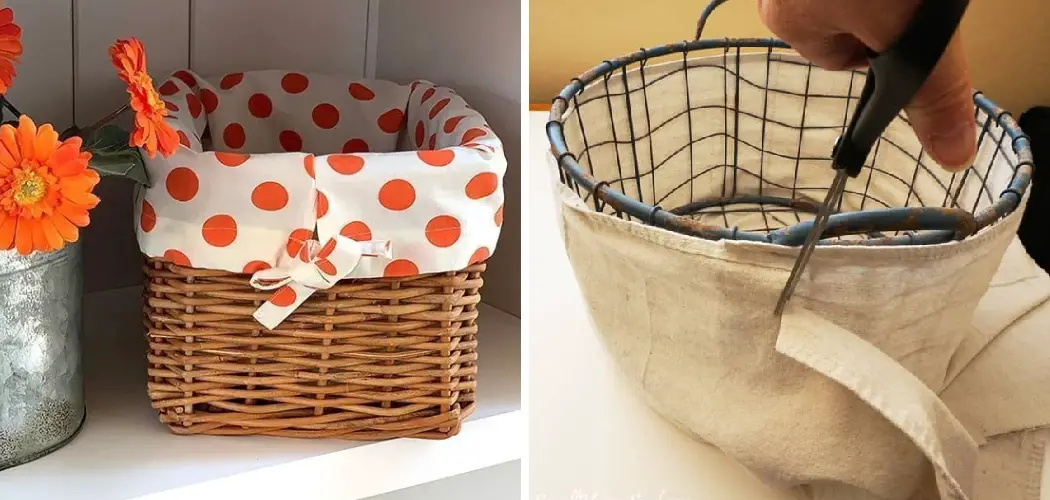
10. Attach the Lining to the Basket:
To secure the lining in place, you have a few options. One method is to use fabric adhesive to attach the lining to the basket’s interior edges. Apply a thin, even layer of fabric adhesive along the top edge of the lining and press it firmly against the basket’s interior.
Another method is to sew small fabric loops along the top edge of the lining and use ribbons or ties to fasten it to the basket. Alternatively, you can simply let the lining rest inside the basket without any attachment.
Things to Consider When Making a Lining for a Basket
1. The Fabric:
Choose a fabric that is strong and durable enough to last for many uses, as it will be supporting the weight of whatever is in the basket. Consider the color and pattern of the fabric to match whatever theme you are going for, or even go for a different look that stands out against the basket’s natural material.
2. The Size:
When measuring your fabric, make sure to add several inches more than what you measured for the circumference of your basket so that it hangs nicely down when finished.
If you aren’t sure how much extra to add or if you want an exact fit, simply trace around your basket on some newspaper first and then transfer that shape onto your fabric.
3. Finishing It Off:
After cutting out the fabric shape according to your measurements, use trim or bias tape to secure all edges together at the top of the basket. This will allow for a more tailored look and make sure that everything is still secure even after repeated uses.
When it comes to making a lining for your basket, these are some important things to keep in mind. It’s best to take time choosing the fabric and size that you need so that your finished product looks perfect! With a little bit of effort, you can have a beautiful and functional lining for your basket that will last for many uses.

Conclusion
Now that you know the basics of how to make a lining for a basket, why not give it a try yourself? Adding this finishing touch will help enhance your handmade baskets and take them from good to great.
It takes some work, but the upgrade in quality is well worth the effort. If you ever struggle with a step along the way, remember that there are plenty of tutorials online that provide visual demonstrations.
For anyone curious about other weaving techniques, be sure to check out basic basket weaving tutorials too. Who knows, maybe making linings for baskets will spark an interest in crafting more complex items!
So go ahead and give this project a go – you may surprise yourself with what you can create!