

Do you ever have a habit of buying kitchen towels but not knowing what to do with them afterward? Are you looking for an inexpensive way to upgrade your home décor or give a thoughtful handmade gift to someone special in your life?
If so, then making a personalized kitchen towel is the perfect project for you! Today’s blog will show step-by-step how to create beautiful and unique towels using items such as fabric paint, stencils and embellishments that are easy to find.
By following these simple instructions on how to make a kitchen towel, crafting custom kitchen towels couldn’t be easier. So grab your supplies and let’s get started on this creative process of transforming plain homewares into stylish pieces – A great DIY project guaranteed!
Needed Tools and Materials
Given below is a list of materials and tools required to make a kitchen towel.
- Plain Kitchen Towel
- Fabric Paint
- Paint Brush
- Stencils/template (Optional)
- Embellishments Such as Ribbons, Sequins, Beads Etc. (Optional)
12 Step-by-step Guidelines on How to Make a Kitchen Towel
Step 1: Choose the Fabric
Cotton towels are the most absorbent and long-lasting options for kitchen towels. If you’re using fabric paint, make sure to purchase a towel that is 100% cotton as the paint won’t stick to other materials. Otherwise, go wild and choose any fabric of your choice. But make sure to pre-wash the fabric before further use. It is also essential to iron the fabric before cutting it.
Step 2: Cut the Fabric
Now take a measuring tape and measure out a square of the desired size. Cut the fabric into a rectangular shape that is slightly larger than your measurement. If you’re using a template, trace it onto the fabric and cut it out accordingly. But make sure to leave at least 1/4 inch of extra fabric along the edges for hemming. This will make sure that the towel does not unravel after washing.
Step 3: Prepare for Designing
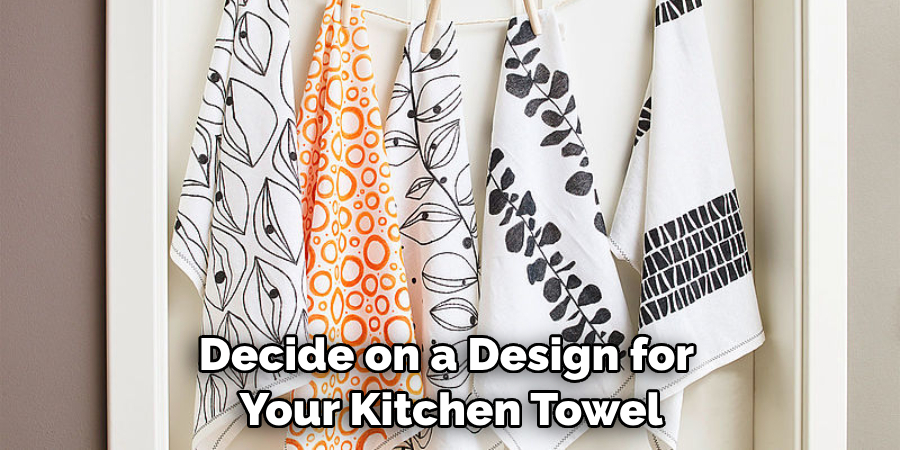
Now it’s time to decide on a design for your kitchen towel. You can either go with an existing pattern or draw one out yourself either by hand or using templates from online sources. Once you have decided on a design, mark it onto the fabric using chalk. It’s best to draw on the wrong side of the fabric if you plan to use a template. This will make sure that the design is not visible on the right side.
Step 4: Start Painting
If you are covering only a small area of the fabric then use a paintbrush for this step. But if the area is large then you should opt for fabric paints in bottles instead as they will provide even coverage over the entire surface.
When applying the paint, make sure to spread it in a single stroke from one end of the fabric to another. If you plan to use multiple colors, remember to let each color dry completely before applying the next.
Step 5: Add Embellishments
If you want to add some extra sparkle and texture, then embellishments such as ribbons, sequins or beads will come in handy. You can stick them onto the towel using fabric glue or sew them on if you prefer.
It’s best to use a needle and thread if you want them to stay intact after washing. But make sure to use colors that will complement the design and fabric of the towel. This will ensure that your embellishments don’t stand out in a bad way.
Step 6: Let It Dry
Leave your design to dry for the recommended time mentioned by the manufacturer of the paint used (usually 24 hours). Once it is dry, turn over your design and iron both sides of the fabric so that all elements are firmly attached to each other. This step is necessary even if you don’t use an iron on the fabric (which would be required if you use an embellishment such as ribbons). It will help the design to last longer.
Step 7: Repeat the Steps
If you want to make several kitchen towels then repeat steps 1-6 for each one. This will ensure that all of your towels have unique designs and create a perfect set of custom kitchen towels. This is a great way to show off your creativity and add some personality to your home décor. It’s sure your friends and family will love this little project too!
Step 8: Hem Your Towel
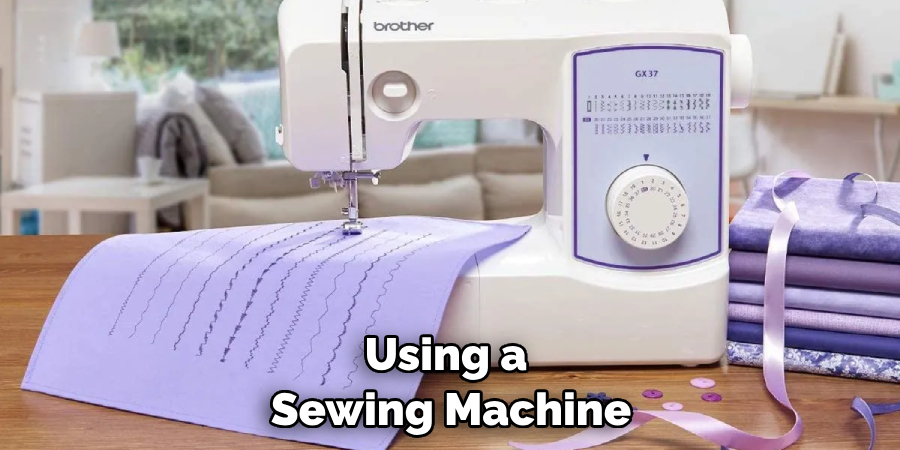
Once your towel is completely dry, hem it by folding in the edges ¼ inch twice and pinning them together. Now sew it using a straight stitch along the edge of the pinned fabric to secure everything in place.
If you’re using a sewing machine, then use the zig-zag stitch to provide extra strength. This will also make sure your towel doesn’t unravel after washing. It’s also a good idea to add an extra stitch at the corners to make sure they don’t fray.
Step 9: Hang It Up
Now hang up your finished kitchen towel in its designated spot or give it away as a gift! This is a great way to show off your creativity and make personalized kitchen towels. It is a custom-made towel that will be sure to bring lots of compliments each time someone uses it. But make sure to follow the instructions given by the fabric paint manufacturer for washing and caring for your towel.
Step 10: Clean Up
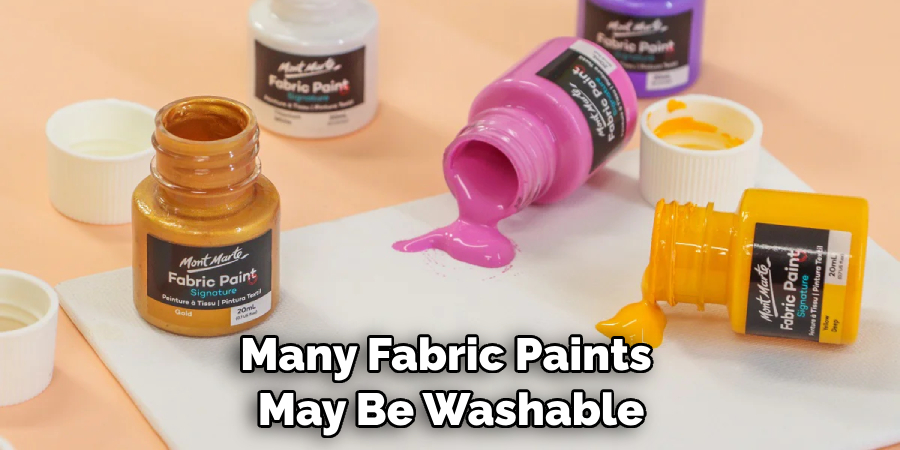
Once you’ve finished making your kitchen towel, it is important to clean up all the tools and materials used. This will make sure that none of the paint or embellishments are left behind on any surface, which can cause staining or other damage.
It is also important to put away any extra fabric or embellishments in a safe place for future use. Although many fabric paints may be washable, it is still essential to clean up any spills or splashes on your work surface.
Step 11: Enjoy the Result
Congrats on successfully making your very own unique kitchen towel! Now pat yourself on the back for a job well done and savor the satisfaction of creating something beautiful with your own two hands. However, don’t forget to share it with friends and family – because handmade items always make wonderful gifts.
Step 12: Share Your Creation
Take pictures of your completed projects and share them with friends and family. You never know who might be inspired by your work and start their own DIY projects! Always remember to tag your photos with the hashtag “kitchen towel” so that others can find them and be inspired by your work.
Making a kitchen towel is not only an easy, inexpensive way to upgrade your home décor but also a great way to express your creativity. With the help of these 12 steps on how to make a kitchen towel, you’ll be able to create beautiful and unique towels with confidence. So get started now and enjoy the process of crafting custom kitchen towels!
Frequently Asked Questions
Q: What Paint Should I Use to Make a Kitchen Towel?
A: For best results, it is recommended to use fabric paints that are specifically designed for use on fabrics. That way, you can be sure that they won’t fade or damage the fabric when washed.
Q: What Types of Designs Can I Make on a Towel?
A: You can make any type of design that comes to your mind! From simple patterns to intricate designs featuring lettering and creative elements like ribbons, sequins or beads — anything is possible!
Q: How Do I Keep My Kitchen Towels Looking Good Over Time?
A: To keep your kitchen towels looking good over time, always wash them in cold water with a mild detergent and hang them up to dry. Avoid using bleach or fabric softener as these chemicals may damage the material. Additionally, it is important to iron the fabric before cutting it as this will give your towels a longer lifespan.
Q: Can I Use a Sewing Machine to Make Kitchen Towels?

A: Yes! A sewing machine can be used for extra precision and speed when hemming the edges of kitchen towels. However, it is not necessary as you can easily achieve the same results with an ordinary needle and thread.
Conclusion
As you can see, making a kitchen towel is not a complicated process. With some fabric, thread, and a little bit of patience, you can create your own set of kitchen towels that are personalized to your own tastes. You’ll be able to match your existing kitchen décor while adding one more personal touch in the form of homemade kitchen towels.
So don’t worry if you can’t find the perfect set at the store, because now with these easy instructions, you can make it yourself! Give it a try today and enjoy having custom-made kitchen linens that will sure to have everyone in your household talking about their style and creativity! Thanks for reading this article on how to make a kitchen towel.