
Are you looking for a fun and creative way to spice up your hairstyle? Look no further! How to make a hairbow is the perfect solution. In this blog post, we’ll walk you through the steps necessary to make your beautifully crafted hair accessory.
Whether making a hairbow for yourself or as a gift for someone special, follow these steps to make the perfect bow. Just make sure to have all the necessary supplies before you start!

From gathering the supplies needed to tying off the ends and accessorizing with ribbons, these simple instructions can have you sporting an eye-catching headband in no time. Now grab that glue gun, and let’s start crafting our unique piece of flair!
Are hairbows still in style?
Absolutely! Hairbows have been a popular hairstyle accessory since the 1950s and are essential to any fashionista’s wardrobe. You can always go right with a classic hairbow for a formal event or everyday wear.
Additionally, hairbows come in various styles and colors, so you can easily find one that suits your look. You can even make your own for an added touch of personalization!
With endless color and style options, you will surely find one that perfectly suits your outfit and style.
What Will You Need?
To make a hairbow, you will need the following supplies:
- Fabric (at least two colors)
- Scissors
- Glue gun and glue sticks
- Ribbon (optional)
- A basic understanding of sewing basics.
- Beads or charms (optional)
Once you have gathered all the necessary supplies, it’s time to start making your hair bow.
10 Easy Steps on How to Make a Hairbow
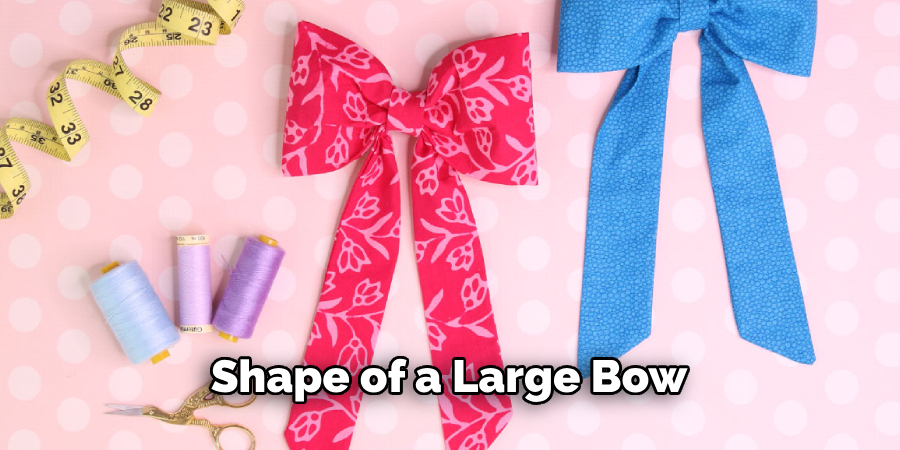
Step 1: Cut the Fabric
Cut two pieces of fabric, each in the shape of a large bow. Make sure that they are the same size. Be careful not to leave any loose threads.
Step 2: Glue the Pieces Together
Use your glue gun to attach the two pieces of fabric. Make sure to use a good amount of glue to ensure that the bow is secure. If you add beads or charms, now is the time to attach them.
Step 3: Sew the Center Together
Using a needle and thread, sew the two pieces of fabric together at the center of your bow. This will help give it some stability and hold it in place better. Additionally, it will provide a neat, finished look to the bow.
Step 4: Cut a Piece of Ribbon to Secure the Bow
Cut a piece of ribbon long enough to wrap around your bow twice. Then, tie it securely at both ends and ensure it is not too tight or loose. Ensure that the bow is securely fastened in place.
Step 5: Add Embellishments (optional)
If you want to take your hairbow up a notch, add some beads or charms to create an interesting design. You can even add ribbons for extra color and texture. Don’t be afraid to experiment and show off your creative side!
Step 6: Secure the Bow
Secure your bow by wrapping a piece of thread around the center of it (you can also use hot glue if you prefer). This will help keep all the pieces in place and make sure that nothing falls apart. If you’re using beads or charms, make sure to hold them in place while gluing.
Step 7: Attach Hairclips to the Back
Attach two hairclips to the back of your bow using hot glue or a needle and thread. Make sure they face opposite directions so they won’t get tangled when you wear them. Check that the clips are secure before you wear your bow.

Step 8: Trim Excess Fabric or Ribbon (optional)
Trim any excess fabric or ribbon after securing all the pieces in place. This will ensure that your bow has a clean and polished look. Moreover, it will ensure that nothing gets in the way when wearing it.
Step 9: Attach Ribbon to Finish (optional)
If desired, finish off your bow with some decorative ribbon. Wrap it around the center of the bow and tie it off at both ends. You can also add other embellishments as desired. Remember that the possibilities are endless!
Step 10: Enjoy Your Handmade Hairbow!
You did it! Now you can show off your beautiful handmade hairbow in style. Whether you’re dressing up an outfit or just want something fun to accessorize, this is a great way to express yourself with flair. Congratulations on completing your unique hair accessory!
By following these simple steps, you can make a unique hairbow in no time. If you’re creative, you can try different fabrics or embellishments to create something unique. No matter your design, having a handmade hair bow will add some extra sparkle and pizzazz to your hairstyle!
5 Additional Tips and Tricks
- Use a heavy-duty thread to tie the middle of the bow together in order to ensure that it holds its shape.
- Experiment with different colors and patterns of ribbon to create unique designs.
- Add an extra layer of glue at the ends of the bow for extra hold.
- Decorate your hairbow with rhinestones, glitter, or other fun embellishments.
- Secure your hairbow to any hairstyle by using a few bobby pins underneath it.

This will keep the bow in place all day long! With these easy tips and tricks, you’ll be sure to have a beautiful hairbow that stands out from the crowd! Have fun creating your own unique pieces!
5 Things You Should Avoid
- Don’t use lightweight thread to tie the bow, as it will need to be stronger to hold its shape.
- Avoid fabrics that don’t have a good amount of stretch, as this will create a stiffer finished product.
- Avoid tying the middle part of the bow too tightly, or you’ll risk damaging the ribbon when trying to fluff it up later.
- Don’t use hot glue on your ribbon; instead, use regular craft glue for easy re-positioning and removal if necessary.
- Don’t try to attach the hairbow directly to your hair with just one bobby pin – always use at least two for extra stability!
With these helpful tips and tricks, you’ll have perfect hairbows every time! Now go ahead and show off your creative creations!
5 Different Types of Hairbows
There are many hair bows to choose from – from classic bows to fun and funky styles.
1. Classic Bows: These are the traditional bow shape with two loops, made with a single piece of ribbon. These can be tied in the middle for a clean look or left untied for more volume.
2. Faux Bows: Faux bows are created using multiple ribbons layered together to mimic the look of a real bow.
3. Butterfly Bows: These are similar to classic bows but with one large loop and two smaller loops on either side, resembling butterfly wings.

4. Boutique Bows: Boutique bows feature a larger, more elaborate design made using multiple pieces of ribbon in various sizes and shapes.
5. Crown Style Bows: These hairbows have two small loops on each side with a long centerpiece that goes over the head like a crown – perfect for all your princess needs!
No matter what type of bow you choose, there’s sure to be an option that fits your style! Get creative and explore all the possibilities when making your own unique hairbow creations.
What Fabric Is Best for Hairbows?
When selecting fabric for a hairbow, look for something lightweight and flexible such as grosgrain ribbon, satin, or organza. These fabrics provide the perfect amount of stretch to create beautiful bows easily. Avoid heavy weight fabrics such as velvet or burlap, which will be too bulky and difficult to work with.
Additionally, you’ll want to select fabrics with a matte finish for best results. Shiny fabrics are slippery, making it harder to get that perfect shape. Lastly, avoid fabric blends with spandex or Lycra, as they will not hold their shape well when tied up into a bow.
Remember that choosing the right fabric is key to creating a perfect hairbow. Have fun experimenting with patterns and colors to create unique pieces!
Why Do Girls Wear Hair Bows?
Hair bows have been a popular fashion accessory for decades, dating back to the 1800s. Today, girls and women wear hairbows for a variety of reasons, such as to express their style and personality or simply because they look cute.
The most popular types of hairbows are those with bright colors and fun patterns – perfect for adding a pop of color to any outfit! Additionally, wearing a hairbow can be a great way to keep your hair out of your face while also looking fashionable – win-win!
So whether you’re going for an elegant look or just want to show off your creative side, there’s no better way than wearing a hairbow! So go ahead and get crafting today!
Conclusion
Making a hairbow is an easier task than many people think. It may take time to perfect certain techniques, but it can be done with just a few supplies. With the right fabric, simple steps, and creative touches, you can make a beautiful hairbow that will shine with pride. Whether it’s for yourself or someone you love, making your hair bow can be enjoyable and rewarding in many ways.
As a final thought, taking your time and ensuring everything is symmetrical and accurate in design will help you ensure that the product you finish with is something to be proud of!
Hopefully, the article on how to make a hairbow has been helpful and informative. Now you’re ready to put your skills to the test and create a beautiful hair accessory that is truly one-of-a-kind! Good luck, and have fun! So why wait? Get creative and get crafting today!