
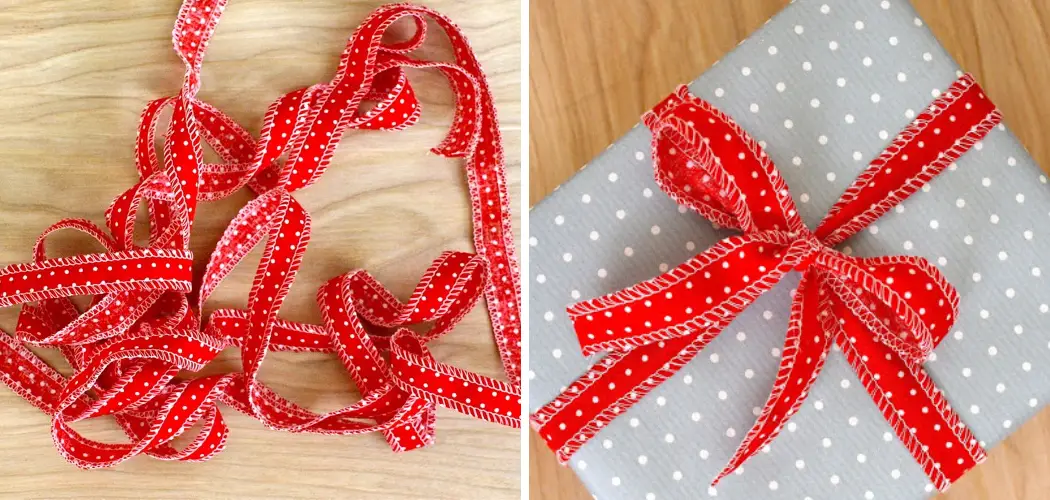
Do you love making accessories, decorations, and gifts? If so, why not learn how to make a fabric ribbon that comes in whatever colors and patterns you choose? Fabric ribbons are a great way to give your projects a personal touch. Plus, the unique texture of the fabric allows for more intricate designs than regular paper ribbons.

With just a few simple supplies like fabric and tape, you can have custom ribbons ready for all your crafting needs in no time! In this blog post, we will show you how to easily make beautiful fabric ribbons with detailed steps and photos. Get ready to break out of the sewing machine!
Supplies You Will Need to Make a Fabric Ribbon
- Fabric of your choice (cotton, satin, silk, etc.)
- Scissors
- Sewing machine or needle and thread
- Fabric glue or tape
- Ruler or measuring tape
Step-by-step Guidelines on How to Make a Fabric Ribbon
Step 1: Choosing the Right Fabric
When it comes to choosing fabric for ribbon making, the options are endless. You can choose from a variety of colors, patterns, textures and materials. Cotton, satin, silk, and tulle are some popular choices. Just make sure the fabric you choose is easy to work with and not too thick or stiff. Choosing a lightweight or medium-weight fabric will ensure that your ribbon drapes nicely and is easy to tie into bows.
Step 2: Measuring and Cutting the Fabric
Using a ruler or measuring tape, measure out the desired width and length of your ribbon. A standard ribbon width is about 1-2 inches, but you can adjust this to your liking. Once you have measured out your fabric, use scissors to cut it into a long strip. If you want angled ends, you can cut the ends at a diagonal. While cutting, make sure to keep the fabric taut and straight for a clean cut.
Step 3: Hemming the Edges
To prevent fraying and give your ribbon a polished look, hem the edges of your fabric strip. Fold each edge over about 1/4 inch and press it down. You can use an iron or even just your fingers to create a crease. Then, fold the edge over again and press it down to hide the raw edge. Use fabric glue or tape to secure the hem in place.

Step 4: Sewing the Ribbon
Now it’s time to sew your ribbon together! If you have a sewing machine, this step will be quick and easy. Simply sew along both edges of the ribbon, making sure to backstitch at the beginning and end to secure the stitches. If you don’t have a sewing machine, you can hand sew using a running stitch or whip stitch. Make sure your stitches are close together for added durability.
Step 5: Finishing Touches
Once your ribbon is sewn together, give it a final press with an iron to get rid of any wrinkles. You can also add some extra embellishments like beads, buttons, or fabric flowers for a more personalized touch. Make sure to let any glue dry completely before using your ribbon. If you’re using tape, simply press the edges together firmly. And voila! Your fabric ribbon is ready to be used for all your crafting projects!
Following these simple steps, you can easily make your own fabric ribbon in any color or pattern. You can use it for gift wrapping, hair accessories, clothing embellishments, and more! Get creative and experiment with different fabrics to create unique and beautiful ribbons. Your friends and family will be impressed by your crafting skills and the personal touch that fabric ribbons add to your projects. Have fun creating!
Additional Tips and Tricks to Make a Fabric Ribbon
- When using a sewing machine, make sure to use the right needle size and type for your fabric. For example, use a fine needle when working with delicate fabrics like silk or chiffon.
- Consider using longer lengths of ribbon to finish off projects such as gift wrapping or decorating wreaths. This can give a more elegant and polished look.
- Experiment with different fabrics and textures when making fabric ribbons. For instance, try using lace or velvet for a more unique and sophisticated look.
- Don’t be afraid to mix and match different colors and patterns of fabric when creating your ribbon. This can add depth and dimension to your finished product.
- If you’re working with longer lengths of ribbon, use a rotary cutter instead of scissors to ensure clean, straight edges.
- For a more personalized touch, consider adding hand-stitched details to your fabric ribbon using embroidery thread or beads.
- Use fabric glue instead of sewing for a no-sew option when creating fabric ribbons. This is especially useful for thicker or heavier fabrics that may be difficult to sew through.
- Try incorporating other techniques such as pleating or gathering into your fabric ribbon for added interest and texture.
- Use pinking shears to create a decorative zig-zag edge on your fabric ribbon. This is a great way to add a playful touch to your projects.
- Don’t be afraid to experiment and find what works best for you – there are endless possibilities when it comes to creating beautiful fabric ribbons!

Following these additional tips and tricks can help take your fabric ribbon-making skills to the next level. With a little creativity and practice, you can create unique and eye-catching ribbons for all of your crafting needs. So go ahead and have fun experimenting with different techniques and materials to make beautiful fabric ribbons that will make any project or gift stand out! Happy crafting!
Precautions Need to Be Followed for Making a Fabric Ribbon
- First and foremost, it is important to choose the right fabric for your ribbon. The best fabrics for making ribbons are cotton, silk, and satin.
- Make sure to prewash and iron the fabric before cutting it into strips for the ribbon. This will help prevent any shrinkage or wrinkling of the ribbon.
- Use sharp scissors to cut out the fabric strips for the ribbon. This will ensure clean and even edges.
- When cutting the fabric strips, it is important to make them slightly longer than the desired length of the ribbon. This allows room for any mistakes or adjustments that may be needed during the sewing process.
- Choose a thread color that complements the color of your fabric. This will help give a polished look to your finished ribbon.
- It is recommended to use a sewing machine for making fabric ribbons, as it will provide more precise and professional-looking results.
- Always start sewing at the edge of the fabric strip, leaving about half an inch of space from the edge. This will prevent any frayed edges and also make it easier to join multiple strips together.
- When joining multiple strips, make sure to overlap the ends and sew them together with a zigzag stitch.

Following these precautions will ensure that your fabric ribbon turns out perfectly and is ready to be used for any decoration or craft project! Remember to have fun and get creative with different fabrics, colors, and patterns to make unique and beautiful ribbons. So go ahead, give it a try, and impress everyone with your homemade fabric ribbons! Happy crafting!
Frequently Asked Questions
What is a Fabric Ribbon?
A fabric ribbon is a thin strip of cloth that is typically used for decorating, tying, or wrapping. They are available in various colors, patterns, and materials such as silk, satin, organza, or grosgrain. Fabric ribbons can be purchased in different widths and lengths to suit your specific needs.
How Do I Choose the Right Fabric Ribbon?
When choosing a fabric ribbon, consider the purpose for which you will be using it. For example, if you are looking to add a touch of elegance to a gift or bouquet, silk or satin ribbons would be a good choice. If you need a strong and sturdy ribbon for tying around packages or boxes, opt for grosgrain or cotton ribbons. Additionally, consider the color and pattern of the ribbon, ensuring it complements or enhances the overall look.
What Can I Use a Fabric Ribbon For?
Fabric ribbons have endless uses in various crafts, DIY projects, and everyday occasions. You can use them for wrapping gifts, tying around bouquets or flower arrangements, decorating home décor items, making hair accessories, creating bows for clothing or accessories, and so much more. The possibilities are truly endless with fabric ribbons.

Where Can I Buy Fabric Ribbons?
Fabric ribbons can be purchased at most craft stores, fabric stores, or online retailers. Some specialty stores may also carry unique or vintage fabric ribbons. If you prefer to make your own fabric ribbon, you can purchase the desired material and cut it into strips or use a ribbon-making tool.
Conclusion
Now you know how to make a fabric ribbon and all the different ways you can use it. Whether it’s for a special occasion or a fun DIY project, fabric ribbons are a versatile and beautiful addition to any crafting supplies. So go ahead and get creative with your fabric ribbons! Happy crafting!