
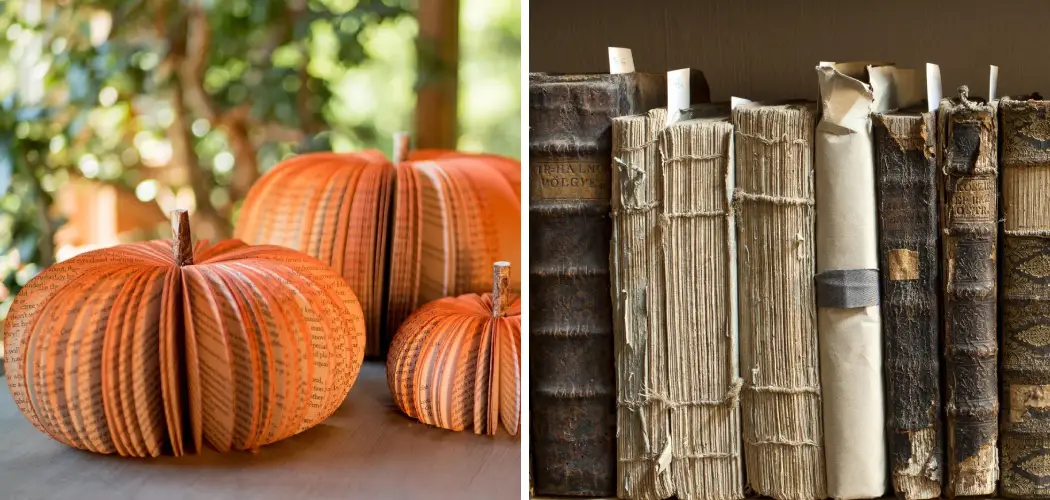
Are you looking for a way to bring your favorite books to life this fall season? With just a few simple materials, you can create an adorable book pumpkin that’s perfect for adding seasonal flair to your library or living room mantel. Not only will it add character to your home decor, but it also makes a great conversation starter!

In this blog post, we’ll take you step-by-step through the process of how to make a book pumpkin that is sure will be the envy of all of your friends. So grab those old books from around the house and let’s get started!
Tools and Materials You Will Need to Make a Book Pumpkin
Before we dive into the tutorial, let’s make sure we have all the necessary materials to make our book pumpkin. You will need:
- An old hardcover book
- Orange acrylic paint
- A paintbrush
- Scissors
- Twine or ribbon
- Glue gun and glue sticks
- Optional: green cardstock paper for stem and leaves
Step-by-step Guidelines on How to Make a Book Pumpkin
Step 1: Prepare the Book Pages
Start by taking your old hardcover book and removing the dust jacket if it has one. Then, carefully tear out a handful of pages from the book. The number of pages you remove will determine the size of your pumpkin, so feel free to adjust accordingly. We recommend starting with 50-100 pages for a medium-sized pumpkin. Preparing the book pages will also make it easier to fold them later on.
Step 2: Fold the Pages
Take the pages you removed from the book and fold them in half lengthwise. This will create a crease down the center of each page, making it easier to shape into a pumpkin later on. You can also use a ruler or bone folder to create a sharper crease if desired. This step may take some time, but it’s worth it for the final result!
Step 3: Paint the Pages
Once you have all your pages folded, it’s time to paint them orange. Use the acrylic paint and a paintbrush to cover both sides of each page. You can also add some variation by using different shades of orange or adding a touch of yellow or brown for a more realistic look. Let the pages dry completely before moving on to the next step.
Step 4: Glue and Shape the Pages
Next, take all your painted pages and start gluing them together with a glue gun. Begin by creating a small circle with five or six pages, then add more pages around it in layers until you have a full, round shape. Make sure to leave a small opening at the top for the stem. Once you have your desired shape, use your fingers to carefully mold and shape the pages into a pumpkin-like form.

Step 5: Add Stem and Leaves
To create a stem, cut a small rectangle out of green cardstock paper and roll it up tightly. Secure it with glue and attach it to the top of your pumpkin. You can also add some green cardstock leaves by cutting out leaf shapes and gluing them onto the stem. Adding these details will make your book Pumpkin look even more realistic!
Step 6: Finishing Touches
To complete your book pumpkin, add some twine or ribbon around the base for a cute rustic touch. You can also place it on top of a stack of books or on a wooden stand for added height and visual interest. Get creative with how you display your book pumpkin and have fun with it. Make multiple pumpkins in different sizes for a fun and festive display!
Now that you know how to make a book pumpkin, there’s no excuse not to add some literary charm to your fall decor. This DIY project is perfect for book lovers and crafters alike. So go ahead and give it a try – we guarantee you’ll be surprised at just how easy it is to make a book pumpkin that looks like it came straight out of a storybook. Happy crafting!
Additional Tips and Tricks to Make a Book Pumpkin
- When it comes to choosing the right book for your pumpkin, opt for a hardcover book instead of a paperback. Hardcover books tend to be sturdier and hold their shape better.
- Use different sizes of books to create a multi-tiered pumpkin display. This adds depth and visual interest to your book Pumpkin.
- Experiment with different color schemes by using books with different colored covers. You can even spray-paint the covers to match your home decor or party theme.
- Get creative with carving designs on the book pages. Use stencils or freehand a design for a unique and personalized pumpkin.
- If you’re worried about damaging your books, try using faux pumpkins instead. Simply glue the book pages onto the pumpkin and add a stem for a similar effect. This is also a great option for those who want to display their book pumpkin year after year.
- Don’t limit yourself to just using books for pumpkins. You can use old magazines or newspapers as well. This is a great way to upcycle old reading materials and add some literary flair to your home decor.
- For a more rustic look, consider using burlap or twine to wrap around the book pages. This adds texture and a cozy touch to your book pumpkin.
- Don’t be afraid to mix and match different types of pumpkins, such as real pumpkins and book pumpkins, for a unique display. You can also incorporate other fall elements like leaves, pinecones, or candles for added ambiance.
- Use hot glue or double-sided tape to secure the pages and give your book pumpkin a polished finish.

Following these additional tips and tricks will help you create a beautiful and unique book pumpkin that is sure to impress your guests. So get creative, have fun, and let your love for literature shine through with this fun and festive DIY project. Happy crafting!
Precautions Need to Be Followed for Making a Book Pumpkin
- If you are planning to make a book pumpkin, choose a book that is not of sentimental value. Most DIY ideas will suggest using an old or damaged book as the base for your pumpkin.
- Make sure to use a hardcover book instead of a paperback one as it will provide better structure for the pumpkin.
- Keep in mind that you won’t be able to use the book for reading once it has been turned into a pumpkin, so choose a book that you won’t mind sacrificing.
- Use caution when cutting and carving the book pages to prevent any accidents or injuries.
- If you are using hot glue to secure the pages, make sure to let it cool down before handling the book again.
- When painting or decorating your book pumpkin, use non-toxic and washable materials if you want to reuse the book for future projects.
- Keep in mind that depending on the size of your pumpkin, you may need to use multiple books. Make sure to have enough books on hand before starting the project.

Following these precautions will ensure that you have a safe and enjoyable experience while making your own book pumpkin. Remember to have fun and be creative with your design! And don’t forget to share your creation with others, as it may inspire them to make their own book pumpkins too. Happy crafting!
Frequently Asked Questions
Can I Use Any Type of Book?
Yes, you can use any type of book as long as it is a hardcover book. This includes fiction, non-fiction, textbooks, and even old dictionaries or encyclopedias. Just make sure the book is in good condition and has a sturdy spine.
Are There Any Tips for Choosing the Right Book?
If you want your book pumpkin to have a specific shape or size, choose a book with similar dimensions. Also, keep in mind that thicker books will result in a fuller and rounder pumpkin, while thinner books will create a flatter and more elongated pumpkin. Additionally, consider the color of the cover as it will affect the overall appearance of your pumpkin.
Can I Decorate My Pumpkin?
Absolutely! You can get creative and decorate your pumpkin with paint, glitter, ribbons, or any other materials you like. This is a great way to add a personal touch and make your pumpkin stand out. Just make sure to use non-permanent materials if you plan on using the book pumpkin as a decoration for an extended period of time.
How Long Will My Book Pumpkin Last?
With proper care, your book pumpkin can last for several months or even longer. Just make sure to keep it away from direct sunlight and moisture, and avoid handling it too much. If you notice any wear and tear, you can always reinforce the pumpkin with additional glue or tape.

Can I Use My Book Pumpkin as a Prop?
Yes, book pumpkins make great props for Halloween parties, photo shoots, and other events. They can also be used as unique centerpieces for fall-themed decorations. Just make sure to keep them away from open flames and heat sources to prevent any accidents.
Conclusion
Now you know how to make a book pumpkin and some tips for choosing the right book, decorating it, and preserving it. It’s a fun and creative activity that anyone can enjoy, and the end result is a unique and personalized decoration perfect for fall. So gather your materials, choose your favorite book, and get ready to create your very own book pumpkin! Happy crafting!